


How to Remove a Stuck Recessed Light Bulb (4 Methods)
Most stuck recessed light bulbs come free with nothing more than better grip. The job turns genuinely risky only when the glass starts to deform or the socket shows visible damage at that point, forcing it makes things worse. This guide walks through removing a stuck recessed light bulb using a clear escalation path, from rubber gloves and duct tape through to last-resort options, and tells you exactly when to stop and replace the fixture instead. By the end, you'll also know how to handle a broken bulb, close out the job properly, and keep it from happening again.
Before you start: power, safety, and what you'll need
Do these steps before touching the bulb.
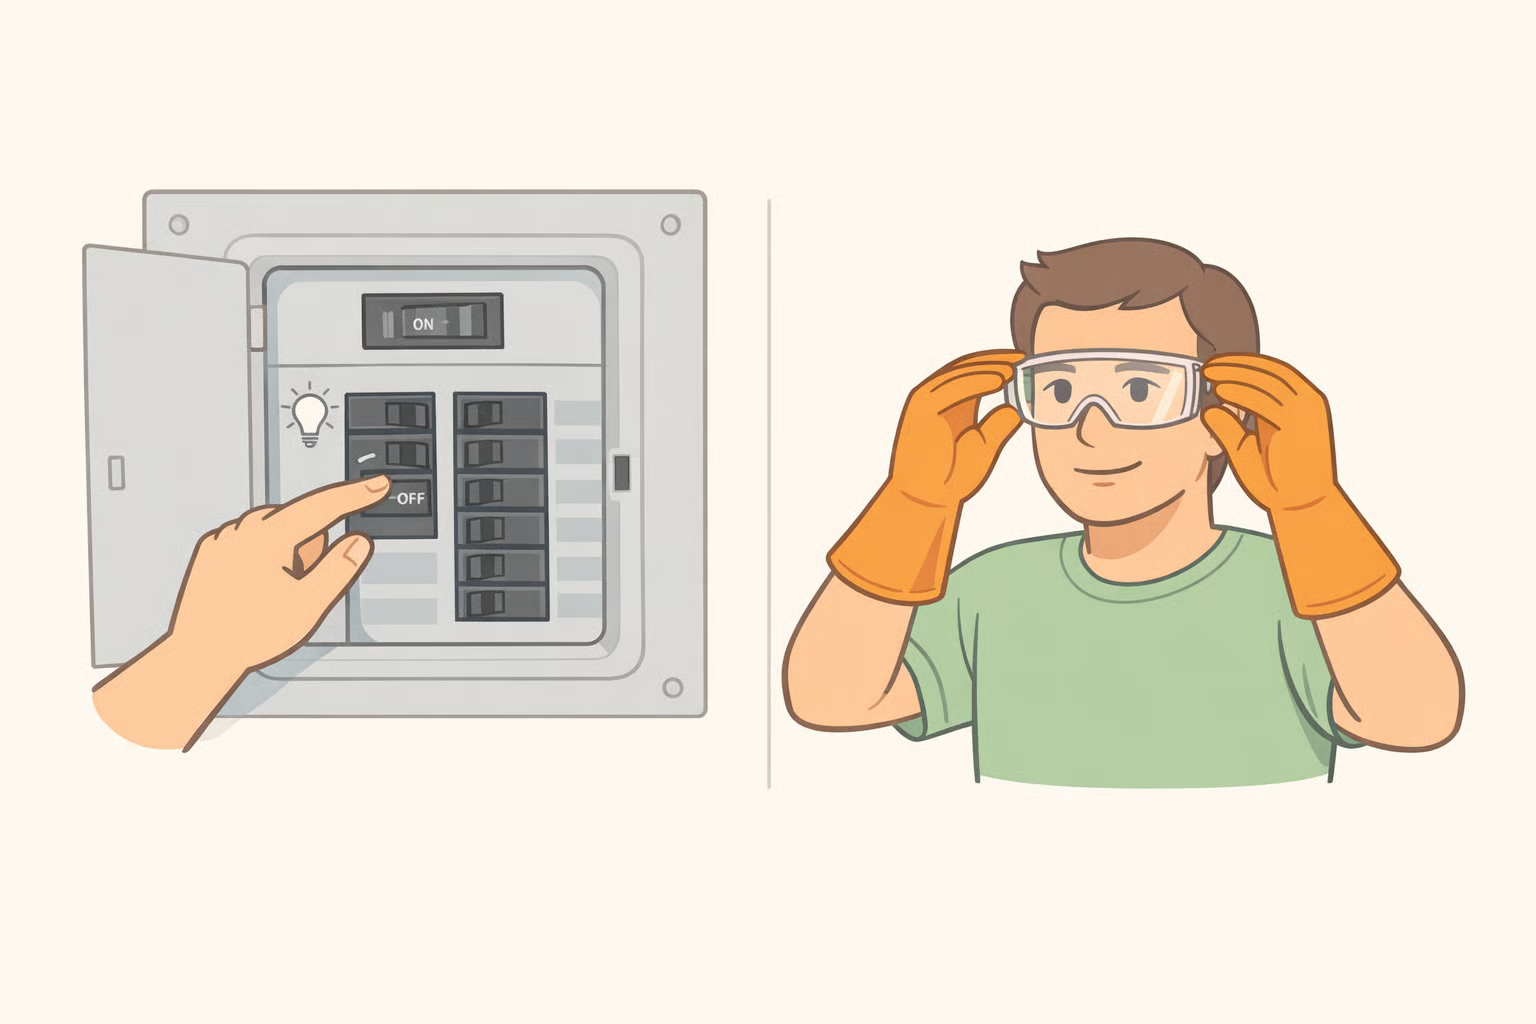
- Switch off the light at the wall, then cut power at the breaker panel. A light switch controls only part of the circuit; the breaker cuts it all, per This Old House.
- Wait for the bulb to cool completely. Incandescent and halogen bulbs hold heat for 15–20 minutes or longer. Touching one too early is both a burn risk and a glass hazard, This Old House notes.
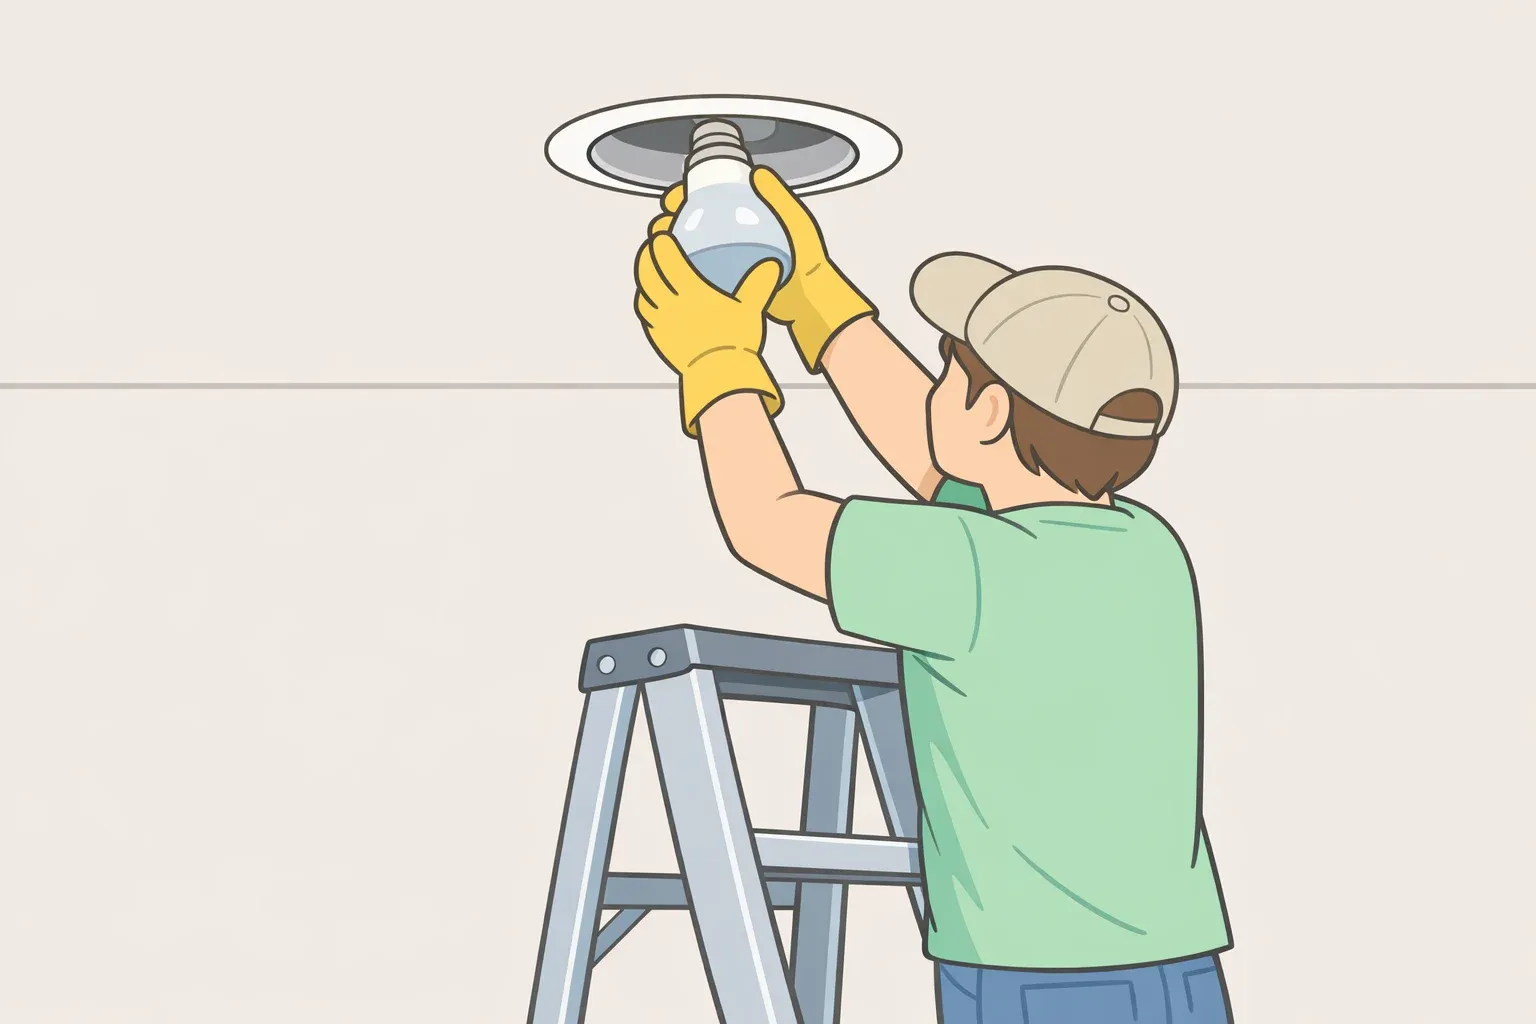
- Put on rubber gloves and safety glasses before climbing the ladder. Gloves serve double duty: they're also your first removal method, since rubber friction is often enough on a mildly stuck bulb.
What you'll need (minimum): Stable ladder or step stool, rubber gloves, safety glasses, 12-inch strip of duct tape.
Optional but useful: Suction cup, bulb changer tool with extension pole.
Estimated time: 15–45 minutes depending on how stubborn the bulb is.
Estimated cost: $0 (duct tape method) to $20 (suction cup or bulb changer).
Why recessed bulbs get stuck and which problem you're dealing with
Heat is the culprit. Older incandescent and halogen bulbs generate significant heat inside a tight housing, and repeated heating and cooling causes the metal base to expand against the socket. Over time, that cycle creates a bond that grip alone may not break.
Before choosing a method, figure out which failure you're actually facing. If a recessed can light bulb is stuck but still spins, the threads are binding or the base has partially fused to the socket traction methods are your best first move. If it won't turn at all, bonding or corrosion is more significant; start with rubber gloves and escalate from there. A bulb that's too recessed to grip by hand calls for the duct tape method or suction cup from the start. A broken bulb is a different scenario entirely skip to that section.
One more check before starting: suction cups only work on flat-faced bulbs. They won't seal on frosted or textured glass. For stuck recessed light bulb removal on irregular or textured surfaces, go straight to duct tape or a rubber-grip bulb changer tool, as This Old House advises.
How to loosen a recessed light bulb without breaking it
Work through these four methods in sequence. Start at Step 1 and move to the next only if the bulb doesn't give.
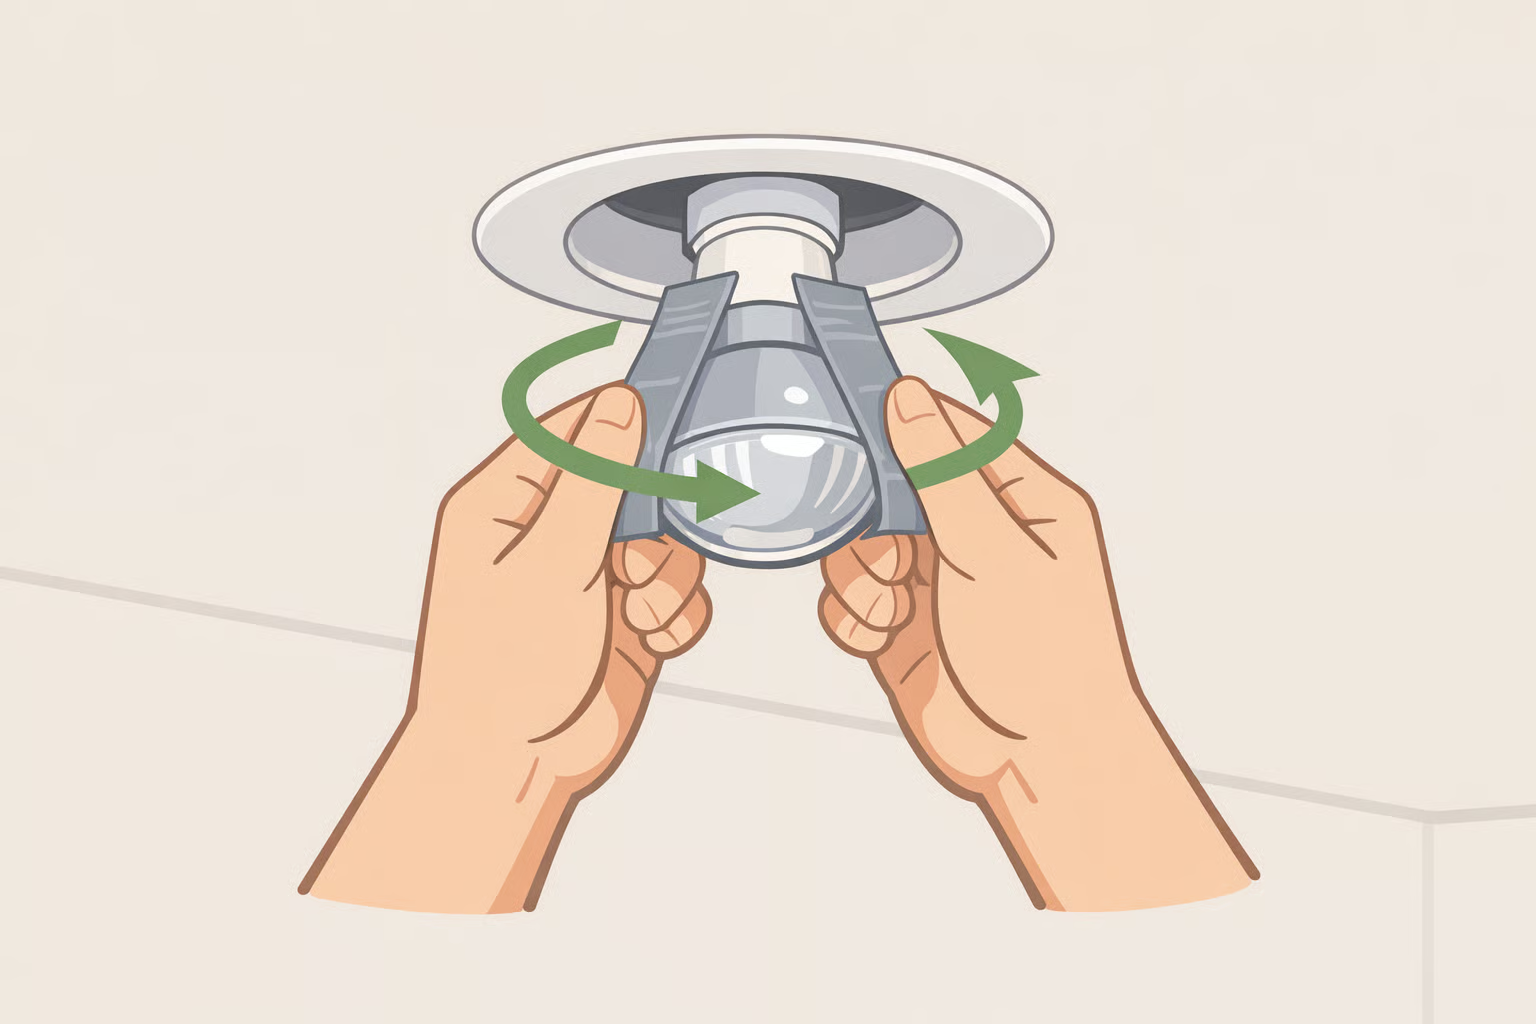
Step 1 Rubber gloves.
Grip the bulb directly with rubber gloves and twist counterclockwise with steady, even pressure. Don't yank the goal is to break the friction seal, not crack the glass. This is the fastest method when it works, costs nothing if you've already done the safety prep above, and leaves no mess. If the bulb doesn't move after sustained pressure, stop and move to Step 2 (This Old House).
Step 2 Duct tape handles.
Tear off a strip of duct tape roughly 12 inches long enough to create handles while leaving sufficient tape adhered to the bulb's surface. Press the center section firmly against the bulb, then fold each loose end back on itself to create two non-sticky handles. Grip those handles between thumb and forefinger, apply steady pressure, and twist counterclockwise. The tape provides traction without requiring direct hand contact, which matters when the housing is deep or the bulb is too recessed to grip comfortably (This Old House).
Gotcha: The bulb must be fully cool before pressing tape against it. Residual heat weakens the adhesive bond and the method falls apart.
Step 3 Suction cup.
Clean the flat end of the bulb with a dry cloth to ensure a solid seal. Press the suction cup firmly against the glass and twist counterclockwise. On smooth flat-faced bulbs, this is more reliable than duct tape and gives better torque control. It will not seal on frosted, ribbed, or textured surfaces if that describes your bulb, move to Step 4 (This Old House).
Step 4 Bulb changer tool.
Purpose-built bulb changer tools are designed for hard-to-reach fixtures and are the most mechanically reliable option, particularly when ceilings are high or the fixture is awkward to access from a stable ladder position. Most accept an extension pole, eliminating repeated repositioning. Select a head with suction cups or rubber grips compatible with your bulb type, attach the pole if needed, position over the bulb, and twist counterclockwise (This Old House). If there are more than a handful of recessed fixtures in the house, a bulb changer tool is worth keeping around.
When the bulb still won't move: last-resort options
If all four steps above have failed, two advanced tactics remain. Neither is a universal fix, and both carry tradeoffs worth understanding before proceeding.
Penetrating oil. Apply a small amount around the base of the bulb where the metal meets the socket, then let it sit for several hours before attempting removal again. This can break a corrosion bond that friction alone can't overcome. Keep oil off the glass entirely it reduces grip and poses a fire risk if residue remains when the new bulb is installed (This Old House). Treat this as a last resort, not a default step.
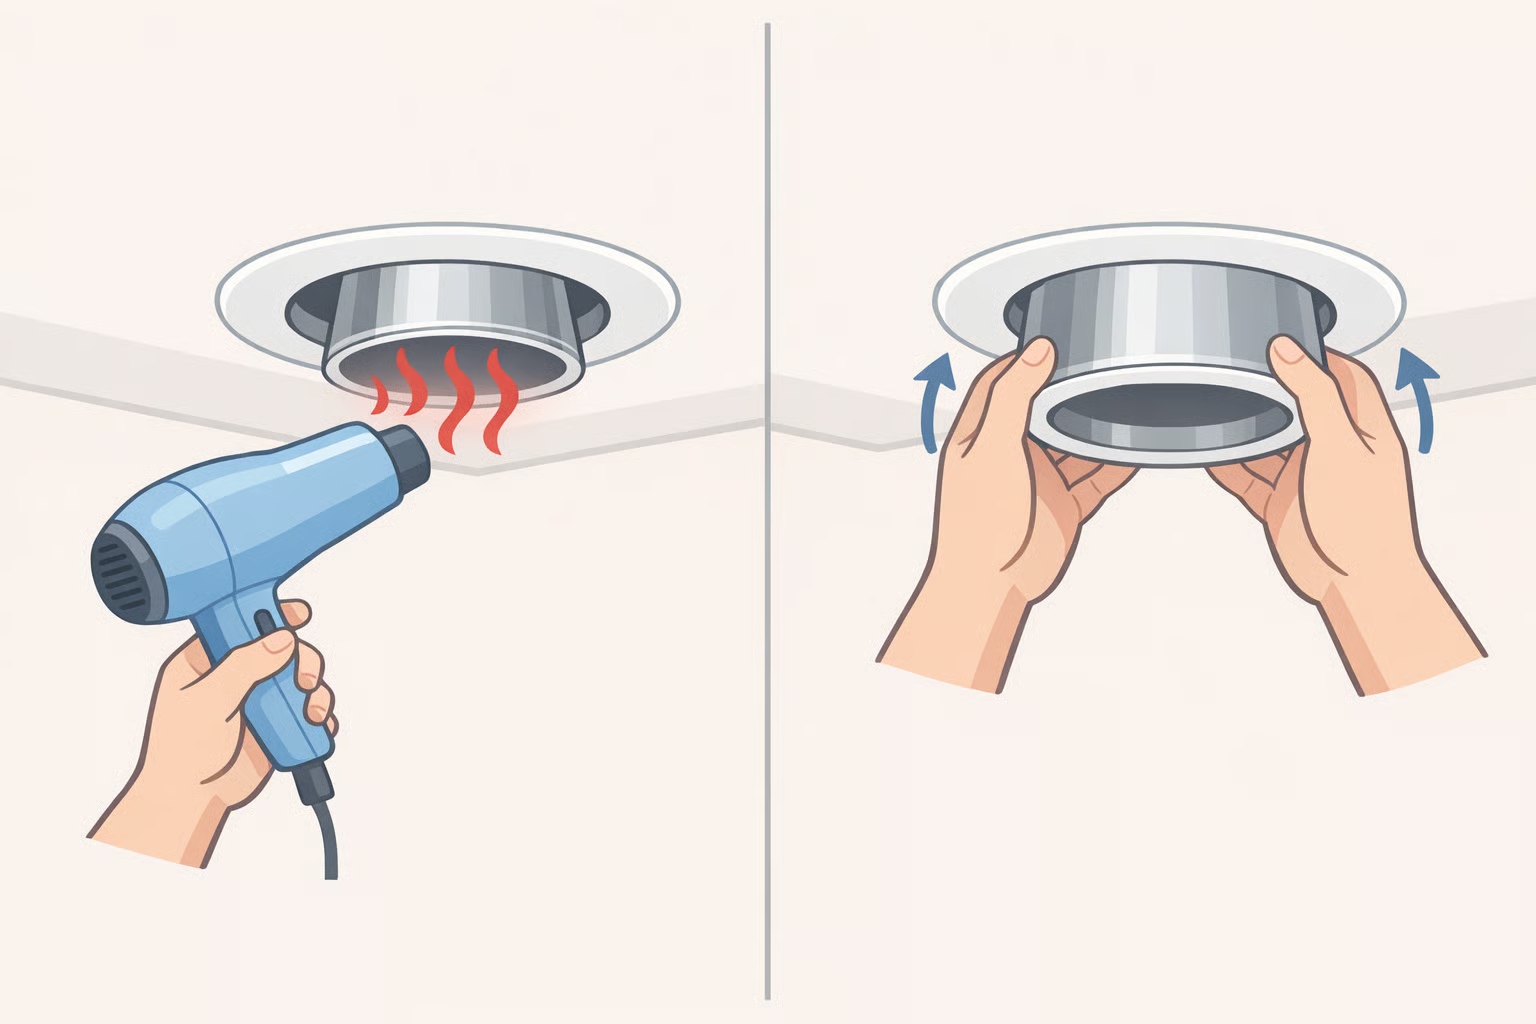
Gentle heat on the housing. A hairdryer applied to the metal fixture housing not the bulb itself can expand the socket slightly and loosen its grip. Attempt removal immediately after. Sequence matters here: the bulb must have cooled completely first, the heat goes on the surrounding metal only, and then make one removal attempt (This Old House).
When to stop. If penetrating oil and heat have both failed, take stock before attempting anything further:
- Visible corrosion inside the socket indicates damage that successful removal alone won't fix
- A deformed or crumbling base means the metal has degraded past what grip tools can safely engage
- An unstable housing or loose trim is a structural problem applying torque to an unsecured fixture risks making it worse
- If the fixture has resisted these methods across multiple bulb changes, the socket itself has failed
At that point, the practical answer is replacing the recessed fixture. That's also a reasonable upgrade opportunity to a more accessible housing type, as This Old House suggests. If the wiring or socket condition is uncertain, call an electrician rather than force the issue.
If the bulb has broken: a different set of steps
A broken bulb isn't just another removal challenge. It's a different risk profile and requires a different approach entirely skip the grip methods above.
- Confirm power is off at the breaker, not just the switch.
- Put on thick gloves leather or heavy work gloves, not thin rubber and eye protection.
- Use needle-nose pliers to carefully remove large glass fragments, working from the edges inward.
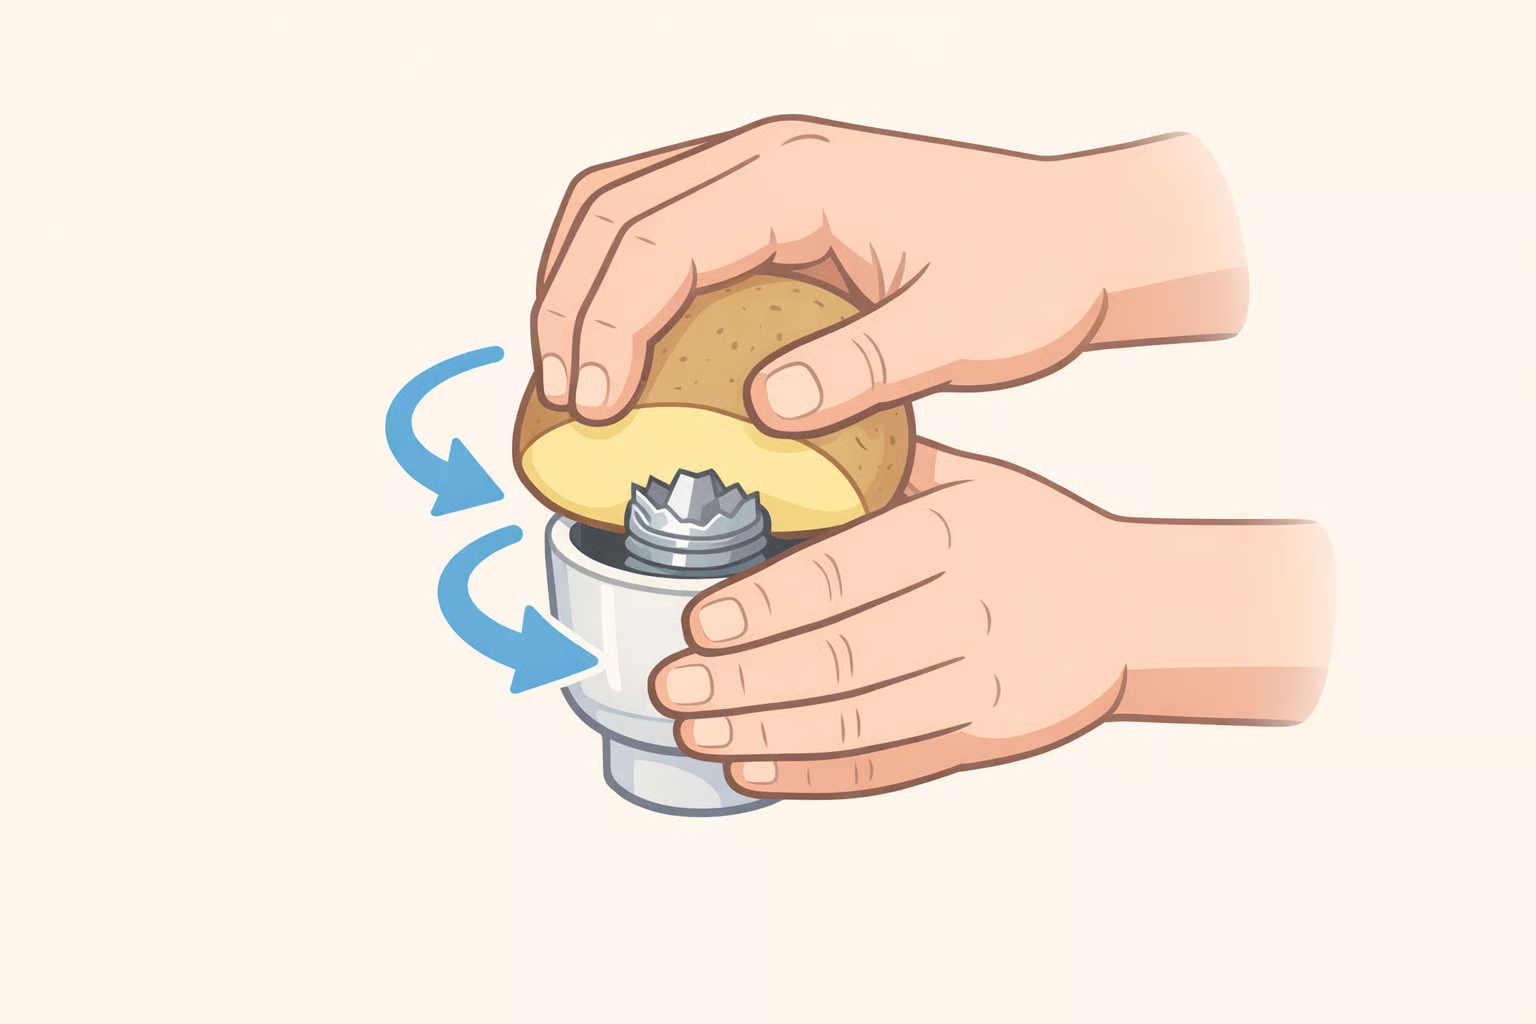
- For the remaining metal base still lodged in the socket, press a raw potato cut in half firmly against it and twist counterclockwise. The potato's texture grips the metal base without requiring finger contact near sharp glass edges (This Old House).
- Once the base is out, clear all glass debris from the housing before proceeding.
Gotcha: Tape, glue, and suction cup methods don't apply to a broken bulb. Go straight to pliers and potato.
After removal: close out the job before installing a new bulb
Extraction isn't the final step. Spend two minutes here before putting in the replacement.
- Inspect the socket interior for corrosion, carbon buildup, or visible damage. If the socket looks degraded, the fixture may need replacement regardless of the successful removal.
- Wipe out any debris, glass fragments, or penetrating oil residue with a dry cloth anything left in the socket can affect the new bulb's seal or create a fire hazard.
- Verify the replacement bulb's base type and wattage rating against the label inside the housing. Oversized wattage accelerates heat buildup and re-bonding (This Old House).
- Apply a thin film of dielectric grease to the metal base of the new bulb before screwing it in. It costs a few dollars at any hardware store and prevents metal-to-metal bonding during future heat cycles (This Old House).
How to prevent a stuck recessed light bulb from happening again
Three steps, under five minutes total.
Switch to LED bulbs. They run significantly cooler than incandescent or halogen types, which means far less heat-cycling and far less bonding to the socket over time. They also last longer, so the fixture gets disturbed less often (This Old House).
Choose textured bulbs when possible. Bulbs with a textured surface offer better grip for future removal worth considering when choosing between otherwise comparable LED options (This Old House).
Keep up with basic maintenance. Check bulbs periodically for signs of wear or damage, and clean fixtures regularly to prevent dust buildup (This Old House).
Most stuck recessed can light bulbs yield to the duct tape method or a suction cup. Penetrating oil and hairdryer heat are genuinely uncommon escalations. If the process leads to fixture replacement, that's not a failure sometimes the socket has simply reached the end of its useful life, and forcing it further isn't worth the risk.


Comments
Be the first, drop a comment!