



Your annual roof maintenance checklist: surface to attic
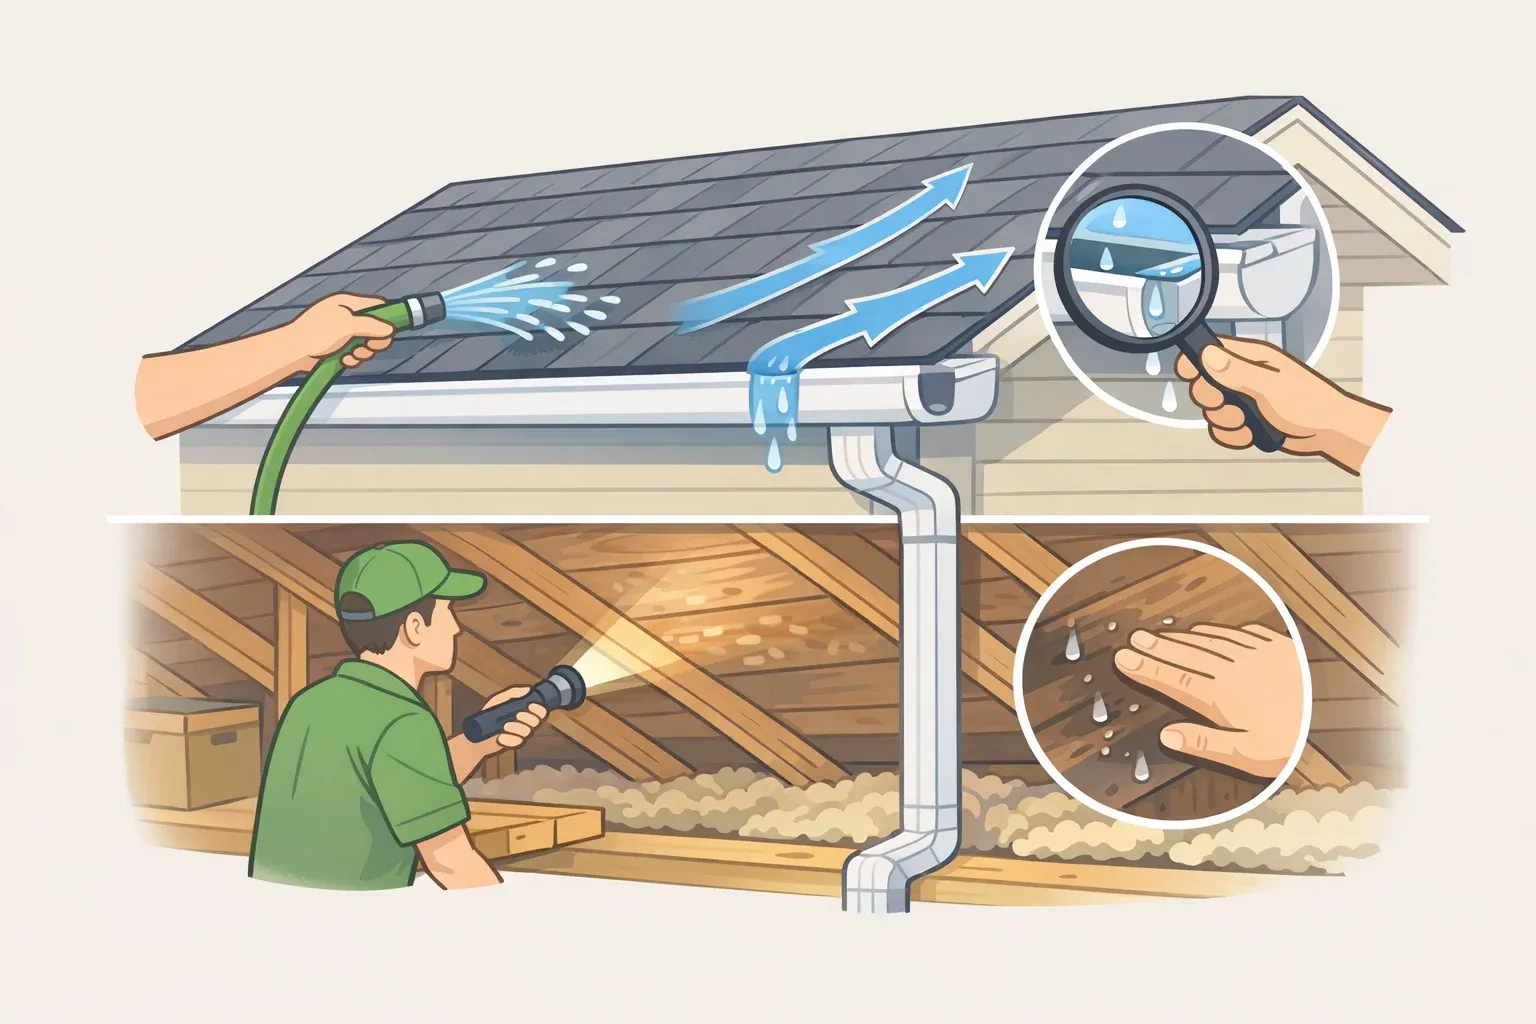
Use this annual roof maintenance checklist to work through the three ways a roof fails: water gets in through a breach in the surface or flashing, water can't get out because drainage is blocked, or moisture and heat problems originate in the attic and destroy the deck from below. Complete the full inspection once a year spring is ideal, before summer heat sets in. Revisit gutters each fall after leaves drop. By the end, you'll know what to look for, what your findings mean, and when to call a professional instead of grabbing a caulk gun.
Roofs fail gradually. Extension programs and building authorities consistently recommend catching deterioration before it compounds into something that forces full replacement (University of Georgia CAES, 2023; City of San Antonio Office of Historic Preservation, early 2025). Asphalt and wood shingles or shakes typically carry a lifespan of 20 to 30 years (City of San Antonio, early 2025). Annual attention is what separates a roof that reaches that ceiling from one that fails years ahead of schedule.
Before the first step, take dated photos from each corner of the house plus close-ups of any areas that looked rough last year. Build the habit of keeping those photos organized by year. Three seasons of documentation shows you whether a problem is new or progressing, and it's invaluable when talking to contractors or filing an insurance claim.
What you'll need before starting
- Binoculars for a ground-level pass before climbing
- A stable ladder that extends at least 3 feet above the roofline (Oregon State University Extension, 2024)
- Non-slip footwear with grip soles
- A bucket and rope to carry tools up; don't bring them on the ladder (Oregon State University Extension, 2024)
- A flashlight for the attic
- Your phone or camera for the photo log
- Safety harness and lines if the roof pitch exceeds roughly 23 degrees, you'll be within 6 feet of the edge, or eaves are more than 16 feet from the ground (Oregon State University Extension, 2024)
Your annual roof maintenance checklist, step by step
The three steps below follow the same logic as the three failure paths: surface first, drainage second, attic third. Each feeds into the next.
Step 1: inspect the roof surface, flashings, eaves, and soffits
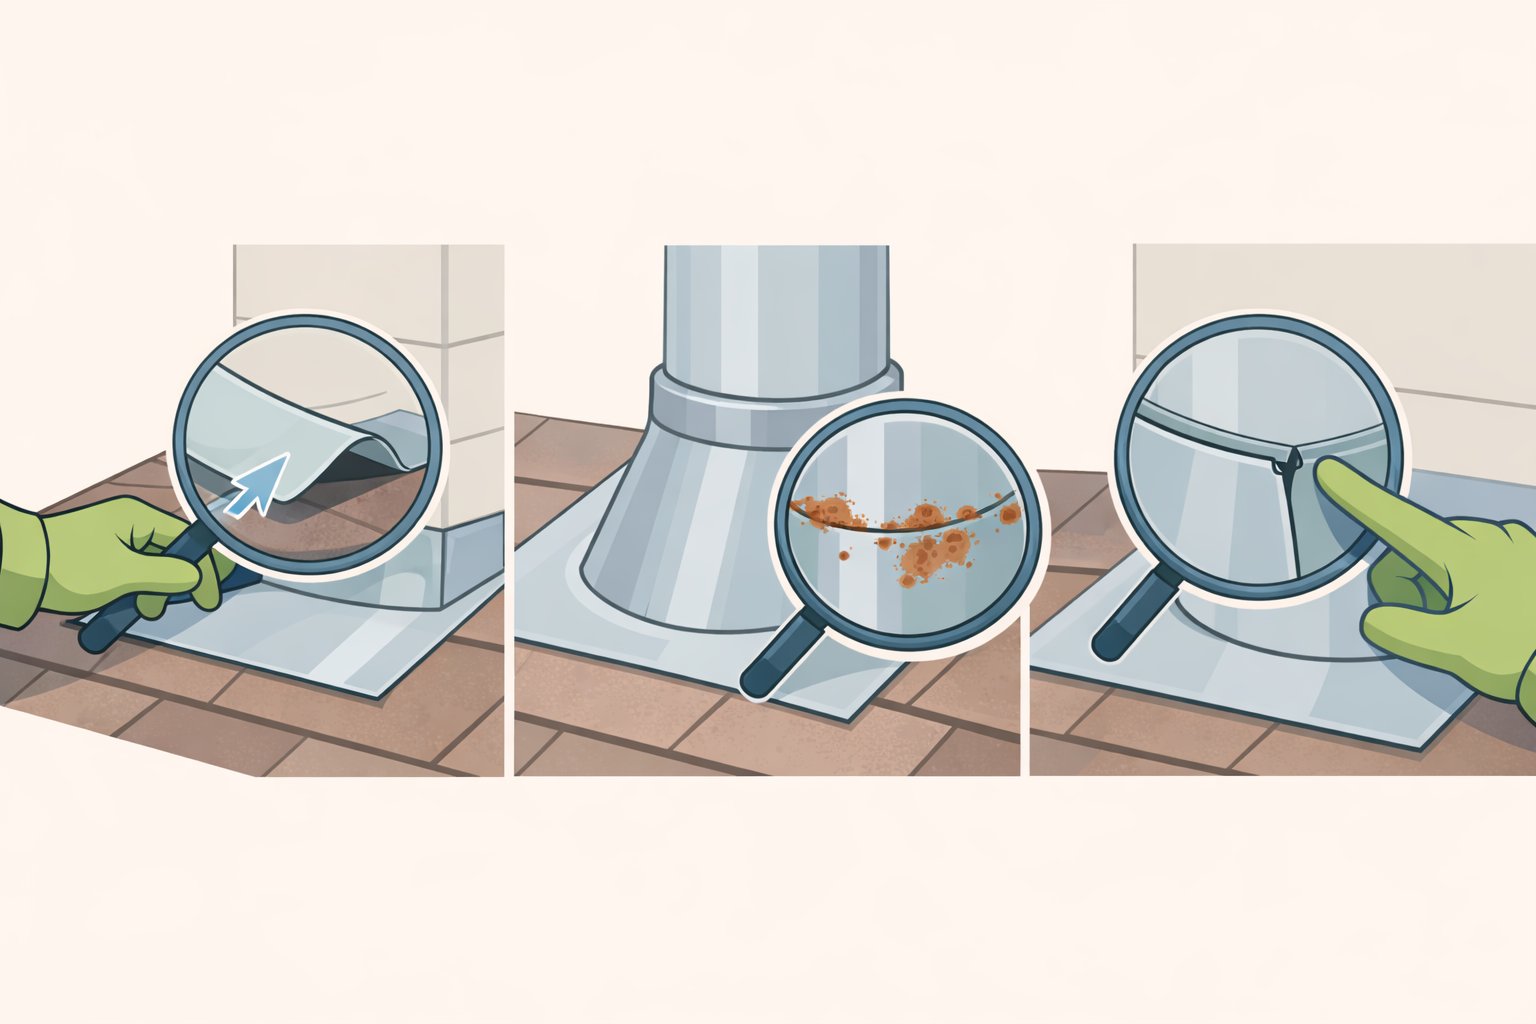
This is where you confirm the weather seal is intact. You're looking for anything that lets water in: cracks, gaps, open seams, missing material, deteriorating metal.
1a. Start from the ground. Walk the full perimeter with binoculars before going up. Note any shingles that are visibly curling, cracked, or missing. Flag any areas where the roofline sags or looks uneven. A ground-level binocular pass catches most major problems anyway, so if you're uncertain about footing on the pitch, don't feel compelled to climb. Add observations to your photo log before going up.
1b. Inspect the roof surface up close. Check for breaks, holes, or open seams in the surface material, since each is a direct water entry point (City of San Antonio, early 2025). On asphalt shingles, look for granule loss: bare or shiny patches signal aging of the protective layer. On wood shakes, check for splits, curling, or dark discoloration indicating moisture retention.
1c. Check every flashing point. Flashing is the metal that seals joints where the roof meets something else: chimney, plumbing vents, skylights, dormers, valleys. Each junction is a potential leak. Confirm each is securely fastened with no lifted edges, open seams, or rust (University of Georgia CAES, 2023). Chimney, plumbing vent, and skylight flashings are priority inspection points; give them more time than the open field of shingles.
1d. Inspect the drip edge. The drip edge is metal flashing along the lower roof edge that directs water into the gutter rather than behind the fascia board (City of Amarillo Building Safety, 2024). Confirm it's seated firmly with no gaps or rust pulling it away from the roofline.
1e. Check eaves and soffits. Look for soft spots, staining, or paint failure on the underside of the eaves. These often signal a leak that started higher up the slope and traveled before dripping, meaning the entry point is somewhere above where the damage is visible.
Gotcha: Skip the pressure washer unless you're experienced with one. Improper pressure washing can ruin a roof (Oregon State University Extension, 2024). Use a long-handled scrub brush if cleaning is needed before inspecting.
After Step 1, what your findings mean:
| What you find | What to do |
|---|---|
| One or two cracked or missing shingles, minor flashing lift | DIY repair if you're comfortable on the roof; seal flashing edges with roofing caulk, replace individual shingles |
| Multiple flashing points failing, recurring seam gaps | Schedule a roofer; this pattern suggests underlying issues, not isolated wear |
| Widespread granule loss, curling across large sections | Call a pro for an assessment; you may be approaching replacement territory |
| Saggy roofline, soft spots at eaves, visible structural irregularity | Call a pro now; this is not a DIY situation |
Step 2: manage drainage, gutters, downspouts, and roof debris
Do this annually as part of the full inspection; revisit gutters in fall after leaves drop.
Blocked gutters back water up under the roofline. Debris-filled valleys hold moisture against the surface for days. Both accelerate failure, and both are preventable with a few hours of work.
2a. Clean gutters and downspouts. Remove all accumulated material: leaves, seed pods, compacted sediment, nests. Run water through the system and watch for overflow at joints, which indicates a blockage lower in the run (City of San Antonio, early 2025). Homes with significant tree cover may need this done twice, once in late spring and once in fall.
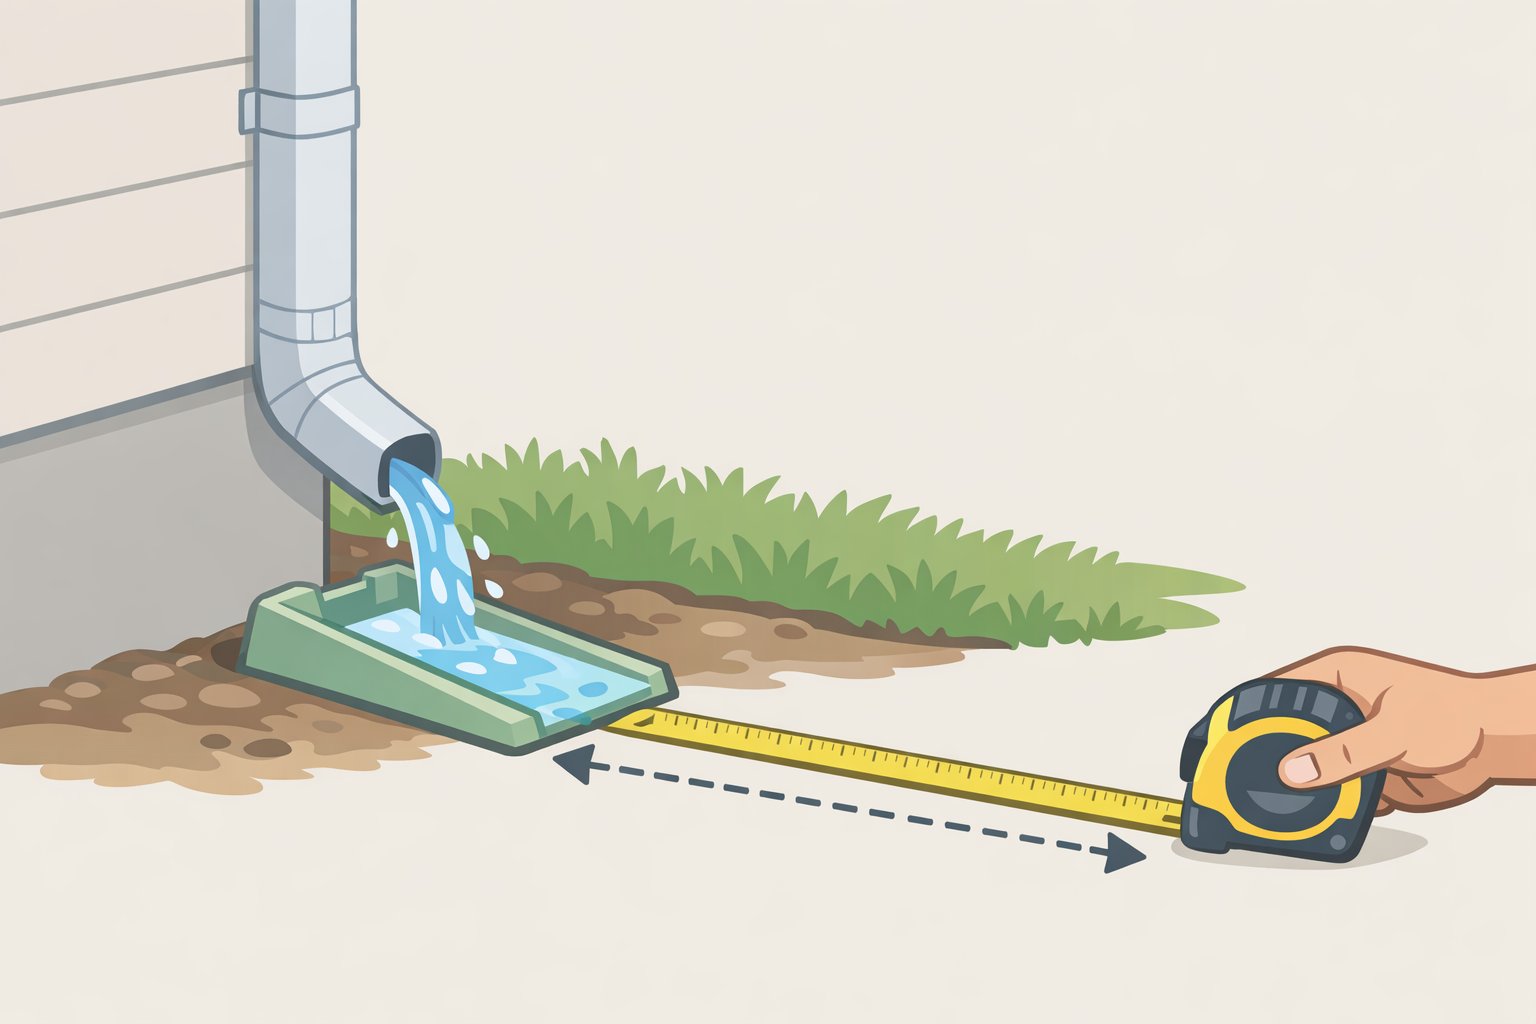
2b. Confirm downspout discharge distance. After clearing, confirm that each downspout carries water at least 2 to 3 feet from the foundation before releasing it (University of Georgia CAES, 2023). Water pooling at the base of the house is a foundation problem in the making, and it often starts with an undirected downspout.
2c. Clear debris from the roof surface. Leaves, pine needles, and grit accumulate in valleys and behind chimney bases. Left in place, they hold moisture and create conditions for moss and fungal growth (City of San Antonio, early 2025). Remove them with a soft-bristled roof rake or brush, working down the slope, never sideways across shingles.
2d. Assess and address moss or organic growth. Moss itself doesn't damage most roofing surfaces directly, but it traps soil and debris that stay wet long after rain ends (Oregon State University Extension, 2024). On wood shakes, that retained moisture feeds fungal decomposition that breaks down the wood itself. On asphalt shingles, established moss works under shingle edges and lifts them, opening a path for water into the underlayment (Oregon State University Extension, 2024).
If you see moss: brush off what you can with a soft-bristled brush, then apply either a zinc sulfate solution or a soap-based potassium fatty acid product using a pump sprayer; both are effective (Oregon State University Extension, 2024). Avoid overspray on plants below, and rinse any foliage that gets contacted.
Gotcha: Skip zinc sulfate if you have copper gutters, flashing, or downspouts; it corrodes copper (Oregon State University Extension, 2024).
Cleaning removes what's there; it doesn't change the conditions. Moss takes hold wherever a roof stays shaded and damp long enough for it to colonize, and the most effective long-term prevention is trimming overhanging branches so sunlight reaches the surface (Oregon State University Extension, 2024). Without that change, it returns.
After Step 2, what your findings mean:
| What you find | What to do |
|---|---|
| Gutters full of debris, no structural issues | DIY cleaning; add fall re-check if trees overhang |
| Downspouts discharging at the foundation | Extend with a splash block or flexible extension; inexpensive fix, do it now |
| Scattered moss or algae | DIY treatment; trim shade-causing branches |
| Heavy, recurring moss despite treatment | Evaluate tree trimming; consider professional cleaning if growth is on steep or fragile sections |
Step 3: check the attic, ventilation, insulation, moisture, and pests
If Step 1 tells you where water gets in, the attic tells you why damage keeps coming back. Heat escaping through a poorly insulated attic warms the roof deck; moisture trapped in an underventilated attic rots structural wood. Neither problem shows up in a surface inspection.
3a. Inspect insulation coverage. Confirm insulation covers the entire attic floor with no gaps, compressed sections, or pulled-back areas near the eaves. Consistent coverage keeps heat in the living space and the roof deck cold (University of Georgia CAES, 2023). Add insulation where coverage is thin, but don't block soffit vents in the process.
3b. Check every ventilation opening. Locate soffit vents, gable vents, ridge vents, and any roof vents. Each should be clear of insulation, nesting material, and debris. A useful benchmark: most attics require at least one square foot of ventilation per 150 square feet of attic floor space, reducible to 1/300 when venting is evenly split between low soffit and high ridge positions (City of Amarillo Building Safety, 2024). If your attic runs noticeably hot in summer or vents look blocked, get it assessed by a professional rather than guessing at a fix.
3c. Scan for moisture damage. With a flashlight, look at the underside of the roof decking for staining, dark spots, or soft areas. Check rafters for water lines or visible mold (University of Georgia CAES, 2023). Any of this means water is entering the structure, and the breach may be somewhere you didn't catch in Step 1.
3d. Cold-climate check: ice dam indicators. A well-insulated attic keeps the roof deck uniformly cold in winter, so snow melts only at the outer edges. Significant bare patches on your roof while a nearby unheated detached garage still holds snow is a clear sign: warm air from the living space is leaking into the attic and heating the deck unevenly (NDSU Extension, 2024). Ice dams that form from this pattern drive water backward under shingles, saturating insulation and rotting structural wood. The fix is sealing air leaks and adding insulation, not roof repairs.
3e. Check for pests. Look for droppings, chewed insulation, or nesting material. Rodents and bats enter through gaps at eaves, ridge caps, and around penetrations (University of Georgia CAES, 2023). If you find evidence, call a pest professional before sealing entry points; sealing first traps animals inside.
3f. Confirm exhaust fans exit the building. Trace bathroom and kitchen exhaust ducts to where they terminate. Any duct that ends inside the attic rather than through a roof or wall vent to the exterior is dumping humid air directly into the attic space (University of Georgia CAES, 2023). It's a common problem and a correctable one, either DIY or with an HVAC contractor depending on your comfort level.
After Step 3, what your findings mean:
| What you find | What to do |
|---|---|
| Minor insulation gaps, clear vents, no moisture | Add insulation; mark done |
| Blocked soffit or ridge vents | Clear debris; monitor airflow |
| Staining or soft decking, no active drip | Re-examine exterior for missed breach; consider a roofer if source isn't obvious |
| Active moisture, mold, or structural soft spots | Call a pro now; moisture that's progressed this far typically involves more than one problem |
| Exhaust duct terminating in attic | Re-route duct to exterior |
When the checklist reveals something beyond maintenance
Annual inspection and upkeep extend a roof's life. They don't extend it indefinitely. Part of the annual review is recognizing when repair no longer makes sense.
Signs to call a professional for assessment:
- Flashing is failing at multiple points or has been patched repeatedly
- You're finding new leak evidence each year despite previous repairs
- Shingles are curling, cracking, or losing granules across broad sections, not isolated spots
- The roof is at or past the expected lifespan for its material type
The replacement threshold: Consider replacement when damage or deterioration covers 25 to 30 percent or more of the roof area, or when that proportion of tiles or shingles are missing or compromised (City of San Antonio, early 2025). Your insurer or a licensed contractor may frame this differently, but it's a useful starting point for the conversation.
Permits: Permit requirements vary by jurisdiction; check with your local building department before work begins rather than assuming one way or the other. Requirements and fees differ significantly by location.
Note for older homes with slate, clay tile, or original metal roofing: These materials can last well over 50 years with regular care (City of San Antonio, early 2025), and replacement decisions may involve preservation standards or code requirements that don't apply to standard asphalt. Consult a roofer experienced with historic materials before making any replacement call.
What to do after the inspection

Calendar the full inspection for the same window each year. Add a gutter pass each fall if your yard has heavy tree cover. Store this year's photos in a dated folder and pull them out next spring.
Most findings from this checklist land in one of two buckets: fix now, or watch. The escalation signals are clear. Multiple flashing failures, widespread shingle deterioration, or any active moisture in the attic structure mean it's time to call a professional (City of San Antonio, early 2025; NDSU Extension, 2024). The whole point of the annual check is catching those conditions when the fix is still a repair and not a replacement.


















Comments
Be the first, drop a comment!