



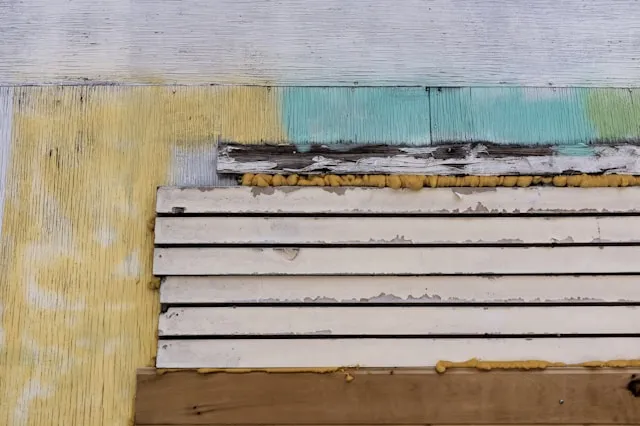
A tube stamped "exterior" or "weatherproof" is a starting point, not a finished answer. Knowing how to choose exterior caulk that holds means matching the product to the joint, not grabbing whatever's labeled for outdoor use.
The research on sealant failure points to incorrect bead geometry and skipped primer as major, preventable causes. A sealant can fail even when the product itself is sound if its movement rating, substrate compatibility, or joint geometry doesn't match the joint it's sealing.
The performance data that matters most is the ASTM C920 classification, a four-part code covering Type, Grade, Class, and Use that governs movement capability, adhesion, and weathering for these sealants.
That standard has a limit worth knowing before shopping: it verifies a sealant's properties as it leaves the factory, not how it holds up for decades against a specific joint's movement, substrate, or climate.
A bare "meets ASTM C920" claim on the packaging isn't enough to act on. The actual classification string, something like Type S, Grade NS, Class 25, Use NT, is what tells a buyer what the product is built to do.
This guide walks through five checks, in order: identify the joint, confirm it's rated for outdoor exposure and matches the joint's orientation, match the movement class to how much the joint really moves, match the chemistry to what the bead touches and whether it'll be painted, and check the product's condition and application limits before buying. Then it covers prepping and applying the bead.
It's built for ordinary jobs: window and door perimeters, trim, siding, and simple masonry joints. Engineered expansion joints, curtain wall, traffic-bearing decks, and pool or immersed joints fall outside ordinary DIY scope, and ASTM C920 itself doesn't even cover pavement joints like highways or bridge decks.
Identify the joint, then confirm the tube is actually built for it
Know the joint before shopping for it. Note four things: what's on each side of the gap (wood, vinyl, aluminum, masonry, glass), whether the joint runs vertical or horizontal, whether it will be painted, and roughly how wide it is.
A joint between two different materials, brick meeting an aluminum window frame, for example, needs a sealant qualified for both surfaces, not just one. A sealant's Use codes only cover what's actually been tested.
A hairline gap around trim is usually a simple cosmetic seam. A gap that recurs at regular intervals or lines up with a control joint in concrete is more likely moving with the building itself, and it needs the movement-class check covered next, not just a wider bead of the same caulk.
Confirm the exterior rating and orientation separately from water resistance. Look for an explicit outdoor or exterior-use claim on the label; that's a different claim than "waterproof" or "approved for wet-area applications."
A bathroom or wet-area sealant can resist water without being formulated to survive UV exposure or the temperature swings and moisture intrusion an outdoor joint faces, so treat exterior suitability and water resistance as two separate checks when comparing weatherproof caulk for exterior use.
The Grade letter tells you orientation. Grade NS (non-sag) holds its shape on vertical joints like window and door frames. Grade P (pourable, self-leveling) is made to flow into horizontal joints and will slump if used vertically. If the full classification string isn't printed on the cartridge, check the manufacturer's technical data sheet, which lists that string along with the test results behind it; a generic "meets C920" claim by itself doesn't say what the product is rated to do.
If a product fails either check, put it back before comparing movement class or chemistry. Neither of those matters if the tube isn't built for the job in the first place.
Match the movement class to how much the joint actually moves
Class numbers, ranging from 12.5 up to 100/50, describe how much stretching and compression the cured bead can survive without tearing. Class 25 tolerates roughly ±25% movement, Class 50 about ±50%, and Class 100/50 allows up to 100% extension but only 50% compression, a spec built for joints that open more than they close.
Long metal runs in full sun move more than most people expect. One modeled 30-foot aluminum joint with a wide surface-temperature swing worked out to roughly 120% movement in a ½-inch gap, well above what a Class 50 product can handle even before adding a safety margin.
That's not a calculation to run for ordinary jobs; it's a cue. If the joint is a long metal expansion run or anything beyond a standard window or door perimeter, check the manufacturer's data sheet or call a contractor rather than guess.
Masonry moves for reasons beyond temperature, too. Concrete keeps shrinking for years after it's poured, and brick can expand as it absorbs moisture. That's a reason to ask about an unusual or wide masonry joint, not a rule that every masonry job needs a higher class than a standard window joint.
A higher Class number isn't a universal upgrade, and it can't rescue a joint that's the wrong shape for sealant. Movement class can't compensate for a joint that's too narrow, bonded on three sides, or too wide or deep for a bead to fill safely; the sealant still needs correct bead geometry and backer rod to use that movement capacity, covered in the application steps below. An unusually wide or deep gap isn't a "bigger tube" problem. It may need a backer rod resized for the opening, a redesigned joint, or a professional look before it's sealed at all.
For ordinary window, trim, and door joints, err toward the higher of two reasonable classes when uncertain. A safety factor of 1.25 to 1.5 on calculated movement is standard practice for anyone sizing a joint. Class is also where most specification mistakes happen in practice, and a sealant with too low a movement rating doesn't announce the problem until it splits.
How to choose exterior caulk by joint type
There's no single best exterior caulk for every joint. The right pick depends on what the bead touches, how much it moves, and whether paint is going over it. The main exterior caulk types homeowners choose between are silicone, polyurethane, and paintable polyurethane-hybrid or MS polymer sealants, and each trades off differently.
Silicone is generally associated with strong UV resistance and high movement capability, which is why it's commonly used on glass and anodized metal. Conventional silicone generally can't be painted, since paint tends to bead up, peel, or fail to bond to it.
Not every silicone product carries the same exterior caulk movement rating, so confirm the specific Class number on the label or data sheet before assuming "silicone" alone answers the movement question.
Polyurethane and paintable hybrid sealants, sometimes labeled MS polymer or silyl-terminated polyether, fit better where paint needs to go over the joint. Standard polyurethane is commonly used on masonry and concrete, but standard aromatic polyurethane has lower UV stability than silicone and can yellow or chalk after prolonged sun exposure unless the specific product is formulated for it.
Hybrid and MS polymer products vary from one formulation to the next in movement capability, cure time, and paint compatibility, so check those specifics on the data sheet rather than assuming one hybrid behaves like another. Don't assume any polyurethane is automatically right for masonry either; check that the specific product lists that substrate on its Use codes.
Around masonry, mortar, or stone, acid-cure silicone is the wrong choice. It releases acetic acid that can attack alkaline masonry and corrode nearby metal. Pick a neutral-cure formulation for silicone on these substrates, and for polyurethane, confirm the product's tested substrate list rather than assuming compatibility from the chemistry name.
If appearance matters, light-colored stone, brick, or limestone trim, look for a manufacturer statement that the product is non-staining to porous substrates, ideally backed by ASTM C1248 testing; a sealant can be chemically appropriate for the substrate and still leave a visible stain.
Use codes like NT to describe traffic exposure, not substrate. NT simply means "non-traffic." A window perimeter needs Use NT plus the substrate codes that match what the bead actually touches, such as M (mortar/masonry), A (aluminum), or G (glass).
Vinyl, painted wood, and other surfaces outside those standard categories don't automatically get their own code. Rather than guess from marketing language like "multi-surface" or "exterior," pull the manufacturer's tested-substrate list for anything that isn't a straightforward masonry, aluminum, or glass joint.
Any joint that carries foot or vehicle traffic, sits in standing water, or is a pavement or parking-deck joint sits outside this guide's scope. ASTM C920 itself excludes highway, airfield, and bridge-deck pavements.
Window/door perimeter
Orientation: Vertical
Codes to look for: NT + substrate code matching frame material
Chemistry starting point: Neutral-cure silicone or polyurethane
Paint note: Use a paintable version if trim will be painted
Painted wood trim/siding
Orientation: Vertical
Codes to look for: NT; wood isn't a standard substrate code, so confirm compatibility on the data sheet
Chemistry starting point: Polyurethane or paintable hybrid/MS polymer
Paint note: Skip conventional silicone
Glass-to-frame glazing
Orientation: Vertical
Codes to look for: NT, G
Chemistry starting point: Neutral-cure silicone
Paint note: Not paintable; check for a window manufacturer's approved-sealant list first
Unpainted masonry/concrete joint
Orientation: Vertical or horizontal
Codes to look for: NT, M; confirm non-staining if appearance matters
Chemistry starting point: Neutral-cure silicone or polyurethane, per data sheet
Paint note: Avoid acid-cure silicone
Horizontal patio or control joint, non-traffic
Orientation: Horizontal
Codes to look for: NT + substrate code
Chemistry starting point: Verify with the manufacturer; may need Grade P polyurethane
Paint note: For standing water or pavement joints, call a contractor
Horizontal walkway or driveway, traffic-bearing
Orientation: Horizontal
Codes to look for: T + substrate code
Chemistry starting point: Manufacturer's traffic-rated system, not a standard tube
Paint note: Outside DIY scope; call a contractor
For a vertical, non-traffic exterior joint, pick a non-sag product whose Use codes cover both materials it touches. Choose paintable polyurethane or hybrid where paint is going over it, and neutral-cure silicone where glass, UV exposure, or high movement is the priority. Confirm the specific class and non-staining claim on that product's own data sheet rather than assuming it from the chemistry name.
Check the tube before checkout, then prep and apply it correctly
Confirm the container is unopened, undamaged, and within its shelf life. Sealants in original containers list the manufacturer's name, classification, batch number, and expiration date, and expired product shouldn't be used.
Check the product data sheet for the substrate-temperature range before buying, since application should follow the substrate surface temperature, not the air temperature. Some single-component products set limits around 40°F to 100°F, but the exact range varies by formulation and polymer type.
Check whether the product calls for a specific primer on the substrate. Porous materials, concrete, CMU, mortar, stone often need one, and skipping primer where it's required is the second most common cause of sealant failure, after a bad width-to-depth ratio. Where primer is required, plan for it to dry to tack-free before the bead goes on, typically 30 to 60 minutes depending on the product.
A small window or trim job is beginner-friendly with basic tools, and it usually takes longer to prep than to actually gun the bead, especially if the old caulk is stubborn to remove. A large, irregular, or structurally shifting joint, or anything flagged as outside scope above, moves into intermediate DIY territory or professional assessment. Skip ladder work in wet, icy, or high-wind conditions, and hold off if the wall is outside the application temperature range listed on the data sheet.
Gather these before starting:
A removal tool for old caulk
A caulk gun
Primer, if the product calls for it
Backer rod or bond-breaker tape
A tooling tool or gloved finger
Gloves and eye protection
Use the cleaner the sealant or substrate manufacturer recommends rather than a generic solvent, since the wrong one can damage siding finishes or coatings and undo the prep work before the bead even goes in. Test any cleaner on an inconspicuous spot first, and work in a ventilated area.
If the product is a gun-grade polyurethane, read the label and safety data sheet before using it: standard formulations contain isocyanates, and glove, eye, ventilation, and cleanup requirements vary by product, so don't assume one consumer polyurethane shares the same formulation or handling requirements as another.
With materials gathered, work through the joint in order:
Remove the old caulk down to bare substrate. Different chemistries generally don't bond to each other, and new sealant applied over old residue tends to fail by peeling away within months.
Clean and dry both joint faces. Dust, oils, and old residue all wreck adhesion before the sealant gets a chance. Both surfaces should feel bare and dry, not just visually clean, before moving on.
Install backer rod or bond-breaker tape. Use backer rod sized about 25% to 33% larger in diameter than the joint width for any joint deep enough to hold it. If the joint is too shallow for the specified rod, use bond-breaker tape on the joint floor instead. The rod sets bead depth and stops the sealant from bonding to the back of the joint, which is what lets the bead stretch instead of tearing.
Load the gun and cut the nozzle to match the joint width.
Gun a continuous bead that wets both joint faces. Keep steady pressure and a consistent pace so the sealant fully contacts both sides without skips, gaps, or trapped air. For joints up to ½ inch, aim for roughly equal width and depth; for wider joints, keep depth to about half the width. A bead deeper than it is wide can't stretch and tears early regardless of which chemistry was chosen.
Tool the bead immediately, before it skins over. Follow the product's own tooling instructions, since some sealants call for a specific tooling liquid or prohibit certain soaps and cleaners. A gloved finger or tooling tool should press the sealant firmly against both joint faces and leave a slightly concave, hourglass-shaped profile. That profile is what gives the bead room to stretch and compress instead of tearing at the surface.
Inspect the finished run for voids, skips, or blisters before calling it done. Any bead with gaps, blisters, or incorrect profile should be cut out and replaced rather than patched over with more sealant.
Protect the fresh bead from rain until it's tack-free, and keep the joint from moving or bearing traffic until it reaches full cure. Both windows are manufacturer-dependent, so check the data sheet rather than assuming a universal number.
What to check if a joint fails again
If an old joint has already failed, diagnose it before buying a replacement tube:
Split down the middle, both edges still bonded: movement exceeded the sealant's rated class. Reconsider the Class next time, or get a professional opinion if the joint is unusual.
Clean release from one side only: a surface-prep, primer, or compatibility problem, not the product itself.
Voids, blisters, or incorrect profile: cut that section out and replace it rather than caulking over it.
Horizontal joint with unclear movement, traffic, standing water, or signs the structure itself is shifting: stop and get a manufacturer rep or contractor involved instead of picking another tube.
Exterior sealant is a wearing part of the building envelope, not a permanent one. Once a bead is finished, check it after it's fully cured to confirm it's bonded on both faces with no gaps, then look at it once or twice a year, especially after a hard freeze or a stretch of intense heat.
Catching a split or a pulled edge early means cutting out a few inches of caulk; ignoring it means dealing with water damage behind the joint later. If a repaired joint fails again within a season, that's the signal to stop guessing at tubes and call a contractor or the manufacturer's technical line instead.

















Comments
Be the first, drop a comment!