



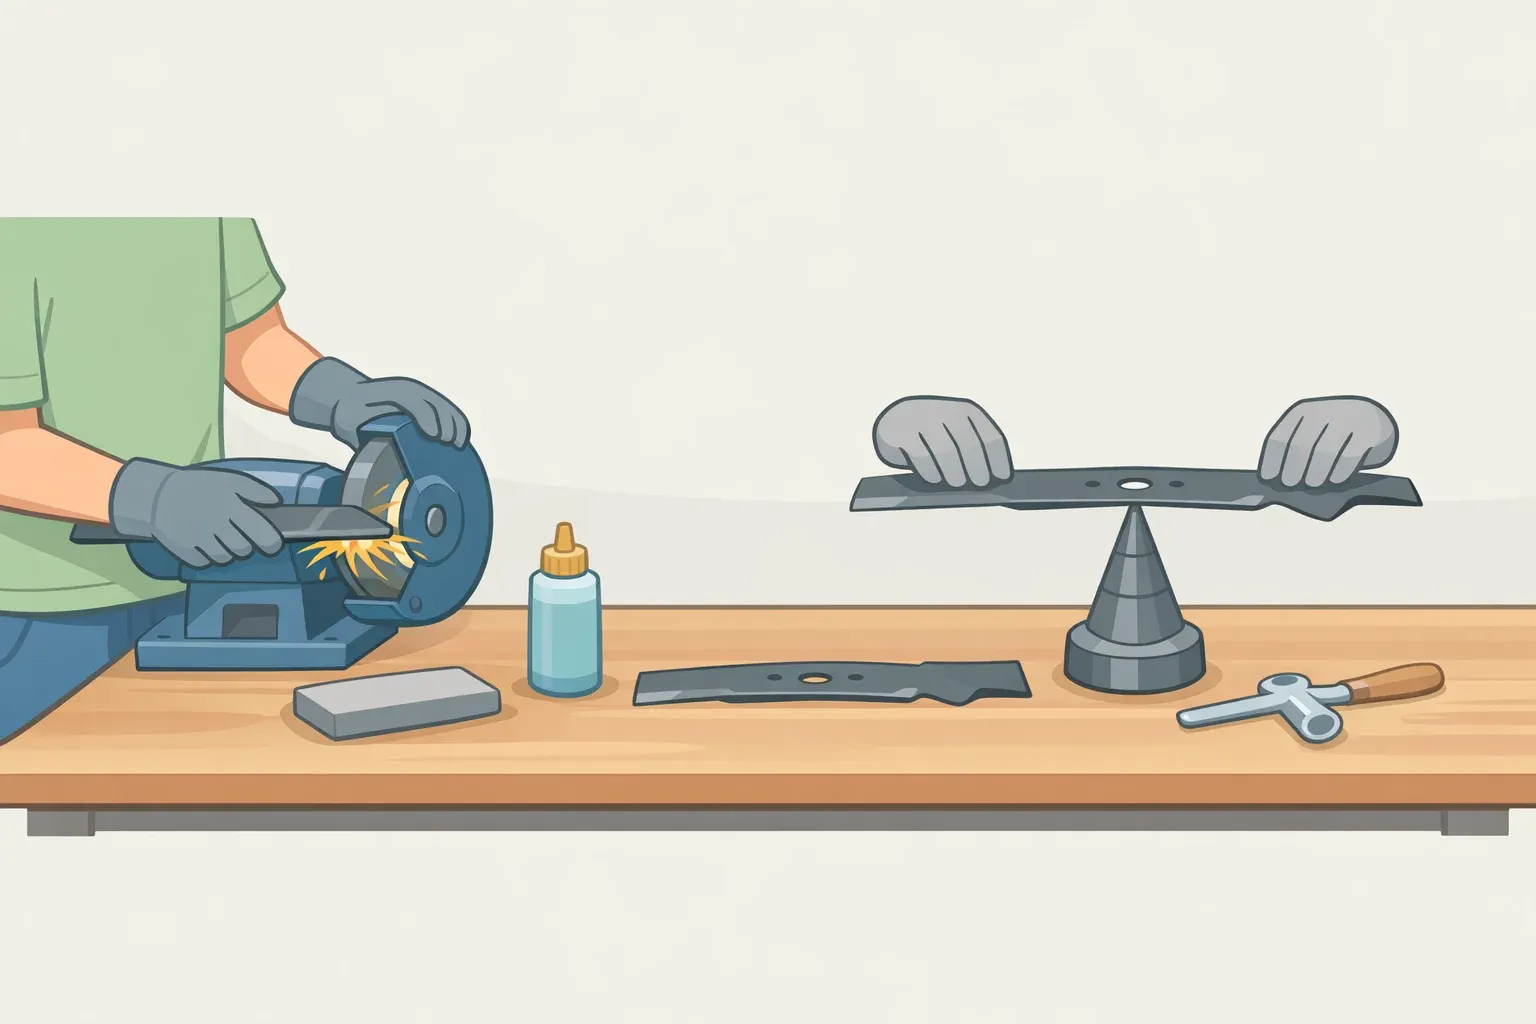
How to sharpen lawn mower blades the right way in 4 steps
The lawn tells you when something's wrong. Ragged, brown-tipped grass after a fresh mow means the blade is tearing rather than cutting, and the fix is a sharpening job done properly, start to finish. This guide covers the whole sequence: inspection, tool selection, sharpening technique, and the balance check that most guides either bury or skip entirely. Do all four correctly and the blade goes back on in better shape than it came off. Skip the last step and everything before it was mostly wasted effort.
For most homeowners sharpening more than once a season, a bench grinder is the best mix of speed and control. A file still has a place, mainly for light touch-ups or first-timers getting comfortable with the motion. The right tool depends on what the blade actually needs.
Before you start: Check the owner's manual. Some models recommend against DIY blade sharpening, and that guidance takes precedence, per How To Anything. For gas mowers, disconnect the spark plug wire. For electric mowers, remove the battery or unplug the cord; the blade must not be able to rotate under any circumstances, per Workhabor. Have eye protection and a bucket of water within reach before picking up any tool.
Step 1: Decide whether to sharpen or replace
Sharpening a blade that should be replaced is wasted effort at best and a safety hazard at worst. This step takes two minutes and shapes everything that follows.
When to sharpen mower blades
Read the lawn first. N.C. Cooperative Extension notes that most homeowners don't sharpen nearly often enough, and the grass gives a clear signal: smooth, even tips after mowing mean the blade is doing its job; ragged, fibrous, or brown-tipped cuts mean it isn't. Use a 20–25 hour mowing interval as your scheduling baseline, or inspect cut quality at the start of each season, per Workhabor. Sharpen immediately after hitting a rock; stone can nick an edge in a single pass.
Inspect the blade before you sharpen it. Pull the blade and look for any of the following. Each one means replacement, not sharpening, per Workhabor:
- Any bend, even slight. A bent blade cannot be balanced
- Cracks or fractures anywhere on the body
- A center mounting hole that no longer fits the bolt snugly
- Cutting-edge thickness below 1/4 inch from repeated sharpening cycles
- Nicks deeper than 1/8 inch that would require removing too much metal to correct
Small nicks under 1/8 inch are safe to file or grind out. A cluster of small nicks suggests a hard impact and warrants a close look for bending before proceeding, per Workhabor.
Remove the blade. Sharpening with the blade still attached to the mower compromises both safety and control. When tipping a gas mower on its side, position the carburetor facing up to keep oil out of the air filter, and keep the fuel tank less than a quarter full to prevent leaks, per Workhabor.
Step 2: Choose the right tool here's when each one wins
The metal file is not the worst option. It's just not the best one for most homeowners who sharpen more than occasionally. Match the tool to what you're actually doing.
| Situation | Best tool | Approximate cost |
|---|---|---|
| First time sharpening, or light dulling only | Metal file | $5–$15 |
| Regular home maintenance, or nicked edges | Bench grinder | $40–$120 |
| Quick mid-season touch-up on a blade in decent shape | Dremel with sharpening attachment | $30–$80 |
(Workhabor)
Metal file: right for beginners, limited for everyone else. A 10- to 12-inch mill bastard-cut file gives complete tactile control over the bevel angle, exactly what a first-timer needs while learning the motion. No electricity required, low cost, per Workhabor. The limitation is efficiency: most normally dulled blades sharpen in under 50 strokes, per How To Anything, but if the edge has any real nicks, a file won't cut through them cleanly. For those jobs, move to a grinder.
Using a grinder to sharpen mower blades
Bench grinder: the practical choice for regular home maintenance. For anyone sharpening more than once a season, Workhabor makes the case for a bench grinder as the best balance of speed, control, and edge quality. It removes metal faster than a file and handles nicks without effort.
Two safety rules that are not optional: wear eye protection the wheel throws a continuous shower of sparks and do not wear gloves. A loose glove can snag the wheel and pull your hand into it, which is a far worse outcome than briefly touching a warm blade, per Workhabor.
Dremel with sharpening attachment: useful in a specific lane. Dremel markets its lawn mower attachment as the fastest and easiest method, run at 25,000 rpm while following the existing bevel. That's accurate for one use case: maintaining a blade already in reasonable condition, particularly for a quick mid-season touch-up without fully removing the blade. The attachment is preset to a fixed bevel angle, so if your blade's geometry doesn't match, compensating manually takes considerably more time and partially defeats the convenience argument, per Workhabor. Technique matters here: use long, smooth strokes across the full cutting edge. Short back-and-forth passes create a wavy edge that causes chatter and vibration when mowing.
Note on angle grinders: they're a recognized machine-sharpening option, but for most homeowners a bench grinder offers better control and lower risk of removing too much metal too quickly. Angle grinders are best left to experienced users.
Step 3: Sharpen to butter-knife sharp, not razor sharp
Sharper is not always better. The goal is to restore the original bevel angle to a clean, shiny edge roughly as sharp as a butter knife. The edge shouldn't cut your finger; a razor-sharp blade dulls faster under mowing conditions and needs replacing sooner, per Workhabor. These lawn mower blade sharpening tips apply regardless of which tool you're using.
The sharpening sequence:
- Identify the original bevel. Manufacturers typically grind blades to a bevel between 25° and 45°, per Workhabor and Dremel. If the blade is too worn to see the angle, check your owner's manual for the specification, per How To Anything.
- Work only the upper beveled face never the flat back side, per Workhabor.
- File or grind in one direction only, applying even pressure across the full length of the cutting edge, per Workhabor.
- Count your strokes. Match that count exactly on the second cutting end uneven metal removal is one of the fastest routes to a balance problem, per Workhabor.
- Stop when a slight burr appears on the back of the edge. Remove it with one or two light file strokes that's the finish line, per Workhabor.
Watch for overheating with powered tools. Metal loses its hardness when it gets too hot the technical term is losing its temper and a softened blade won't hold an edge. If the cutting edge begins turning blue, gold, or dark, stop and dip the blade in water before continuing, per Workhabor. A simple threshold: too hot to touch means too hot to continue. With a bench grinder, alternate sides and cool in water every few passes.
Step 4: Check balance before the blade goes back on
Skip this step and the job isn't finished. An unbalanced blade vibrates under the mower deck, and over time that vibration damages the spindle bearings and seals, shortening the life of the entire mower, per Workhabor. Dremel confirms the balance check is essential before reinstalling. Two minutes with a $10 tool is cheap insurance against a repair that runs several hundred dollars.
Nail method (quick): Drive a small nail horizontally into a wall or workbench and hang the blade from its center hole. A balanced blade stays level. If one end dips, that side is heavier, per How To Anything and Workhabor.
Blade balancer (more accurate): A cone-shaped balancer sits on a flat surface and holds the blade at its center hole. These cost $5–$15 and are far more accurate than the nail method for detecting minor imbalance, per Workhabor.
Correcting imbalance: remove metal from the flat side only. Take a small amount of metal off the heavier end, but only from the flat, non-cutting back of the blade. Never remove metal from the cutting bevel to correct balance that changes the cutting geometry and undoes the sharpening work, per Workhabor. Recheck after each small adjustment until the blade hangs level.
Four steps, one clean result
Inspection, tool selection, sharpening, balance. Do all four and the job is done. Skip the last one and you've protected nothing.
- Inspect before you sharpen. Replace if the blade is bent, cracked, thinned below 1/4 inch, or carrying nicks deeper than 1/8 inch, per Workhabor.
- Pick the tool that matches your use. File for first-timers and light dulling; bench grinder for regular maintenance or nicked edges; Dremel for quick touch-ups on a blade already in decent shape, per Workhabor.
- Sharpen to butter-knife sharp, not razor sharp. Follow the original bevel (25°–45°), work only the beveled face, and stop short of a razor edge overshooting accelerates wear, per Workhabor.
- Balance before reinstalling. A cone balancer takes two minutes and protects the spindle bearings. This is the step that determines whether the sharpening job actually extends the life of the mower, per Workhabor.
The lawn remains the simplest feedback loop: smooth, even cuts mean the blade is working. Ragged or brown-tipped grass means it's time to run through this again, per N.C. Cooperative Extension.


















Comments
Be the first, drop a comment!