



Most guides on how to paint a room start with color swatches. This one starts a step earlier, because the decision that determines whether a paint job goes smoothly or turns into a health hazard happens before anyone opens a can. Homes built before 1978 may still have lead-based paint hiding under later coats, and that old paint can be disturbed during renovation or repainting. The risk rises when preparation disturbs existing paint, especially through sanding or scraping.
EPA is direct about the stakes: any renovation, repair, or painting project in a pre-1978 home can easily generate hazardous lead dust that harms children and adults. A separate EPA FAQ narrows that warning to a specific mechanism: whether prep counts as a regulated "renovation" comes down to whether the work disturbs existing paint, not whether painting happens at all. Washing and recoating a sound wall gets treated very differently from sanding or scraping it.
This guide covers the full sequence for painting a room yourself: assess the home and the walls, choose color and finish deliberately, prepare the room and the air, apply the paint, then clean up and evaluate the result. These DIY room painting tips are built for homeowners painting a room themselves. Renters hit a different set of steps partway through, and this guide flags exactly where that fork happens.
How to paint a room safely: assess your walls and your home first
Answer two questions before setting foot in a paint aisle: how old is the house, and what shape is the existing paint in?
Check your home's age. Lead-based residential paint was banned in 1978, but many homes built earlier still have it beneath newer layers, and that old paint can be disturbed during renovation or repainting.
Sort your walls by condition, since that decides your prep method. Intact paint that only gets washed and recoated is unlikely to disturb the surface, and washing generally isn't the kind of activity that triggers the RRP Rule's renovation definition. Paint that's peeling, chipping, chalking, or cracking is a different situation. EPA's advice there is to clean the spot immediately with a wet wipe rather than treat it as cosmetic.
Condition tells you what to do next, not whether lead is present. A wall's visible state points you toward the right prep method and toward whether the job needs professional help; it doesn't confirm or rule out lead in the paint underneath. When work will disturb paint in a pre-1978 home, EPA recommends hiring a Lead-Safe Certified contractor trained in lead-safe work practices, or using lead-safe DIY work practices if you handle it yourself. That recommendation is broader than the RRP Rule's paperwork trigger: a project can fall outside the rule and still be one where EPA advises lead-safe practices for anyone disturbing paint.
If you rent, this step isn't yours to finish alone. EPA advises renters who suspect lead-based paint or hazards to bring in their landlord or tribal housing authority, who should hire a Lead-Safe Certified contractor rather than have the tenant perform repairs.
Know which DIY projects fall outside, and inside, federal rules. The RRP Rule generally doesn't apply to homeowners painting their own home. It does apply if you rent out all or part of the home, run an in-home child care center, or buy, renovate, and sell homes for profit.
Treat these as two separate questions: what the RRP Rule requires on paper, and what EPA recommends for safety. A pre-1978 home with sound, intact paint might not trigger the rule, but sanding or scraping there still calls for lead-safe work practices. The moment prep looks bigger than a light wash-and-recoat, a Lead-Safe Certified contractor is worth the call.
Choose your color, finish, and paint product
Once the walls are sorted, color and finish come next, and testing pays off before the roller ever touches the wall.
Test color in the actual room, not on a chip in a store. Lighting type, direction, and paint finish all change how a color reads once it's on the wall.
Watch the swatch across a full day. Morning light skews warm and yellow, direct midday sun can wash a color out and cool it down, and late-day light adds a reddish cast. The same can of paint can look like three different colors depending on the hour.
Factor in which way the room faces. A west-facing room can look shadowy and dull in the morning, then glow warm by evening. An east-facing bedroom lit by sunrise looks noticeably different under a lamp at night.
Pick a finish with intention. Flat, satin, semi-gloss, and gloss finishes reflect increasing amounts of light, and higher-gloss finishes tend to make a color look richer and brighter.
Low-VOC interior paint is a reasonable preference, not a shortcut on ventilation. For anyone painting a room themselves, choosing a lower-VOC product doesn't remove the need for airflow while the paint dries and cures. That's a Section 3 problem no matter what the can promises.
Color and finish decisions are lighting decisions. Make them before the work starts, not as a correction after a shade that looked perfect on the sample card reads wrong on the actual wall.
How to prepare a room for painting: matching prep to wall condition and airflow
What a wall needs depends on what's already on it. Match the method to the condition, not the other way around.
Match your prep method to your wall's condition. Washing walls before painting is unlikely to disturb a painted surface. Sanding, scraping, or other dust-generating prep is what changes the calculus.
Understand the six-square-foot threshold, and what it does and doesn't cover. EPA treats minor spot sanding or scraping, up to six square feet in an interior room or 20 square feet on an exterior, as an exempt "minor repair," provided the work avoids prohibited practices such as power sanding without a HEPA filter attachment. That threshold governs paperwork under the RRP Rule; it isn't a judgment about how much lead dust is safe to breathe. Wet-clean any dust generated with a cloth or mop instead of dry sweeping, the same approach EPA recommends for lead dust generally.
Gather what the room needs before starting. Drop cloths, painter's tape, a putty knife and spackle for small holes, sandpaper, and a bucket of water with clean cloths for wet cleanup. Power sanding without a HEPA filter attachment is a practice the RRP Rule prohibits for regulated work, worth keeping in mind if a pre-1978 wall needs more than a light touch-up.
Plan airflow before you start, not after you notice a smell. VOC concentrations can run up to ten times higher indoors than outdoors, and earlier EPA research found common organic pollutants averaging two to five times higher indoors than outside, regardless of whether the home sat in a rural or industrial area.
Expect exposure to spike during work and linger afterward. During and for several hours immediately after certain activities, such as paint stripping, VOC levels may reach roughly 1,000 times background outdoor levels, and elevated concentrations can persist in the air after the task ends. EPA's general advice is to increase ventilation and meet or exceed whatever precautions are printed on the label, low-VOC or not.
Apply the paint: order of operations
Everything above this point was planning. This is where it turns into a finished wall.
Confirm the wall is clear to proceed as a DIY job. If the assessment above turned up sound paint in an owner-occupied home, continue below. If the work will disturb deteriorated paint beyond EPA's narrow minor-repair conditions, stop before sanding or scraping and bring in a Lead-Safe Certified contractor instead. The six-square-foot allowance is a regulatory condition, not proof that the dust below it is harmless.
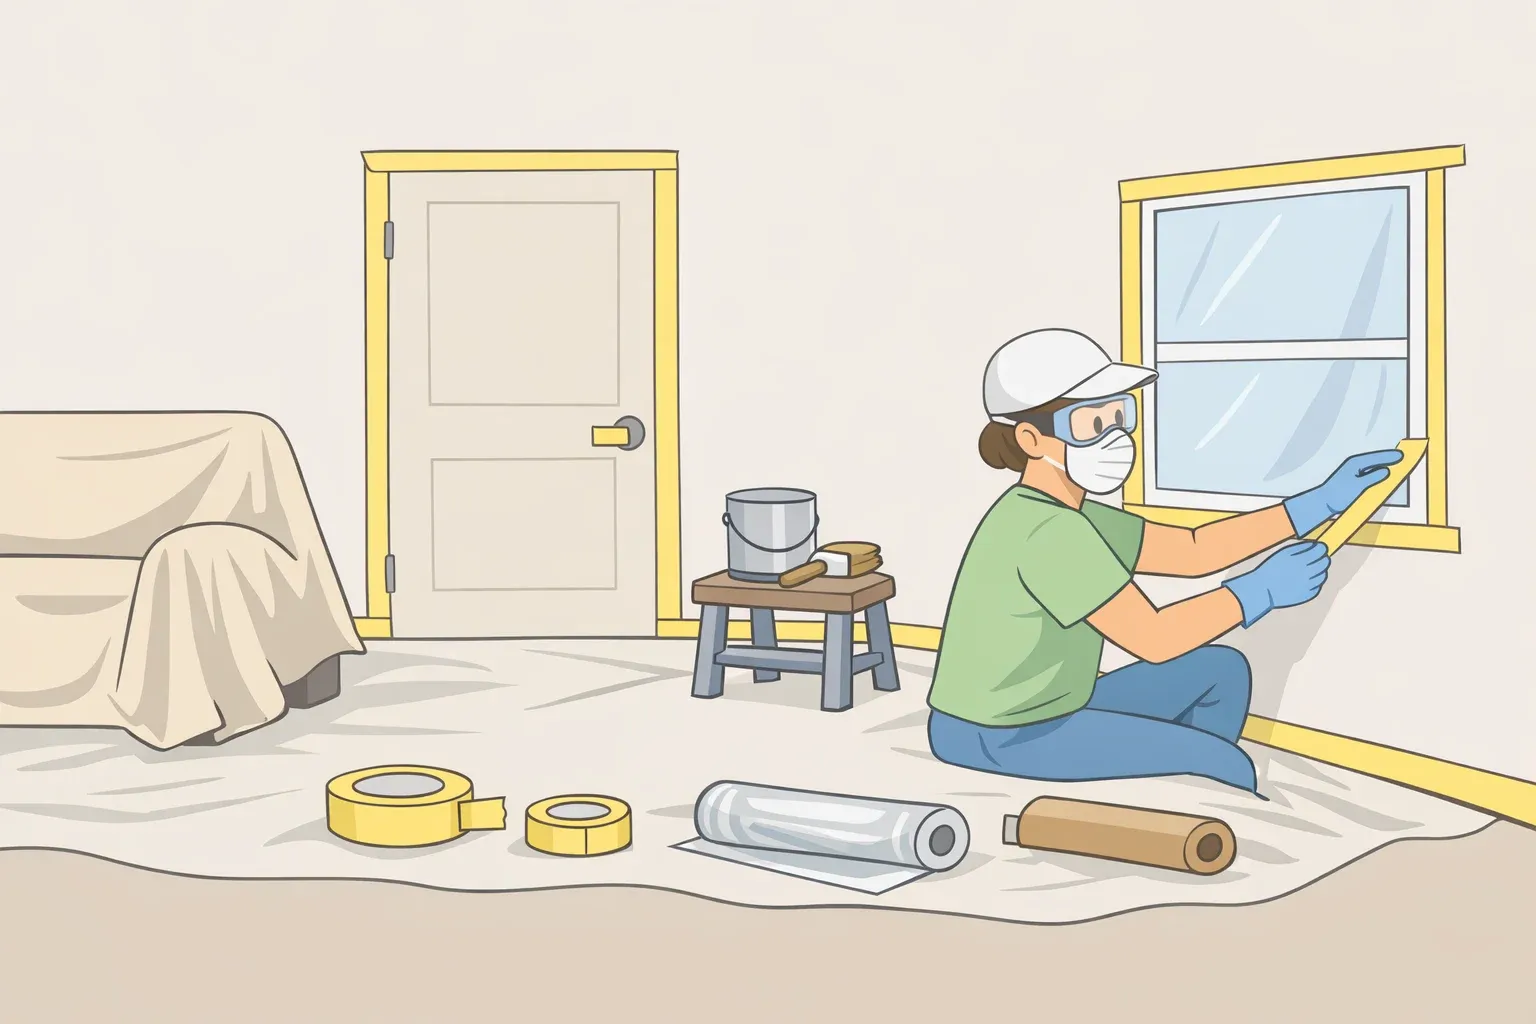
Clear the room and decide what leaves versus what gets covered. Move furniture out if possible, or push it to the center and cover it, along with the floor, with drop cloths. Remove switch plates and outlet covers rather than taping around them.
Wash sound walls and let them dry before taping or patching anything. This is the wash-and-recoat path from the assessment step, and it's the simplest one.
Patch small damage, then check the can for primer instructions. Fill nail holes and dents with spackle, sand smooth once dry, and follow whatever the paint can says about priming the patched or repainted surface.
Tape off what's staying, then cut in before you roll. Run painter's tape along baseboards, window frames, and fixtures. Work a brush along the ceiling line, into corners, and around trim using short, controlled strokes.
Roll the larger areas while the cut-in edge is still wet. Load the roller, work off the excess on the tray, and roll in overlapping strokes across one section at a time, blending into that wet edge before it dries.
Follow the label's stated recoat time before a second coat. The can's window is more reliable than judging by touch.
Keep the space contained while you work, especially in older homes. If any prep disturbed old paint, EPA advises keeping residents, children in particular, out of the work area until the job is finished and the area has been cleaned, not just until the paint looks dry.
Keep ventilation running past the last coat. Elevated VOC levels can persist in the air for hours after painting stops, so continue airflow and meet or exceed whatever the label recommends.
Clean up wet, not dry. Use a wet cloth, sponge, or mop on floors, sills, and hard surfaces afterward. Dry sweeping can redistribute dust that may carry lead residue from surrounding older paint.
Conclusion
The decision that matters most is the one from the beginning: how old the home is, and whether the existing paint is sound. Color testing, prep method, and ventilation all follow from that answer.
If the assessment turned up deteriorated paint beyond EPA's narrow minor-repair conditions, or the home is a rental, child care space, or flip, that's the point to bring in a Lead-Safe Certified contractor rather than push ahead solo.
For everything else, the habit worth keeping long after the drop cloths come up is simple: when chalking or a crack shows up on a painted surface, clean it with a wet wipe that day rather than waiting for the next full repaint.

















Comments
Be the first, drop a comment!