



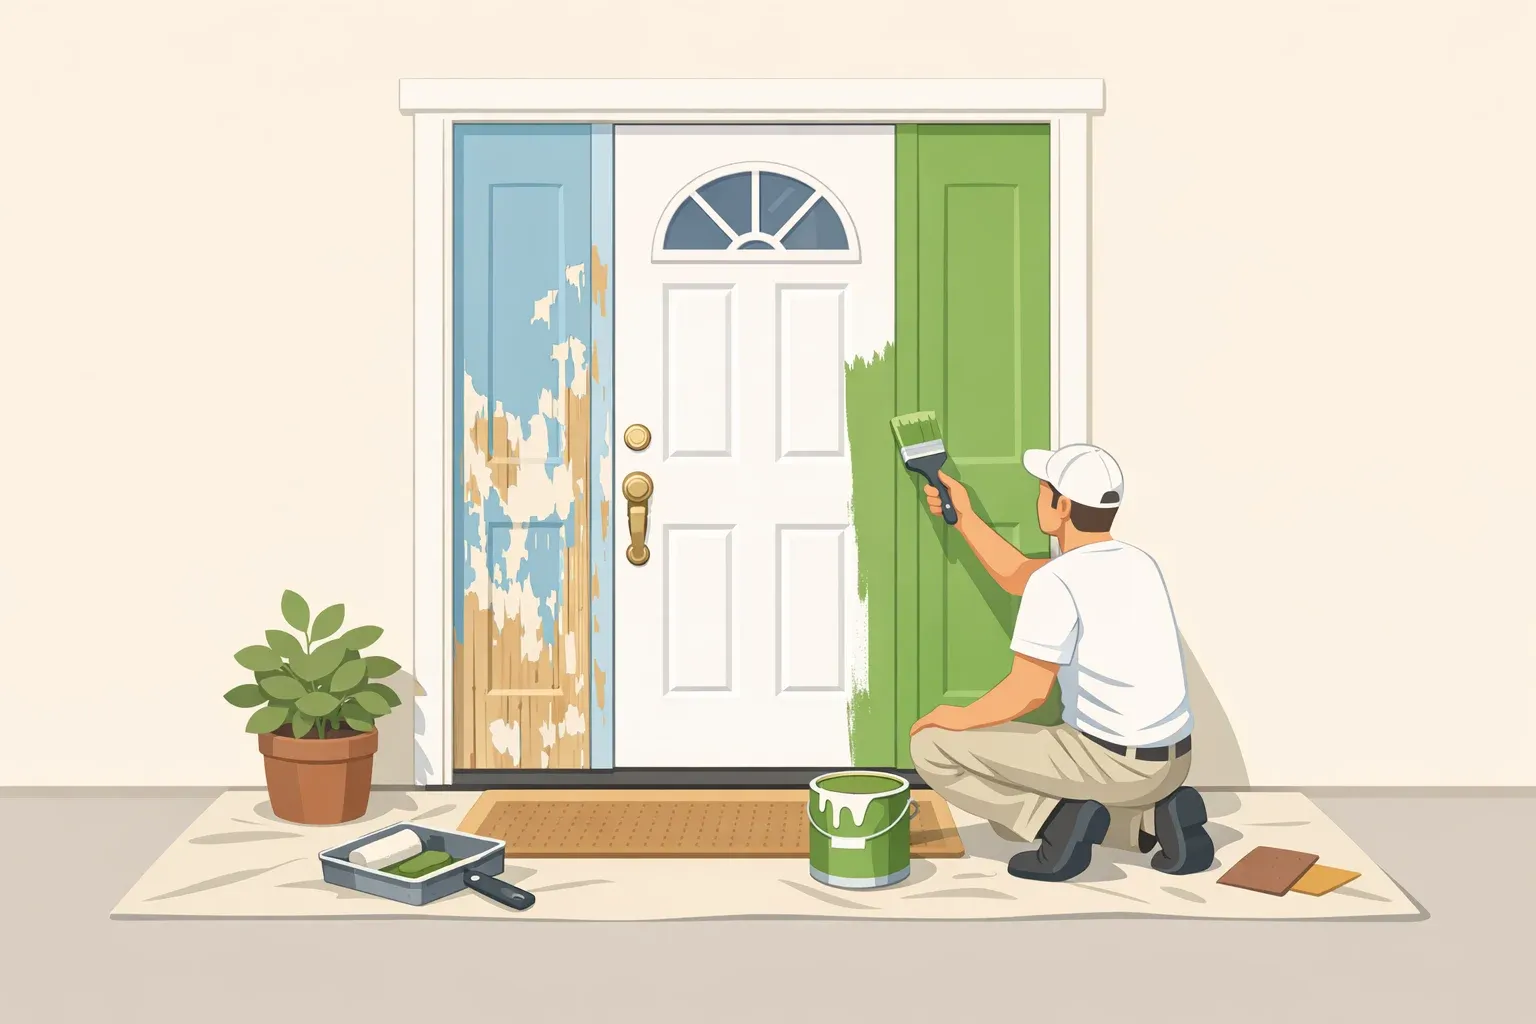
How to Paint a Front Door That Lasts: Do's and Don'ts
By the end of this guide, you'll know how to paint a front door so the finish holds for years rather than failing within a season and exactly where most paint jobs go wrong before a single brush stroke is applied.
A front door faces punishment that no other exterior surface experiences simultaneously: concentrated UV on a small, non-ventilated area; thermal swings that can push a dark door's surface past 160°F in afternoon sun; mechanical stress from thousands of open-and-close cycles per year; and daily hand contact that tests adhesion in ways that weather alone never does, according to Trailblaze Paints. Apply the wrong paint over a dirty surface on a humid afternoon and the finish starts failing within two years. Do it right and a quality 100% acrylic latex or waterborne alkyd enamel is rated for 5–7 years potentially longer under favorable conditions, Scobis Millwork notes.
Front door paint failure almost always traces back to a handful of specific decisions, not bad luck. This guide addresses each one.
Should you paint at all? Check this first
Some doors have moved past the point where painting helps. If any of these describe your door, repair or replacement comes first:
- Soft, spongy wood at the bottom rail that's rot, and paint won't seal it
- Cracks running through panel depth, which let water find its way underneath any coating
- Warping that prevents the door from sealing properly against the frame
- Peeling paint with widespread lifting across the surface
Painting over structural problems just delays the inevitable, Scobis Millwork advises. If the door is sound, keep reading.
Paint in place or remove the door? Both work. Most DIYers paint an exterior door without removing it no need to pull hinge pins or find sawhorses. The tradeoff: laying the door flat on sawhorses eliminates drips and makes panel work slightly easier. This guide covers both paths, with in-place painting as the primary method. Remove the door if you want the cleanest possible finish and have a second person to help with the weight.
Materials you'll need before starting:
- Sandpaper: 120–150 grit for stripping, 220 grit for scuff-sanding, 320 grit between coats
- Tack cloth or microfiber wipe
- Exterior primer: oil-based for bare wood; rust-inhibiting for steel with any rust spotting; adhesion-promoting for fiberglass
- Exterior door or trim enamel in semi-gloss
- Foam roller and 2-inch angled brush
- Painter's tape, drop cloths, small screwdriver for hardware
Total material cost typically runs $30–$100, per Impact Wizards.
Do #1: Prep the surface completely starting with a triage of what you're working with
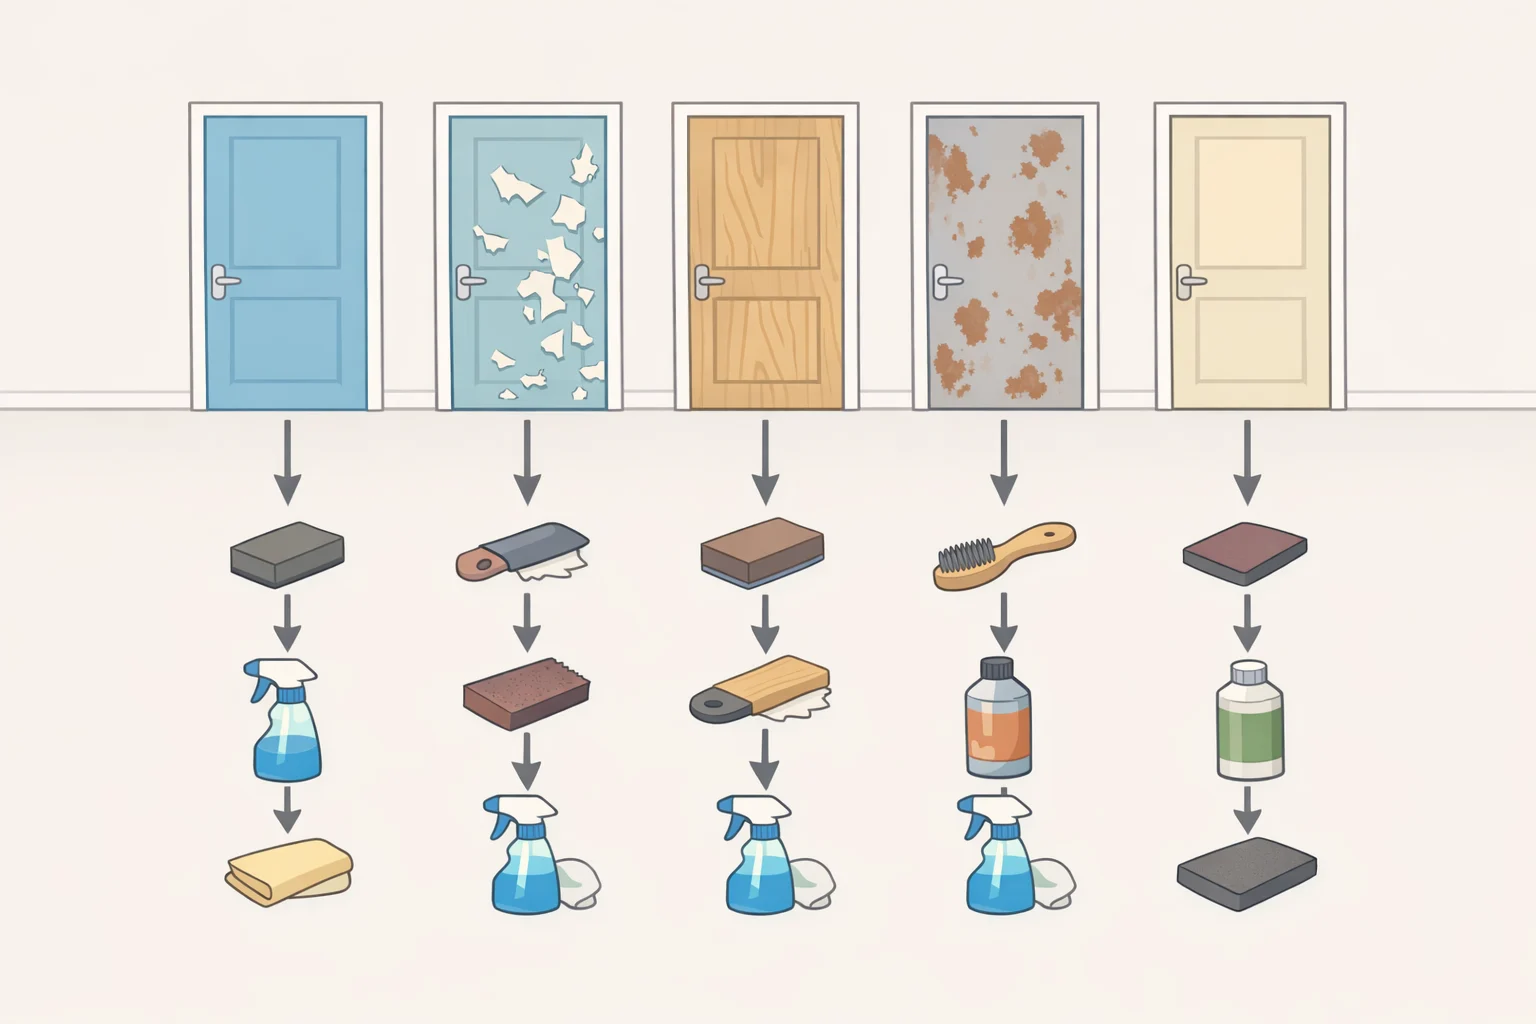
One millwork specialist puts it plainly: prep is 80 percent of the job, and even a quality finish coat will fail within two years if applied over bare, wet, or contaminated wood, Scobis Millwork reports. The first decision is figuring out what you're actually working with.
Step 1 Assess the existing coating. Your prep path depends entirely on what you find:
- Sound existing paint (fully adhered, no lifting at edges): Scuff-sand with 220-grit and degrease. No stripping required.
- Peeling or lifting at panel edges: This system is failing. Strip to bare substrate with a paint scraper and chemical stripper before anything else goes on scuff-sanding over a failing coat will fail too, Trailblaze Paints advises.
- Bare wood: Sand 120-grit then 220-grit, then apply full oil-based primer before any finish coat.
- Steel door with rust spotting: Remove loose rust, then apply rust-inhibiting primer. Standard primer applied over active rust lets corrosion continue underneath, producing the bubbling and peeling that appears seemingly out of nowhere two or three years later, Trailblaze Paints warns.
- Fiberglass door: The primary failure risk is adhesion to the smooth, non-porous surface not tannin bleed. Use a primer specified for fiberglass.
Step 2 Remove hardware before you touch sandpaper. Take off the doorknob, deadbolt, kick plate, knocker, peephole hardware, and strike plates. What you can't remove, mask carefully including hinges. This isn't just about clean lines: hinges and locksets collect body oils and grime that prevent primer and paint from bonding and can stain the new finish along the hardware edge, Impact Wizards notes. Handle weatherstripping and the threshold separately remove and reinstall after cure, or tape precisely. Paint buildup on weatherstripping causes the door to stick and eventually tears the seal.
Step 3 Clean the door. Wash with warm water and low-suds detergent: dish soap works, or TSP cleaner for heavily soiled doors. Sudsy detergent leaves a slippery film that compromises adhesion, Consumer Reports warns. Rinse and let the surface dry completely before sanding.
Step 4 Scuff-sand and wipe. For doors with sound existing paint, scuff the entire surface with 220-grit sandpaper. You're not stripping you're creating mechanical tooth for the new coat to grab. Follow with a microfiber wipe to clear dust and oils, per Practical Home Guides. For heavy peeling, scrape all loose material first.
Step 5 Protect the area. If painting in place, open the door and seal the doorway with plastic sheeting to keep dust and insects out of the house. Cover the floor and any nearby plants with drop cloths, Consumer Reports recommends.
The don't: Don't paint over a failing system. A coating that looks intact from ten feet away but shows lifting at any panel edge needs stripping, not sanding. New paint over a failing old system just fails faster.
Do #2: Choose the best paint for front door projects and the right primer for your substrate
The most common product mistake in front door painting is reaching for standard exterior house paint: the same product used on siding. Standard exterior latex cures to a softer film that holds up fine on a wall but shows wear marks, scratches, and adhesion failures at hardware contact points within a single season of daily use, Trailblaze Paints explains.
Purpose-formulated exterior door or trim enamels waterborne alkyd hybrids such as Sherwin-Williams Emerald Urethane Trim Enamel or Benjamin Moore Advance, for example cure to a significantly harder film than standard latex while retaining enough flexibility to accommodate thermal movement without cracking at panel edges. A quality 100% acrylic latex in a door-and-trim formula is also a sound choice when correctly applied, Scobis Millwork notes.
Sheen matters. Semi-gloss lasts longer, cleans more easily, and holds a smoother surface than flatter finishes. According to Consumer Reports testing, there's really only one practical sheen choice for exterior doors: semi-gloss. Satin can work with quality products, but when uncertain, semi-gloss is the safer call.
Primer and finish by substrate the short version:
| Door type | Prep | Primer | Finish coat | Full-door prime? |
|---|---|---|---|---|
| Bare or stripped wood | Sand 120 then 220-grit | Oil-based, stain-blocking | Door/trim enamel, semi-gloss | Yes |
| Sound existing paint | Scuff-sand 220-grit | Spot-prime bare areas only | Door/trim enamel, semi-gloss | Not required |
| Steel with rust | Remove loose rust | Rust-inhibiting primer | Door/trim enamel, semi-gloss | Yes, at minimum on all rust areas |
| Fiberglass | Light scuff-sand | Adhesion-promoting primer | Door/trim enamel, semi-gloss | Yes |
The tension between sources is worth clarifying directly. Trailblaze Paints argues primer is never optional on a front door given the heat, flex, hand contact, and UV stress the surface faces. Practical Home Guides notes that for previously painted doors in good condition, modern self-priming paints bond adequately and full-door priming isn't strictly necessary. Both are right in their contexts: if the existing coating is completely sound and you're using a quality self-priming formula, spot-priming bare areas is defensible. If there's any doubt, prime the whole door.
For bare or stripped wood, use a stain-blocking formula specifically tannins from unprimed wood bleed through every finish coat applied over them, Practical Home Guides cautions.
Tools for painting a door without brush marks: Use a foam roller on flat panel sections. Foam leaves a noticeably smoother finish than nap rollers no stipple texture per Practical Home Guides. Switch to a 2-inch angled brush for recesses, panel edges, and trim details. This combination handles all the textures a paneled door throws at you without requiring spray equipment.
Do #3: How to paint an exterior door without removing it conditions, sequence, and coat count
Work when temperatures are between 50–85°F with low to moderate humidity and no rain forecast for at least 24 hours. Spring and fall mornings are typically ideal, per Consumer Reports and Impact Wizards. The narrower your temperature window, the more important morning timing becomes paint in shade and before peak heat.
Don't paint in direct sun. Dark south- or west-facing doors can reach surface temperatures between 140–170°F during peak afternoon hours, Trailblaze Paints reports. Paint applied to a superheated surface dries too fast, leaves visible brush marks, and bonds poorly. Work on the shaded side first, or wait until the direct sun has moved off the door.
For dark colors on south- or west-facing doors: check the paint's solar reflectance index before committing. Darker pigments absorb significantly more heat, amplifying thermal stress on the film and accelerating failure at panel edges the characteristic first failure point on front doors, Scobis Millwork explains.
Humid climates the label timing doesn't apply. In high-humidity environments (Florida, the Southeast, anywhere with summer dew points consistently above 65°F), manufacturer recoat windows are optimistic for those conditions. In that context, expect dry-to-touch in 4–6 hours, plan on 24 hours minimum before recoating, and build in 7–14 days for full hardness before treating the door as fully cured, EFC Painting advises.
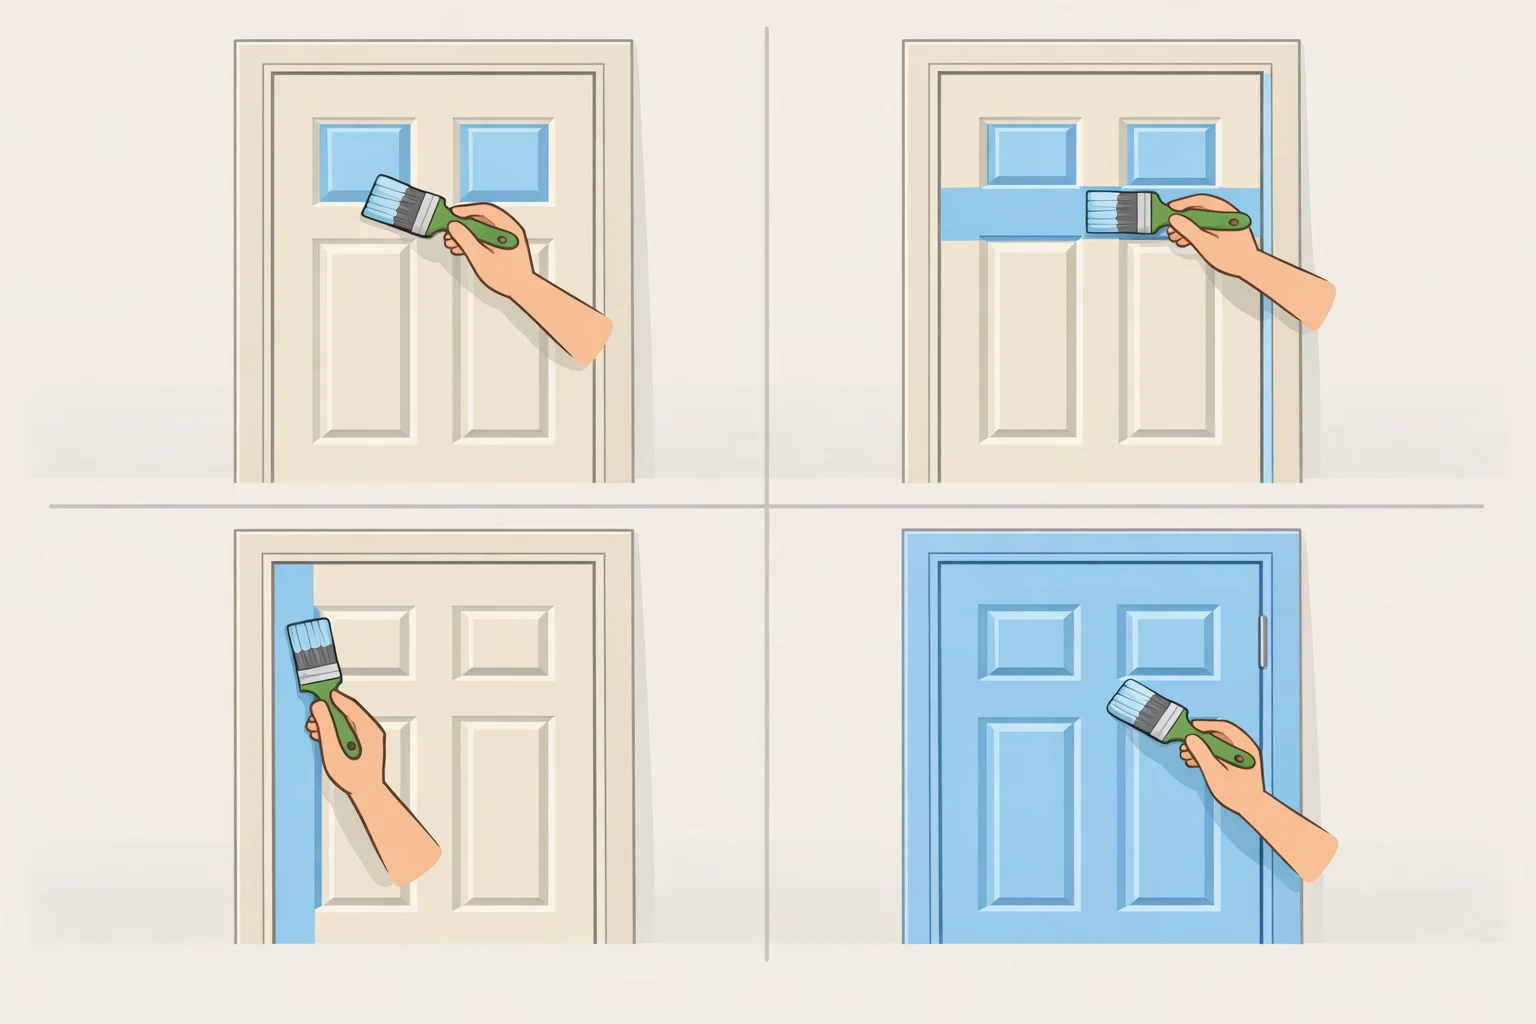
The sequence for a paneled door:
- Paint the recessed panels first, working paint into corners and edges before coating adjacent flat sections
- Move to the horizontal rails
- Paint the vertical stiles
- Finish with the outer edges
This order prevents wet paint on larger flat sections from dragging into recesses already finished, per Practical Home Guides and Consumer Reports. On flat sections, roll in one direction, then make one light pass back with no pressure to even out the strokes. Painters call this "tipping off," and it's the single most effective front door painting tip for getting a smooth finish without spray equipment.
Two coats, not one heavy coat. A thick single coat traps solvents, dries unevenly, and is more prone to cracking along panel edges. The durability comes from the second coat, not from thickness in a single pass, Scobis Millwork and EFC Painting both confirm. Going from light to dark, or vice versa, may require a third build up coverage in layers rather than compensating with a heavier pass.
Between coats: wait the manufacturer's full recommended window, at least 4–6 hours in good conditions. Sand lightly with 320-grit and wipe clean before the second coat. That produces a noticeably smoother final surface, per Practical Home Guides.
The don't: Applying the second coat before the first has dried properly traps solvents and causes tackiness, bubbling, or adhesion failure. Touch-dry is not the same as ready-to-recoat.
Do #4: Wait out the cure before closing the door or reinstalling hardware
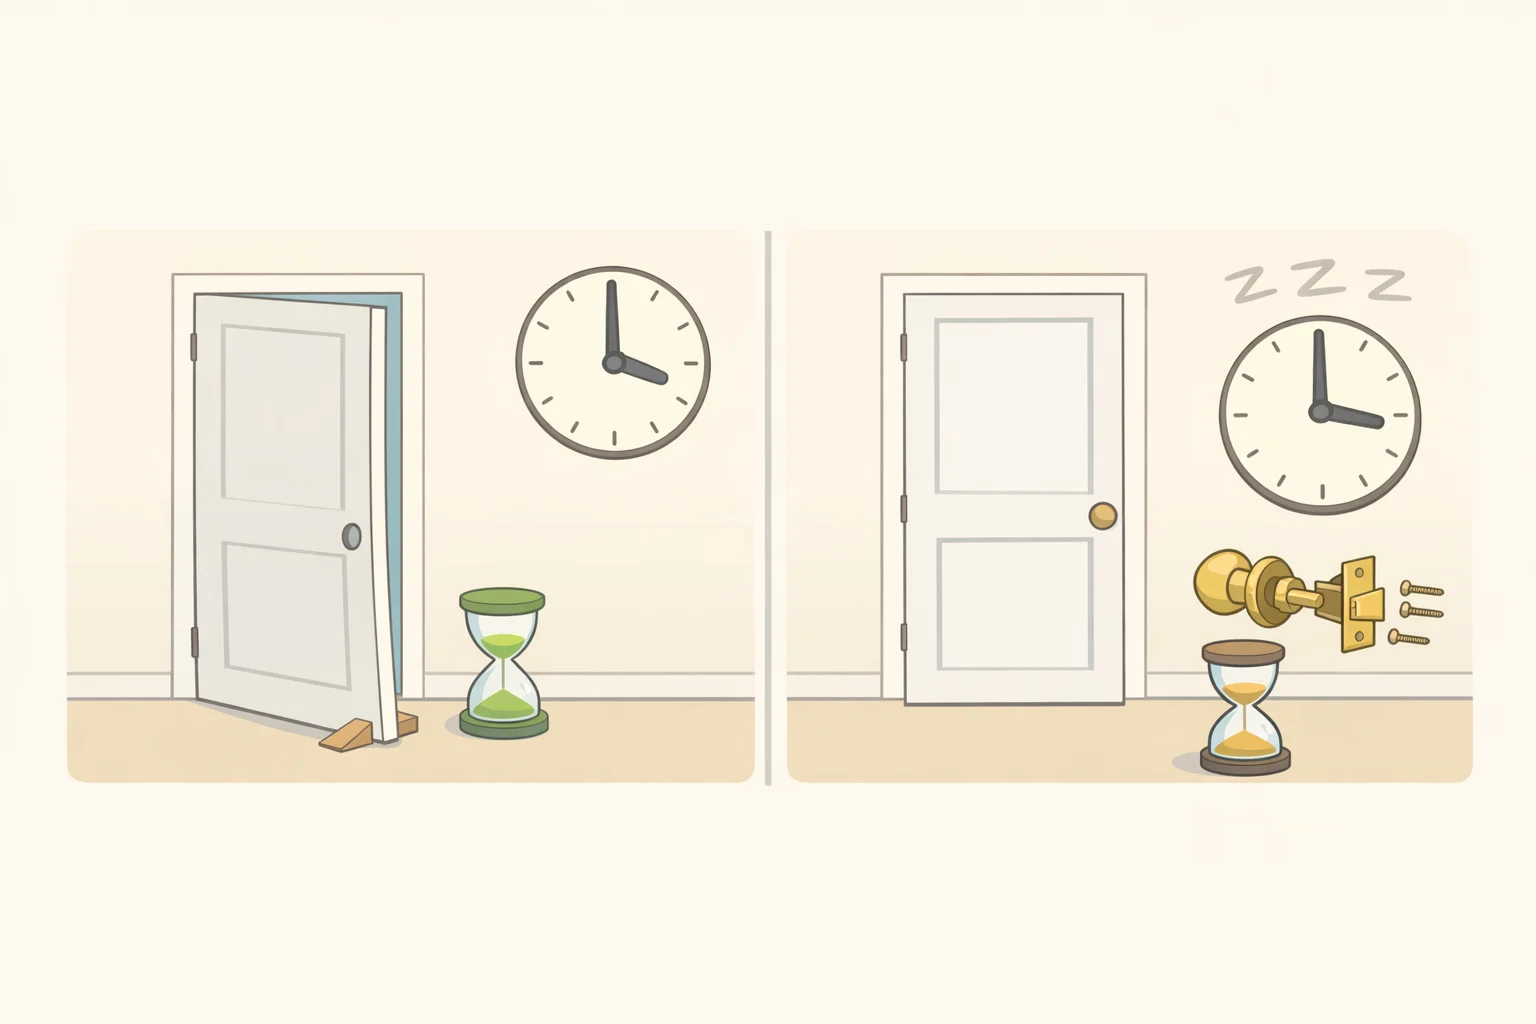
"Dry to the touch" and "fully cured" are two different things, and confusing them reliably ruins otherwise good paint jobs. A door that feels dry in two hours may still be soft enough to stick to the frame, transfer marks from hardware, or tear when the weatherstripping makes contact.
Timing to follow:
- Keep the door propped open not just ajar, but held with a doorstop or wedge for at least 24–48 hours after the final coat, Impact Wizards advises. In humid conditions, extend that to 72 hours before closing against the frame, per EFC Painting.
- Wait a minimum of 24 hours before reinstalling hardware; 48 hours is better. Full chemical cure the point at which the film is hard enough to resist everyday wear takes 7–30 days depending on paint type, climate, and coating thickness, Impact Wizards reports.
- Remove painter's tape when the paint is dry to the touch but not yet fully cured. Pull slowly at a 45-degree angle away from the painted surface for clean lines without lifting the new finish, per Impact Wizards.
The don't: Don't slam the door, scrub the surface, or hang anything on it for at least the first two weeks. The film looks and feels solid but is still hardening chemically. One rough close against a frame during that window can leave a permanent impression.
Reinstalling hardware: Once the final coat has dried 24 hours minimum (48 preferred), reinstall in reverse order weatherstripping and threshold last, after everything else is in place. This is also the right moment to replace worn weatherstripping; it's a simpler fix before the door is back in service than after.
How long will this actually last?
If prep and cure time are the two steps most likely to ruin an otherwise good paint job and they are then everything else is optimization. Get those two right and the other variables mostly take care of themselves.
A well-executed job using a quality exterior door enamel is a 5–7 year finish under normal conditions, Scobis Millwork reports. Premium waterborne alkyd formulas on well-prepped surfaces may push toward 8–12 years under favorable conditions a sheltered entry, moderate climate, thorough prep per Practical Home Guides. A south-facing door in a hot, humid climate will land closer to the lower end. Sun exposure and climate are the biggest variables, not brand loyalty.
Inspect the door each spring. Touch up chips and small cracks before moisture gets underneath. A quick annual check and minor spot repair is far cheaper than a full repaint, Scobis Millwork notes.
Pick a dry morning when temperatures are in the comfortable range, gather materials the day before, and expect prep to take at least as long as the painting itself. That's how it's supposed to go.


















Comments
Be the first, drop a comment!