



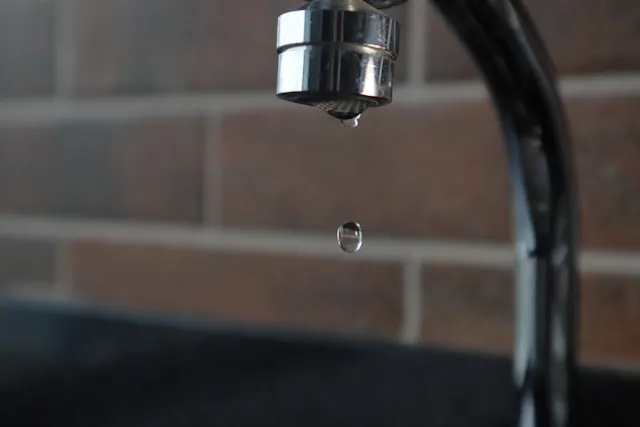
The average household loses more than 9,300 gallons a year to leaks nobody notices, and 9% of homes have leaks wasting 50 gallons or more every single day. That's the quiet math behind a confusing high water bill leak detection puzzle. Learning how to find and fix hidden water leaks doesn't require special equipment or a plumber on day one. It requires knowing where to look first, and in what order.
Fixing easily corrected household leaks, a worn flapper, a dripping faucet, or a leaky sprinkler head, can save homeowners about 10% on their water bills. A leaky toilet is the most common indoor leak in an average home, and outdoor irrigation can account for up to 70% of total household water use during summer or in dry climates, which is exactly why one small sprinkler leak can hit a monthly bill so hard.
This guide starts at the water meter, then walks through the one test that separates an indoor plumbing problem from a possible buried service-line leak, before sending readers to the toilet, the faucets, or the yard. It also flags the warning signs that mean a leak has moved past DIY territory.
How to find and fix hidden water leaks with your water meter
Before chasing a specific fixture, confirm a leak actually exists. This takes 10 to 15 minutes and needs access to the water meter, usually found near the curb in an underground box, along with two or three recent water bills for comparison.
Compare recent bills for an unexplained rise in metered use, even a small one, without any change in household habits. That's the earliest signal something is off.
Locate the meter's built-in leak indicator: a small red or blue triangle, or on newer meters, a blue snowflake-shaped dial.
Shut off every water source inside and outside the house.
Watch the dial. If it's spinning, water is moving somewhere it shouldn't be.
If the dial looks still, note its exact position, wait several hours without using any water, and check again. Movement after that stretch points to a slow leak.
As a rough benchmark, a family of four using more than 12,000 gallons in a month may be dealing with a serious leak rather than normal use.
The mistake most people make here is skipping step 3. An ice maker cycling or a dishwasher mid-run will make the dial spin normally and produce a false positive. A still dial after a full shutdown makes an active leak less likely during that window, though a single check can still miss an intermittent drip. A spinning or slowly creeping dial means it's time to isolate where the water is going.
How to isolate an indoor leak from an outdoor or underground one
This is the step the meter test alone can't answer, and it's the branch point for everything that follows. It requires finding the home's main shut-off valve, usually near the water heater in a basement or garage, and one indoor faucet to test.
Close the main shut-off valve completely.
Turn on an indoor faucet and wait several seconds.
If water still flows from the faucet, the shut-off valve isn't sealing. There's no way to tell from this test whether the leak is indoors or outdoors, and the valve itself may need attention before retrying.
If no water flows, the valve is working. Return to the meter and check the indicator again.
From here, the result splits two ways. If the indicator is still moving, water is flowing between the meter and the shut-off valve, which may point to a leak there, possibly underground. Skip ahead to the irrigation and underground-leak section below. If the indicator has stopped, the leak is likely somewhere in the home's own plumbing, commonly a toilet, faucet, appliance, or even a garden hose. Continue to the toilet and fixture checks next.
How to find a toilet leak with a dye test and fix a leaking flapper
Since toilets are the most common indoor culprit, this is the logical next stop, and it's often the cheapest fix in the whole guide. What's needed: dark food coloring or a leak-detection dye tablet, a replacement flapper, and the tank's brand and model number if it's handy.
A worn or old flapper can cause a toilet to run intermittently or leak silently for thousands of gallons a year without ever overflowing or making a sound. To test for it, add dye to the tank, don't flush, and check the bowl. The EPA says color showing up within 10 minutes signals a leak, while Tampa and Sherwood recommend waiting 15 to 30 minutes to catch slower leaks too. The practical rule: wait at least 15 minutes, and longer if the meter test suggested a small, slow leak. Color in the bowl points to the flapper or the fill valve as the likely culprit.
Most toilet leaks are fixable by an ordinary DIYer, and the parts are relatively inexpensive. The EPA recommends replacing the flapper on a schedule, at least every five years, even without a confirmed leak, since the rubber seal degrades over time.
Shut off the toilet's supply valve.
Flush to drain the tank.
Remove the old flapper.
Bring it or the tank's brand and model to the hardware store so the replacement matches. A mismatched flapper is a common reason a repair doesn't hold.
Install the new flapper and refill the tank.
Re-run the dye test to confirm the seal holds.
Success looks like no color reaching the bowl after 15-plus minutes, with the tank refilling to its marked line and staying there without a trickle.
How to check faucets, showerheads, and pipes for silent water leaks
If the toilet checks out clean but the meter still shows movement, the leak is likely sitting in a fixture, an appliance, or a supply line. Gather a flashlight, an adjustable wrench, a basic repair kit for the fixture in question, and a dry paper towel for testing under-sink connections.
The numbers here matter more than they seem. A faucet dripping once per second wastes more than 3,000 gallons a year, enough to show up on a bill from a single tap. A showerhead leaking at just 10 drips a minute wastes more than 500 gallons annually.
Tampa recommends a physical walkthrough: check for pooling water under sinks, around the dishwasher, the refrigerator's ice maker, the water heater, and the washing machine; scan walls for wet spots, soft spots, cool spots, mold, discoloration, or bubbling paint; and listen for dripping or spraying sounds behind fixtures.
Inspect every faucet and showerhead for visible drips.
Run a dry paper towel along supply lines and shutoff valves under sinks and behind the toilet, checking for dampness.
If a home has a water softener, switch its bypass valve on and recheck the meter indicator. If the dial stops spinning, the softener itself is the leak.
If a fixture drips at the spout, a repair kit matched to that faucet's model can usually solve it with basic tools, though the exact worn part varies by fixture.
The mistake to avoid is assuming a drip is too small to matter. The gallons-per-year math above shows even a slow drip adds up fast, and a worn part never fixes itself. One warning sign changes the picture entirely: moisture, mold, or discoloration on a wall or ceiling, rather than under a visible fixture, may indicate a leak inside the wall cavity.
That typically needs a licensed plumber to open up and diagnose properly. Success here looks like no drips after reassembly, confirmed by a follow-up meter check with everything else off and the dial staying still.
How to detect irrigation leaks and know when to call a pro
If the isolation test pointed outside, or the yard is the last suspect standing, set aside 20 to 30 minutes to walk the property while the system runs. Check local watering rules first; some cities, including Tampa, limit leak-check runs to 10 minutes per zone, once a week, and require the system to be visible from the street to avoid a citation.
The scale of a hidden irrigation leak is easy to underestimate. A leak just 1/32 inch wide, about the thickness of a dime, can waste roughly 6,300 gallons a month. A basic inspection means running each zone for about two minutes and walking the area to confirm every head turns on and off correctly, without misting, pooling, or spraying sideways.
Not every spike is a leak. Longer run times can look identical to a leak on a monthly bill even when nothing is broken; Tampa notes that adding just 10 minutes to a watering schedule can noticeably raise usage, so rule out a schedule change before assuming a leak.
It's worth being clear about what the shut-off isolation test does and doesn't prove here. A meter that keeps moving after the main valve is closed narrows the problem to somewhere between the meter and the house, not specifically to the sprinkler system. Plumbing layouts vary, and irrigation lines can tie in on either side of that shut-off valve, so this result points toward a possible underground leak without confirming the exact source.
Watch for these additional signs of an underground leak: a sudden drop in water pressure, rust or air in the water supply, unusually wet or pooling spots in the landscape, persistently green or mossy patches surrounded by drier ground, cracked or lifted pavement, sinkholes, or an uneven floor or leaning structure near a buried line.
When any of those show up, or when the meter test suggests a buried-line issue, this is the stop point. Document the meter reading and take photos, test only the controls that are accessible at the surface, and avoid digging near suspected buried lines.
Underground pipe leaks can come from corrosion, root intrusion, loss of glue adhesion, shifting soil, or even rodents, and they typically call for a professional leak-detection company to pinpoint the source and a contractor to make the repair. Responsibility for the line between the meter and the house, and whether a permit is required for the repair, varies by city; check with the local water utility or permitting office rather than assuming.
Homes with pools should factor those in too: a simple bucket test, comparing water loss in the pool to water loss in a bucket set at the same water level over 24 to 72 hours with the pool systems off, can reveal a pool leak that otherwise looks like household water waste.
Finishing the job
Once a leak is repaired, restore any valves, bypass switches, or irrigation settings that were changed during testing, then rerun whichever meter test matches the fix: the basic shutdown test for an indoor repair, or the full isolation test if the issue involved the main shut-off valve or the yard.
Photograph the repair and the meter reading for a record, then watch the next billing cycle for the drop in usage. Contact the local water utility to ask about its own policy on bill adjustments for promptly repaired leaks; Portland and Sherwood both offer this kind of adjustment, but the terms differ by city, so it's worth a direct call rather than an assumption.
For ongoing peace of mind, a flow-monitoring or moisture-detection device can flag unusual water use before it turns into another surprise bill, catching the kind of intermittent leak that a single meter check might miss.














Comments
Be the first, drop a comment!