



Reviewed by: Y. Garcia
Most of the gear that makes a minor shingle repair possible isn't about the shingle at all. Three of the four tool categories below exist entirely to get you up there safely and bring you back down the same way. The fourth is what actually fixes the roof. That distinction is worth keeping in mind before you buy anything.
Is this repair something you should DIY?
Not every shingle problem belongs on a homeowner's weekend list.
DIY if all of these are true:
The roof has a moderate pitch and feels structurally sound underfoot, with no soft spots and no visible sagging
The damage is isolated: one or a handful of cracked, lifted, or wind-torn asphalt shingles
Conditions are dry, calm, and mild; working in wet, windy, or icy weather meaningfully increases slip risk, per Traditional Roofing Specialist
A second person is available to stay on the ground
Call a professional if any of these apply:
The deck feels soft or the roof sags visibly; widespread or structural damage means shingle replacement won't resolve it, per Traditional Roofing Specialist
The pitch is steep, the surface is fragile, or climbing at height isn't something you're comfortable with; if that's the case, call a pro
A prior repair attempt hasn't stopped the leak, which typically signals an entry point that hasn't been found yet
This guide covers one scenario: replacing a damaged asphalt shingle on a moderately pitched, accessible roof.
The repair sequence, and what each tool makes possible
Each tool in this guide maps to a specific stage of the same workflow. Here's the job from start to finish.
The sequence for replacing a damaged asphalt shingle:
Start in the attic with a flashlight after a rain. Use the light to trace the leak's path back to its entry point on the roof, per Traditional Roofing Specialist; the ceiling stain and the actual breach are rarely in the same spot.
Access the roof with a properly positioned ladder.
Test the shingles surrounding the damaged area. Several nearby shingles are likely loose too, per Family Handyman.
Peel back the course above the damaged shingle, pry the nails holding it, cut a clean rectangle around the damage, slide the replacement in, fasten it, and re-secure any loose neighbors with roofing tar, per Family Handyman.
Tool-to-task map:
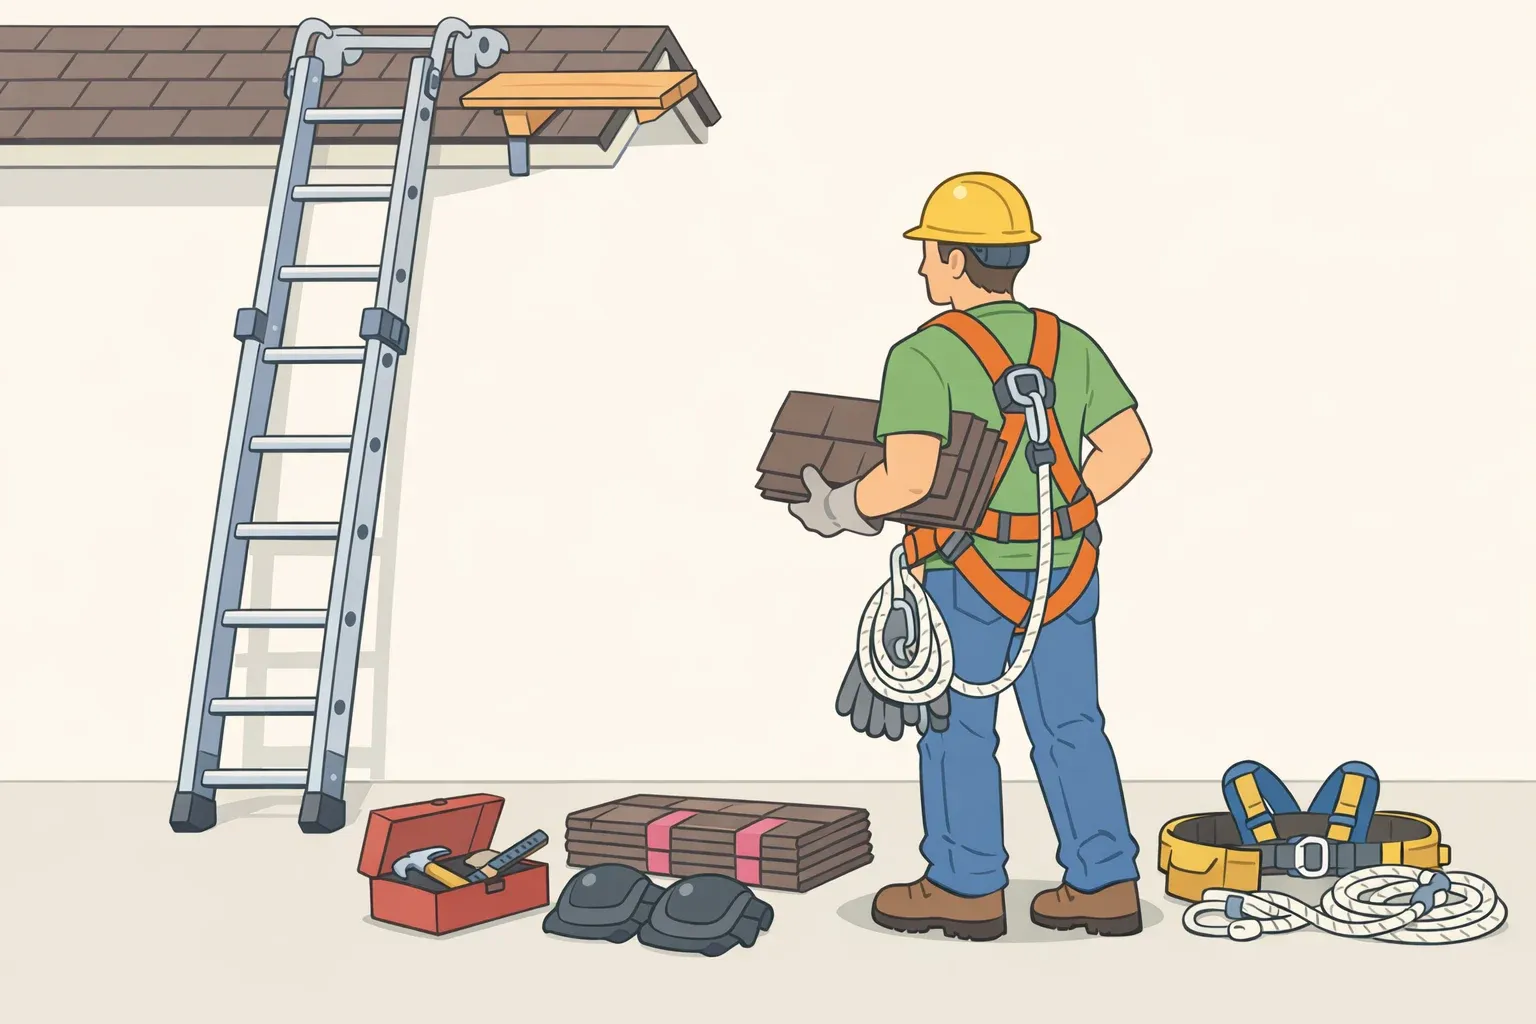
Ladder setup → roof access
Harness and rope → fall arrest if something goes wrong on the surface
Non-slip footwear → stable footing while you work
Repair kit → everything that touches the shingle itself
The hardware matters less than the setup. Most homeowners own a ladder adequate for this job; what creates risk is how it gets placed. Incorrect ladder placement is a leading cause of roofing accidents, per Traditional Roofing Specialist.
Set it up correctly:
Plant the base on stable, level ground. Soft soil, wet grass, and uneven pavement all shift under load. If the footing isn't firm, find a flat board or reposition entirely.
Apply the 4:1 rule. For every 4 feet of rise to the roof edge, move the ladder base 1 foot out from the wall. A 16-foot climb puts the base 4 feet out, per Traditional Roofing Specialist.
Secure both ends. Brace or tie the top against the fascia; have your ground assistant hold the base, or use a stabilizer bracket, for the duration of the job.
Climb with both hands free. Carry tools in a belt or hoist them separately. Three points of contact, meaning two hands and one foot or two feet and one hand, at every rung, per Traditional Roofing Specialist.
If the repair area is more than arm's length from where you're standing, move the ladder. Stretching shifts your center of gravity and can pull the base out from the wall, per Traditional Roofing Specialist.
Optional upgrade: A ladder hook attachment lets the ladder straddle the roof ridge, providing a more stable platform on pitches where a standard setup tends to shift, as demonstrated in Tech Tuesday's roofing safety equipment overview from late 2022.
Tool category 2: a harness and rope system
This is the item most homeowners skip at the hardware store. It's also the one that separates a recoverable stumble from a serious fall.
How to rig a basic setup:
Attach a complete personal fall-arrest system to a purpose-built roof anchor installed and used according to the manufacturer's instructions. Do not improvise an anchor using a tree or vehicle.
Put the harness on before stepping off the ladder onto the roof surface. Attach it to the rope once positioned. The rope should allow lateral movement but arrest a fall immediately.
Use a shock-absorbing lanyard if available. These webbed straps extend under fall force, acting as a shock absorber so the deceleration load spreads rather than transferring all at once to the anchor point, as described by Tech Tuesday.
On steeper pitches, fall protection becomes especially important. Tech Tuesday notes that OSHA recommends fall protection for pitches over 7/12, though current residential standards should be verified directly rather than treating that number as a universal compliance threshold.
Tool category 3: non-slip roofing footwear
Non-slip footwear is essential for roof work on wet or steep surfaces, per Traditional Roofing Specialist. Standard rubber-soled shoes don't always meet that bar on asphalt shingle granules, particularly when the surface is warm or slightly damp. The failure mode isn't a sudden slip; it's a slow, confidence-draining slide that leads to overcorrecting and bad weight shifts.
At a minimum, wear non-slip footwear on wet and inclined surfaces before stepping onto the roof. Test grip on a dry, pitched surface before committing to it 15 feet up. Shoes from gym use or yard work with compacted tread channels look adequate on flat ground but perform poorly on angled surfaces.
If you're doing this more than once: Specialty roofing boots like Cougar Paws use strap-secured soles engineered specifically to grip shingle granules; the straps interface with the sole rather than the upper, which keeps the gripping surface locked to your foot, per Tech Tuesday. They're not necessary for a single repair, but worth knowing about if roof maintenance becomes a recurring task.
Tools needed for roof repair: what belongs in the kit
For a minor asphalt-shingle replacement, the list is shorter than most hardware-store end caps suggest.
What belongs in the homeowner roof repair toolkit:
Catspaw prybar: Reaches under the shingle course above the damaged piece to pop roofing nails without tearing adjacent material, per Family Handyman
Tin snips: Cuts the replacement shingle to precise length using the edges of the adjacent course as a guide; cleaner and more controlled than a utility knife on layered asphalt, per Family Handyman
Carpenter's square and permanent marker: Marks a clean cut line before trimming and keeps the patch aligned and gap-free, per Family Handyman
Hammer and roofing nails: Fastens the new shingle into the decking after sliding it into position under the overlapping course above
Caulking gun loaded with roofing tar: When there isn't clearance to swing a hammer, which is common under a tight overlap, roofing tar bonds the shingle in place, per Family Handyman; also used to re-secure neighboring loose shingles found during the surrounding-shingle check
Work gloves and safety goggles: Gloves protect against sharp edges and rough shingle material; goggles shield eyes from dust and debris during prying, per Traditional Roofing Specialist
One common under-preparation mistake: buying only roofing sealant. Traditional Roofing Specialist recommends sealant for minor cracks; Family Handyman calls for full replacement when a shingle is torn or damaged. A tube of sealant won't re-bond a shingle that has lifted or broken apart. Match the tool to the actual damage before you climb.
What this kit won't handle: Soft decking revealed after pulling the damaged shingle, or structural issues that turn up once you're up there. Either finding is a contractor call, not a supply run.
Choosing a replacement shingle that fits
The repair kit only works if the replacement shingle is a reasonable match. Shingles vary by color, texture, granule blend, and tab pattern; a stark mismatch won't compromise the repair structurally, but it signals to every potential buyer that work was done and raises questions about what else might have been patched over.
The most reliable approach is to check whether any leftover shingles from the original installation are stored in the garage or basement. Builders sometimes leave a small stack for exactly this reason. If not, photograph the existing shingles from close range and bring the photo to the lumber yard or roofing supplier; most can narrow down the manufacturer and product line from a decent image. Newer shingles will be brighter than weathered ones and will blend over a season or two of UV exposure, which is worth knowing before you reject a close-but-not-perfect match.
One practical note: buy a few more shingles than you need. If the adjacent-shingle check turns up two or three loose neighbors, you'll want material on hand rather than make a second trip mid-repair.
After the repair: verifying it worked
Return to the attic after the next significant rain and confirm the leak is gone. Water still moving means the entry point wasn't the shingle you replaced, and the search starts over.
While still on the roof during the repair itself, test all shingles immediately surrounding your work. One failing shingle frequently signals others nearby that are also lifting, per Family Handyman. Re-securing them with roofing tar at the same time avoids the need for a return trip.
If a second DIY attempt doesn't stop the leak, or if soft decking turned up during the repair, get a professional assessment before the next weather event. Repeated failure points to a source that hasn't been located yet. That's not a tools problem; it's a scope problem, and the right response is to stop adding patches and find out what's actually wrong, per Traditional Roofing Specialist.


















Comments
Be the first, drop a comment!