





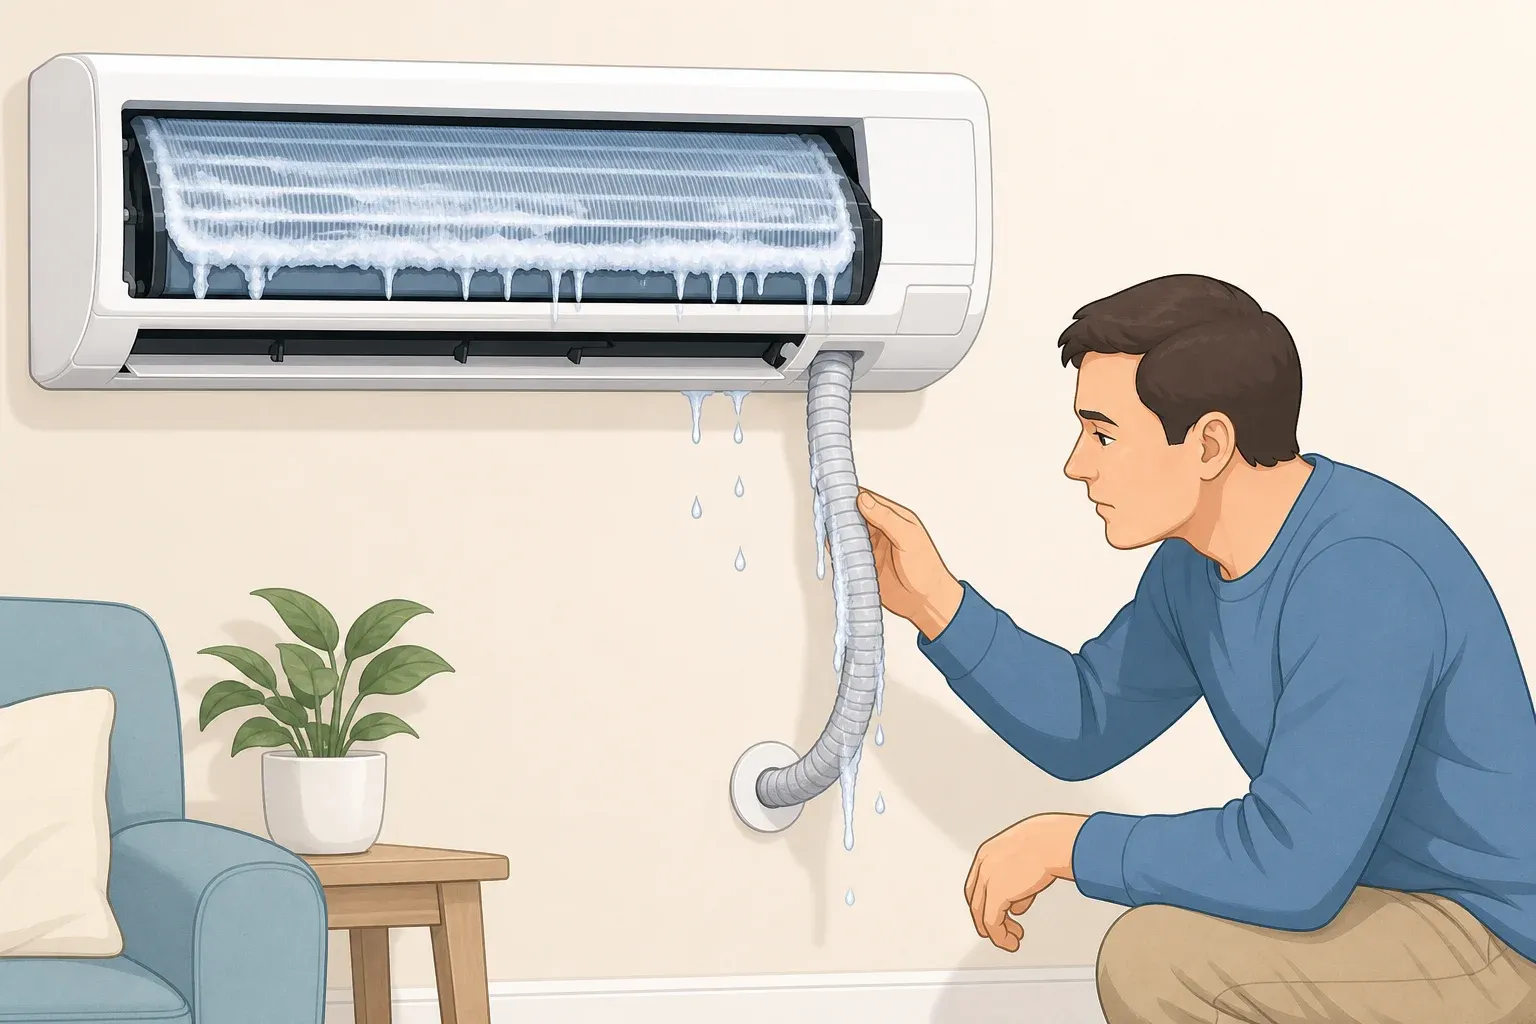
This guide covers three symptoms that show up again and again in ductless mini-split systems, Daikin units included: water leaking from the indoor unit, weak or icy airflow, and a system that gradually loses its ability to cool or heat. Daikin mini-split problems tend to sort into these three buckets, and each one calls for a different response. Treating all three the same way, usually by waiting to see if things improve on their own, skips the one judgment call that actually matters: figuring out which bucket you're in.
This isn't about opening up a sealed HVAC system and fixing it yourself. It's about correctly sorting what you're seeing into one of three responses: safe to check yourself, safe to monitor briefly, or time to call a licensed technician. A mini-split's indoor unit produces condensation that drains through a small line, and when that line clogs with algae, dust, or debris, water backs up and drips from the unit.
One HVAC contractor calls this the most common ductless mini-split complaint its technicians see, though that reflects one company's service calls across brands, not Daikin-specific data. Error-code guides for Daikin-style systems map common codes to categories like abnormal drainage, freeze-up protection, and refrigerant shortage, but the exact code list varies by product family, so your owner's manual has the final say on what a code means for your specific unit.
Knowing how to troubleshoot a Daikin mini split starts with that sorting step, not with guessing at a repair. This article walks through three commonly reported problem categories, what causes each, what an ordinary homeowner can safely check, and the exact point where each one becomes professional-only work. Visual inspection, filter cleaning, and documenting error codes are beginner-friendly tasks. Anything involving refrigerant lines, control boards, or the sealed system is professional-only, full stop.
Before you start: gather your tools and use this quick decision table
Grab a flashlight, a step stool if the indoor unit is mounted high on the wall, and a soft brush or a vacuum with a brush attachment. Pull up your unit's owner's or service manual too, since code meanings vary by model, and know where the outdoor unit's breaker and disconnect switch are located before you need them.
External inspection, filter removal, and documenting codes are beginner-friendly. Anything past that is intermediate-DIY at most, and often strictly professional-only.
Use this as a quick reference before diving into the details below:
Water dripping or staining from the indoor unit → inspect the visible exterior drain line now. If flow doesn't resume or dripping continues, call a technician.
Weak airflow, visible ice, or a musty smell → clean the filter and let the coil thaw with the unit off. If ice returns, call a technician.
Gradually weaker cooling or heating, or a refrigerant-type code (often shown as "U0" on Daikin-style displays) → stop resetting the unit, document the code and timeline, and book service. This one isn't a homeowner check.
Mini-splits report faults through blinking LEDs or on-screen codes, but the meaning of each blink pattern varies by manufacturer and model line, which is why the manual for your exact unit matters before you touch anything. One caution applies across the board: cycling power to the equipment can temporarily clear an error code without fixing whatever caused it in the first place, according to Daikin's own service documentation for one of its residential systems. A reset is not a repair. Keep that in mind through every section below.
Problem 1: water leaking or dripping from the indoor unit
You'll notice dripping from the bottom or side of the head, water stains forming on the wall below it, or a musty smell near the unit.
Stop now if: water is running down a wall, pooling near outlets, or reaching the unit's electrical compartment. Turn the system off immediately and place a towel or shallow container under the drip. Don't wait to see if it stops on its own once water is anywhere near electrical components, and leave the system off until you've cleared the check below.
The indoor unit's condensation drains through a small line to the outside. Algae, dust, or insect debris can clog that line, causing water to back up and leak from the unit, with dripping, wall stains, and a musty odor as the telltale signs. Error-code guides for Daikin-style systems associate a drainage-related code with a clogged drain or a failed condensate pump, though the exact code label depends on your model's display, so check it against your manual rather than assuming a universal code.
Safe check: locate where the exterior drain line exits the wall or terminates outside, then clear any visible debris and straighten any kinks. Check your model's manual before restarting the system, since some units require specific steps to resume cooling mode safely after a leak. If water hasn't reached wiring or a wall cavity, run the system in cooling mode and watch the exterior line.
What success looks like: water flowing out the exterior opening during the cooling cycle, and the indoor dripping stopping soon after. If you don't see steady flow outside, don't keep running the unit hoping it clears itself.
What's off-limits: opening the indoor unit's casing to reach the internal drain pan or condensate pump. That requires disassembly tools most homeowners don't have, and most owners' manuals don't identify it as a homeowner-serviceable task.
Call for service if: the exterior line still isn't flowing after you've cleared it, water reached a wall cavity or electrical components, or the drip comes back within a few days. Recurring clogs sometimes need drain-line rerouting or an inline condensate pump to fix for good.
One distinction worth keeping straight: a drainage leak is not a refrigerant leak. Dripping water on its own is not evidence that the coil is failing.
Problem 2: weak airflow, ice on the indoor unit, or musty odor
You'll notice reduced airflow at the vent, visible ice on the indoor coil, or a sour, musty smell when the fan kicks on.
Stop now if: you see ice on the coil. Turn the unit off and don't chip or scrape it, no matter how tempting that is. Let it thaw fully on its own before doing anything else.
Washable mini-split filters need cleaning every two to four weeks during heavy use, and a clogged filter restricts airflow enough to let ice form on the compact evaporator coil. Error-code references for Daikin-style displays link a freeze-up-protection code to either low airflow or low refrigerant, and recommend checking filters first before jumping to a refrigerant diagnosis.
Confirm the actual code against your unit's manual, since labels differ by series. A musty or sour smell, separately, can point to mold or mildew growing on the evaporator coil or inside the blower-wheel housing. Running the unit in fan-only mode for 15 to 30 minutes after cooling helps dry the coil and cuts down on buildup.
Safe check:
With the unit off, let any visible ice fully thaw on its own.
Remove the washable filter, the one that lifts or slides out for cleaning, and rinse it with water only.
Let it dry completely before reinstalling.
Look at the coil behind the filter for dust buildup, but don't touch it or spray anything on it. If your manual doesn't identify a component as user-removable, leave it alone.
What success looks like: airflow feels noticeably stronger at the vent once the filter is clean and the coil has fully thawed, and no new ice forms during the next full cooling cycle.
What's off-limits: scrubbing or chemically treating the coil itself. Professional service typically uses a no-rinse coil cleaner during annual maintenance, and that's a technician's job.
Call for service if: ice reforms after a clean filter and a full thaw, or the freeze-up code comes back. That pattern points toward a possible refrigerant issue rather than a simple airflow restriction, which moves this out of DIY territory.
Daikin mini split error codes and when to call for service
You'll notice cooling or heating that's noticeably weaker than it used to be, a refrigerant-type code on the display, or a technician telling you the system needed a recharge. A Daikin mini split not cooling the way it used to, especially paired with a display code, is where troubleshooting stops being a homeowner task at all.
Stop now: don't reset the unit repeatedly hoping the code clears. Power cycling can temporarily hide an error code without fixing what caused it, which is why Daikin's own service documentation warns against treating a reset as a repair.
Error-code references for Daikin-style systems commonly link a code often displayed as "U0" to refrigerant shortage caused by a leak or low charge, with the recommended action being a professional leak check and recharge, not a homeowner fix. Code labels can vary by model, so confirm against your manual.
A Daikin service manual for a wall-mounted FTXJ-L/M series includes dedicated sections for refrigerant shortage diagnosis, leak-detection methods, and refrigerant recovery, which confirms this is sealed-system territory requiring the specialized tools a certified technician carries.
There's a separate, clearly-labeled note worth knowing here. A law firm says it is investigating consumer reports of Daikin indoor coil leaks occurring at the U-bend within roughly three to five years of installation, with owners describing repeat leaks and labor costs that weren't covered by parts warranties.
This is a firm soliciting potential claims, not a confirmed defect finding, and it doesn't establish which models or how many systems are affected. If your own system has needed more than one refrigerant recharge or coil replacement, ask your installer in writing what your warranty covers for parts versus labor before authorizing repeat repairs.
Safe step: document, don't diagnose. Write down the exact code shown, your unit's model number (usually on a sticker on the indoor or outdoor unit), and roughly when performance started declining.
What's off-limits under any circumstance: opening refrigerant lines, adding refrigerant, or touching any sealed-system component. Daikin's technical documentation treats refrigerant recovery and leak repair as certified-technician procedures throughout.
Call for service: immediately for any refrigerant-related code or a system needing repeat recharges. This isn't a wait-and-monitor situation.
What to do next
Condensate drainage, filter-driven icing, and refrigerant loss look different once you know what to check, but from the couch they can feel like the same vague "it's not working right." Getting the bucket right matters more than trying to nail the exact fault yourself.
Clean the filter every two to four weeks. For Saving, an HVAC service company, describes that habit paired with annual professional service, coil cleaning, drain-line clearing, and a refrigerant check, as the top way it recommends for preventing error codes and extending system life. Waldrop's technicians point to the same annual combination as standard upkeep for ductless systems.
Don't overthink a filter-reminder light or a single drop of condensation right after cleaning a filter. Complete the safe check, confirm the success signs described above, and move on with your day.
What does need immediate action rather than monitoring: water reaching electrical components, any refrigerant-type code, or ice that comes back after a full filter clean and thaw. Before your next service call, have your model number, the exact code displayed, and a rough timeline of when the problem started ready to go. That record helps a technician diagnose faster, and it gives you a clear basis if a warranty conversation turns out to be necessary.
















Comments
Be the first, drop a comment!