



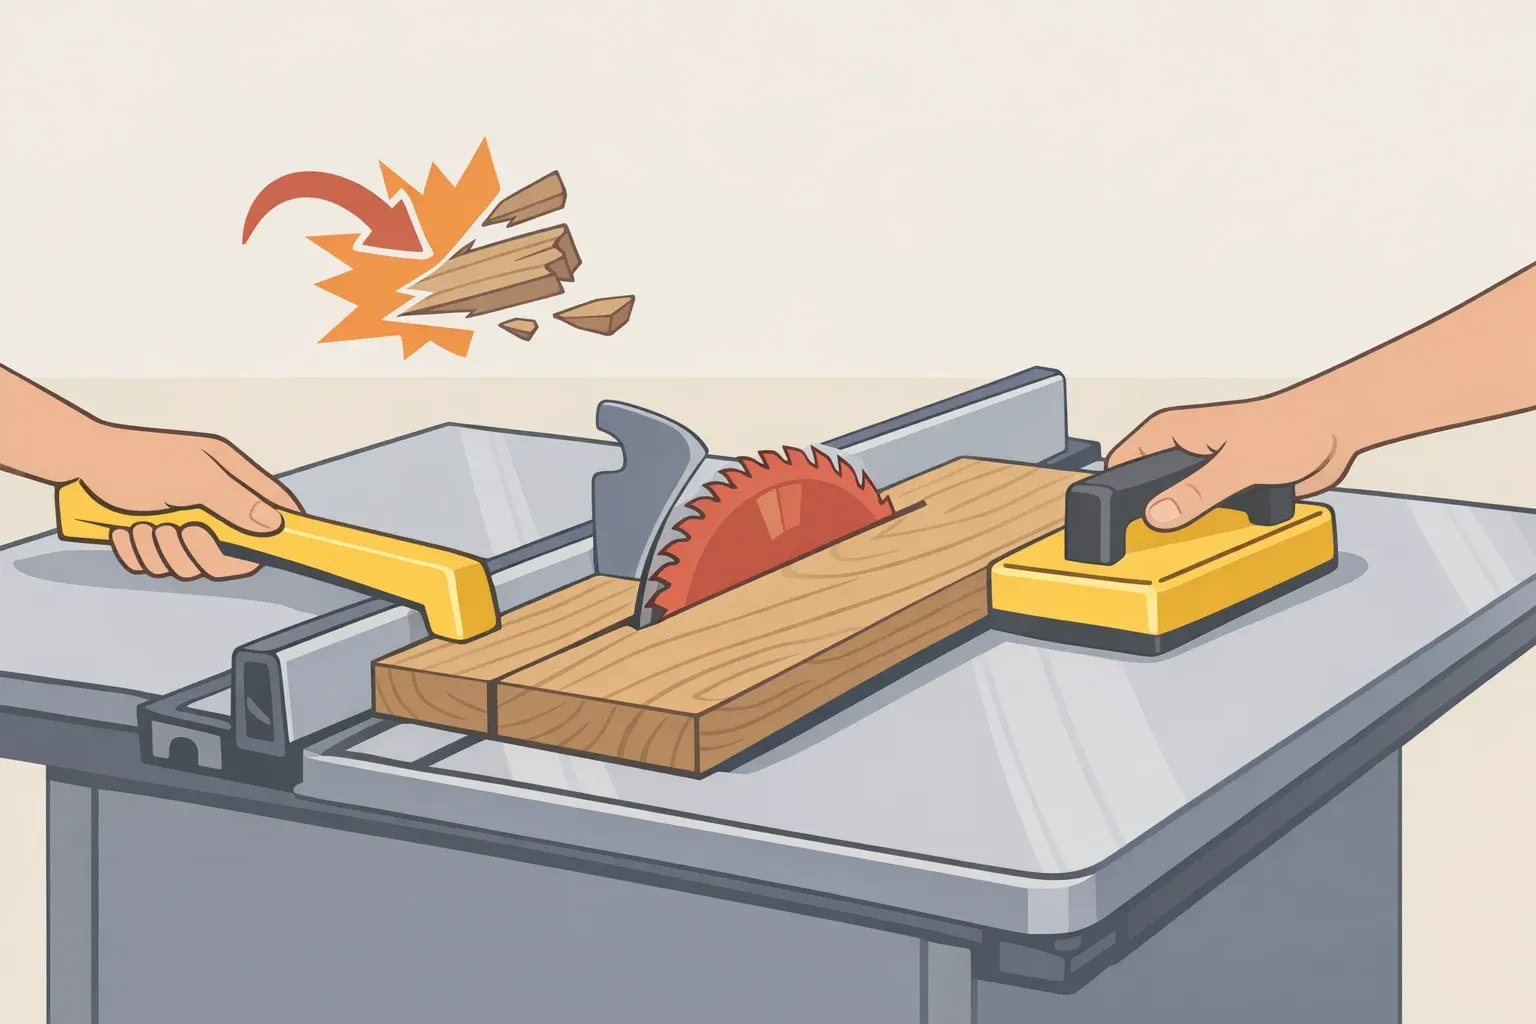
How to Use a Table Saw Riving Knife With the Right Push Tool
Table saw kickback ejects a workpiece at up to 120–140 mph. The whole event completes in under 100 milliseconds, less than half the average human reaction time of roughly 250 milliseconds, per Woodwiki. There is no responding your way out of it. The only workable strategy is prevention, and prevention is a layered problem.
Table saws send roughly 30,000 people to U.S. emergency rooms each year, with around 4,000 of those injuries ending in amputations, NPR reported in April 2024. The CPSC told that same reporter it had seen no discernible change in blade-contact injuries since the industry adopted voluntary improvements to guards and anti-kickback features in 2010. More hardware on the saw has not moved the number.
This guide covers straight through-rip cuts on a table saw equipped with a blade guard and a table saw riving knife or splitter. By the end, you'll have one decision rule you can apply before every pass: which push tool to use based on rip width, why the riving knife must be present for either tool to do its job, and how to execute each cut correctly. The tools cost about $10.
Scope note: Dado cuts, non-through cuts, and crosscuts involve different setups and are outside this framework.
What is a riving knife on a table saw?
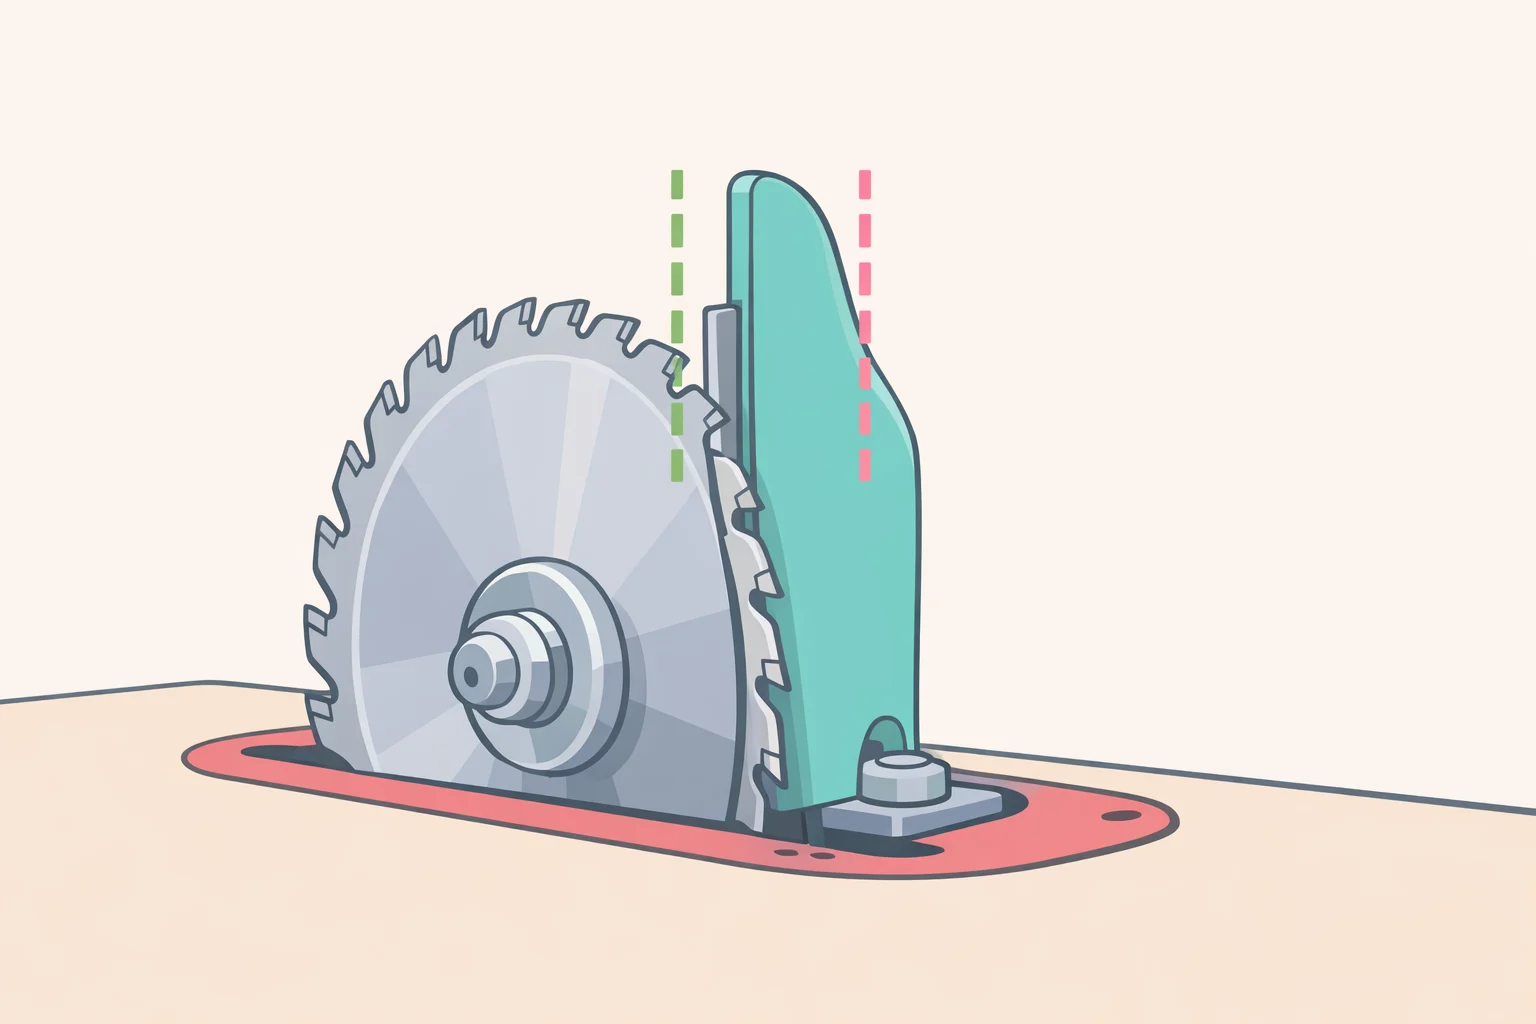
A riving knife is a curved steel plate mounted directly to the saw's arbor the same shaft the blade spins on, Woodgearlab explains. That mounting point is the key distinction from older designs. Because it attaches to the arbor, the knife rises, falls, and tilts in exact alignment with the blade at every height setting, maintaining a consistent gap of roughly 2 to 3 millimeters between knife and blade regardless of blade position, per Woodwiki.
How a riving knife works comes down to geometry: by filling the kerf immediately behind the blade, it physically prevents the two halves of a stressed board from closing and pinching the rear teeth, Woodgearlab notes. To do that job, it must be thinner than the blade's kerf width but thicker than the main blade plate. Both conditions must be met simultaneously. A knife that's even slightly misaligned or wrong-sized leaves the binding failure mode unaddressed.
Since 2008, Underwriters Laboratories has required riving knives on all new table saw designs, Woodwiki notes. If your saw is less than 15 years old, it may well have one though it's worth confirming before proceeding rather than assuming.
Riving knife vs splitter
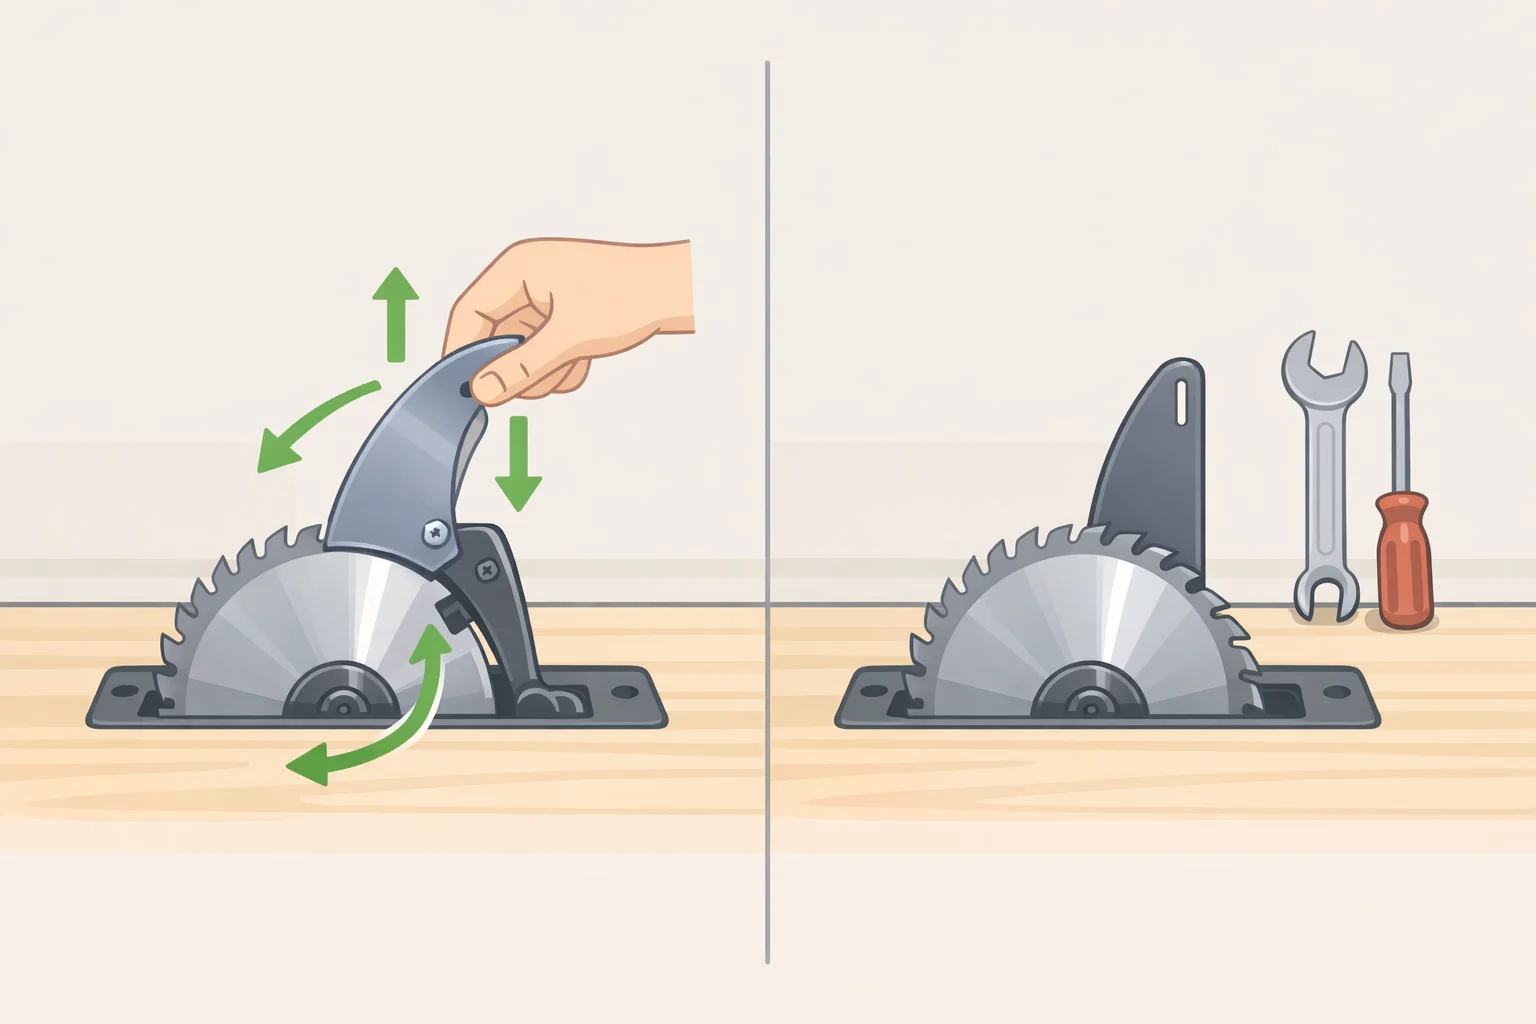
Older saws use a splitter instead. The distinction matters in daily use.
| Feature | Riving knife | Splitter |
|---|---|---|
| Mounts to | Arbor assembly | Table or trunnion |
| Moves with blade | Yes rises, falls, tilts | No |
| Must be removed for bevel cuts | No | Yes |
| Reinstallation risk | Low | High frequently skipped |
A splitter keeps the kerf open on through-cuts, but because it cannot tilt with the blade, it must be removed for bevel cuts, Woodwiki explains. Operators often must also remove splitters for non-through cuts like dadoes, and Woodgearlab notes they frequently are not reinstalled afterward. A splitter is better than nothing. A riving knife is better than a splitter.
Before proceeding: Confirm the riving knife is installed, properly aligned, thinner than the blade's kerf but thicker than the main blade plate, with a consistent 2 to 3 millimeter gap at every blade height, per Woodgearlab and Woodwiki. If the saw uses a splitter, confirm it is reinstalled before every rip. This check takes under a minute and is not optional.
Why kickback happens and which table saw safety device stops which failure mode
Kickback is not one thing. It has three distinct failure modes, each requiring a different fix. Understanding which tool addresses which problem is the fastest way to see why no single device covers everything.
Binding is the most common. Wood carries internal stress. When a rip cut releases that stress, the kerf can close and pinch the rear teeth the teeth moving upward toward the operator. On a standard 10-inch blade, those teeth are traveling at over 100 mph, Woodgearlab notes. When the board grabs them, it launches back along the line of the cut. The riving knife fills the kerf and physically prevents closure. No push tool addresses this failure mode.
Climbing happens when the operator contacts the rear of the blade directly, most often by reaching over a running blade to retrieve a cut-off. The rear teeth catch and throw whatever they touch. The fix is positional: never reach over or behind a running blade, and never retrieve offcuts until the blade has stopped completely, Woodwiki advises.
Blade contact from lifting or rotation occurs when a wide board tilts up as it exits the blade, or when the workpiece rotates away from the fence and contacts the rear teeth at an angle. The fix is downward and lateral control throughout the entire pass which is precisely what a correctly chosen push tool provides, Woodgearlab explains.
Each layer has one job. The riving knife handles binding. Correct positioning handles climbing. The right push tool handles workpiece control. Remove any layer and a specific failure mode goes unaddressed.
The rip-width decision: which push tool to use and when
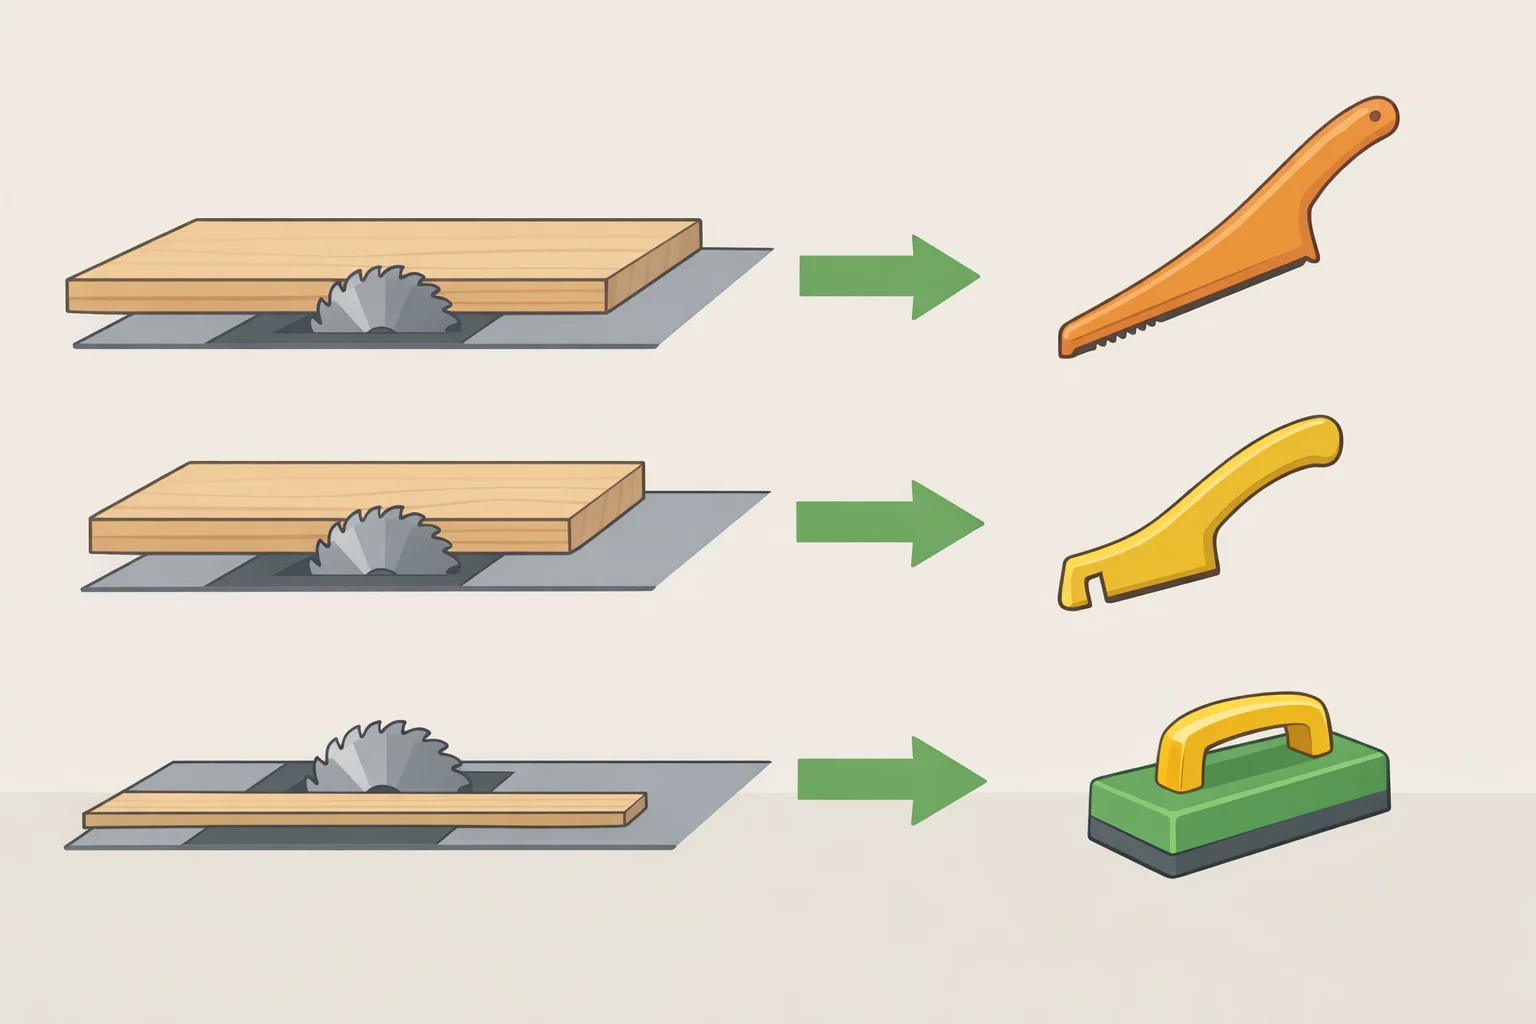
With the riving knife confirmed in place, the push tool decision comes down to one number: the width of your rip cut. That number determines where your hand sits relative to the blade, which determines whether you are in control or in danger.
| Rip width | Tool |
|---|---|
| Under 3 inches | Push stick only |
| 3 to 6 inches | Push stick + push block together |
| Over 6 inches | Push block only |
(Woodwiki)
OSHA's woodworking machinery standard (29 CFR 1910.213) requires a push tool whenever a cut would bring the operator's hand within 6 inches of the blade, Woodwiki explains. Penn State's shop operating procedure sets the threshold tighter, at 4 inches, per their SawStop SOP. Use whichever standard your shop or saw manufacturer specifies. For most home shop rip cuts under 6 inches wide, that means a push tool on every single pass.
Push stick (under 3 inches): A push stick is a flat piece of material, typically 12 to 18 inches long and 3/4 inch thick, with a notch or bird's-mouth cutout at one end. The notch hooks the trailing corner of the workpiece and drives it forward, keeping the hand above and behind the cut, Woodwiki explains. Forward force only no downward pressure on the board's face. On narrow stock that is fine: the fence handles lateral control, and the narrow footprint keeps the hand clear. On wide stock, the absence of downward grip becomes a problem. A wide board can lift as it exits the blade, catch the rear teeth, and kick back a second time.
Push block (over 6 inches): A push block is a shoe-shaped device, typically 6 to 8 inches wide, with a rubber or high-friction base that grips the full top face of the workpiece and a heel that catches the trailing edge. It applies force in two directions simultaneously forward from the heel, downward from the base keeping the board flat against the table throughout the cut, Woodwiki notes. Its width is also its limitation: on a narrow rip with the fence set close to the blade, that footprint puts the hand directly over the blade zone. Push blocks do not belong on narrow cuts.
Both tools together (3 to 6 inches): Push block in the dominant hand on the fence side of the cut, push stick in the other hand on the offcut side. The push block handles downward pressure and fence contact; the push stick guides the trailing edge past the blade. Both hands advance at the same pace letting one get ahead of the other creates uneven feed pressure and can rotate the board toward the blade, Woodwiki warns.
Using the wrong tool is not a neutral choice. A push stick on wide stock leaves the board uncontrolled against lifting. A push block on narrow stock puts the hand in the blade zone. Both failure modes share one cause: using a tool outside its safe width range, per Woodwiki.
Step-by-step: how to execute each rip cut safely
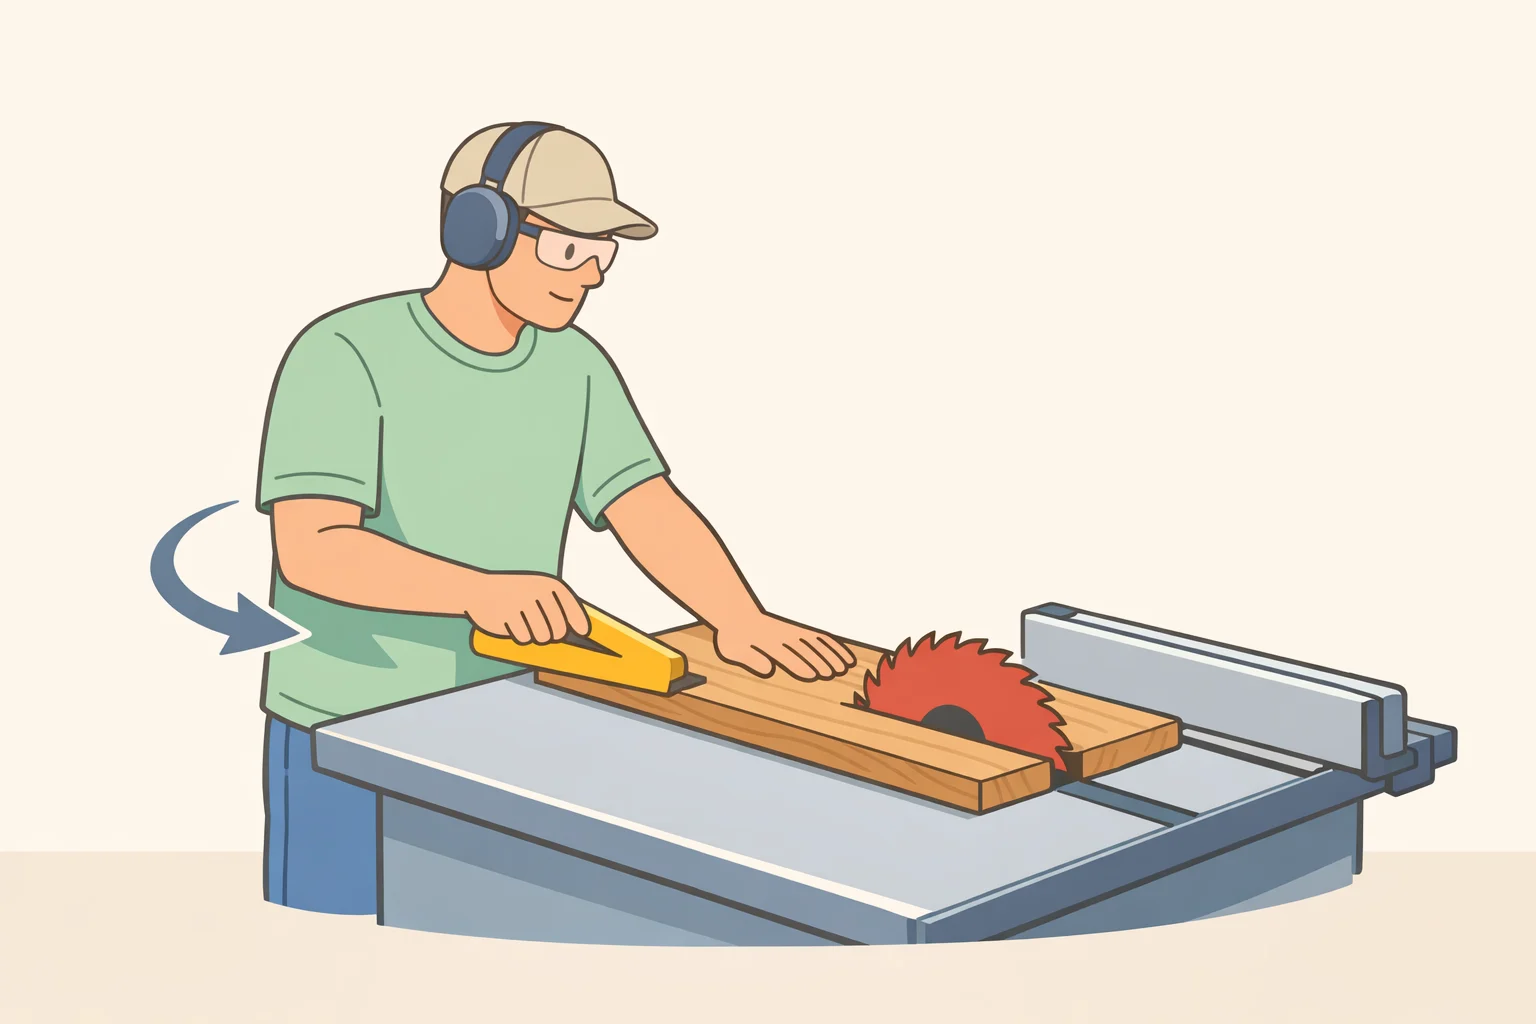
Step 1. Measure the rip width and select your push tool before turning the saw on. Set the fence, confirm the measurement, and have the correct tool or both in hand before the blade starts spinning. This is not a mid-cut decision.
Step 2. Set blade height low. Most guidance recommends no more than 1/4 inch above the material, SFVW notes; Penn State's SOP specifies no more than 1/8 inch, per their documentation. Follow your saw manual or shop standard. Exposed blade above the cut adds risk and contributes nothing useful.
Step 3. Check fence alignment. A fence that angles even slightly toward the blade at the back called toe-in creates the exact conditions that trigger binding, Woodwiki explains. This check takes less than a minute. Do it periodically, not just when something feels off.
Step 4. Clear sawdust from the table surface. Rubber-soled push blocks grip well on a clean surface. Sawdust between the base and the workpiece reduces traction significantly, Woodwiki notes. Five seconds before each rip.
Step 5. Position yourself to the side of the blade, not directly behind it. OSHA recommends standing to the side of the cut line rather than in line with the blade, Woodwiki notes. If kickback occurs, this positioning keeps the operator out of the projectile's path. Build it into the setup routine until it requires no conscious thought.
Step 6. Start the cut with the board flat against the table and tight to the fence and keep it that way. Fence contact and a flat board are conditions to maintain for the entire length of the cut, not just at the start, Woodgearlab emphasizes. Feed at a steady, consistent rate slowing down or stalling increases heat, friction, and kickback risk.
Step 7. Switch to your push tool before the hand reaches the 6-inch threshold.
- Under 3 inches: Hook the push stick notch on the trailing corner of the board. Apply steady forward pressure. Keep the stick above and behind the cut never position it in line with the blade path.
- 3 to 6 inches: Push block (dominant hand, fence side) and push stick (other hand, offcut side) advance together at the same pace through the full length of the cut.
- Over 6 inches: Push block on the fence side. Rubber base maintains downward grip; heel drives the board forward. Stay in full contact with the workpiece through the entire pass.
Step 8. Push the workpiece completely past the blade before releasing pressure. Continue until the board is clear of the blade and onto the outfeed table, then lift the push tool, Penn State's SOP specifies. Stopping early leaves the board in contact with a spinning blade.
Step 9. Turn the saw off and wait for the blade to stop completely before reaching for offcuts. Reaching over or behind a running blade is the primary cause of climbing kickback. It requires no machine failure only a hand in the wrong place, Woodwiki notes. Wait. Every time.
What to buy and what to skip
Push sticks: Free if cut from 3/4-inch plywood scrap in about 20 minutes. Make several push sticks eventually contact the blade and need replacing, and having one at every station removes the temptation to skip using one, Woodwiki recommends. Commercial plastic models run $5 to $15 and do the same job.
Push blocks: The meaningful choice is rubber versus foam grip. Rubber maintains traction through a full session even on a dusty surface. Foam compresses under load and loses grip as sawdust accumulates, Woodwiki explains. Rubber-grip push blocks run $15 to $30. If budget forces foam, clear the table before every rip it compensates for the grip deficit but adds a step.
The GRR-Ripper ($75–$85): A modular push block with a center leg that straddles the blade, handling rips as narrow as 3/8 inch with a single tool instead of switching between stick and block, Woodwiki notes. It is a legitimate upgrade for frequent narrow ripping, not the right first purchase. Start with a push stick and a rubber-grip push block, then revisit the GRR-Ripper after six to twelve months of regular use, once it is clear whether the work calls for it.
On flesh-sensing brakes: In April 2024, NPR reported that the CPSC appeared poised to mandate SawStop-style technology on all new table saws systems designed to stop and retract a spinning blade within milliseconds of skin contact. That reporting reflected the state of the rulemaking as of that date; whether the mandate has advanced since is outside the scope of this guide. What Penn State's own SawStop operating procedure makes clear is that the brake is a last-resort backstop, not a substitute for correct habits users must still use push sticks, set proper blade height, and keep the riving knife installed, per their SOP. The brake responds after contact has already begun. A push stick used correctly keeps hands out of that zone before contact is possible.
The pre-cut checklist
The CPSC reported no discernible change in blade-contact injuries since the industry adopted voluntary safety improvements in 2010, NPR noted in that April 2024 report. Equipment on the saw matters less than consistent use of the right tool on every pass.
The riving knife addresses binding the most common kickback trigger and no push tool substitutes for it, Woodgearlab notes. The push tool addresses workpiece control, and the wrong tool for the rip width creates its own failure mode. Both layers have to be present. Neither is optional.
Before every rip:
| Check | Action |
|---|---|
| Riving knife | Installed and aligned |
| Fence | Parallel to blade (no toe-in) |
| Blade height | No more than 1/4 in. above material |
| Table surface | Clear of sawdust |
| Body position | To the side of the blade, not behind it |
| Rip width | Under 3 in. → push stick / 3–6 in. → both / over 6 in. → push block |
| After the cut | Push past the blade; wait for full stop before reaching for offcuts |
Next steps: For wider panel crosscuts, a crosscut sled provides significantly better workpiece control than a miter gauge alone it is the standard approach for that operation and worth building or buying once ripping feels routine, Woodgearlab notes.


















Comments
Be the first, drop a comment!