



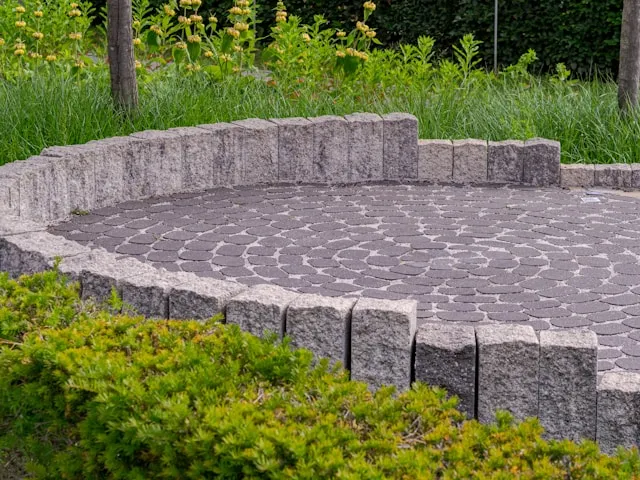
A puddle on a paver patio can come from one settled paver, but it can also be the visible symptom of a drainage or base problem spreading under the whole surface. Sorting out which one you're dealing with is the real work behind learning how to fix standing water on a paver patio, because a bedding reset and a full base rebuild call for different tools, different time, and different skill levels.
Rain, snowmelt, and freeze-thaw cycles are usually what expose these low spots, moving water through the joints and bedding until a weak point gives way. The Concrete Masonry & Hardscapes Association backs that up from the engineering side in a construction guide: subgrade drainage that keeps water moving away from the base extends how long an installation lasts, which is why water reaching the base, not just sitting on top, is the thing worth worrying about.
Diagnosing the puddle and resetting one isolated paver is a beginner-friendly job. Rebuilding a base, installing drainage pipe, or working near utilities, foundations, or tree roots is not. This guide walks through telling those two situations apart before any paver comes up.
Diagnose the pooling before you grab a tool
The first job is separating two categories: a single sunken paver with no other symptoms, and sunken pavers causing standing water as a symptom of something bigger happening below.
A widening bowl shape, a puddle that keeps coming back, a spreading edge, or an area that's already been reset once and settled again all point toward drainage, soil, base, or edge-restraint failure rather than a simple cosmetic dip. The same source notes that CMHA's paver rehabilitation recommendations direct attention to uneven areas, cracked units, and loose edge restraints, not just the low spot itself, when scoping a repair.
Soil conditions matter here too. CMHA's construction guidance calls for geotextile fabric under soil that stays saturated part of the year, sees regular freeze-thaw cycles, or sits over clay or moist silt. That's not proof that a specific puddle came from shifting soil, but it flags the conditions where subsurface movement is worth taking seriously instead of assuming a bedding tweak will hold.
Inspect the patio and classify the problem
Before picking up any tools, spend time confirming what you're actually looking at. Paver patio water pooling can look identical on the surface whether the cause is a two-inch bedding dip or a slope problem across the whole section, so the inspection does the real diagnostic work.
What you'll need: a phone camera, a straightedge such as a 2x4 or level, and access to the patio both dry and shortly after rain.
Photograph the affected area while it's dry, then again after rain. Comparing the two shows how much water actually collects and how long it lingers.
Mark the deepest point of the puddle, the direction water is coming from, the nearest downspout or slope, and any edge that looks like it has opened up.
Walk the area and press on pavers near the low spot. Rocking underfoot while neighboring units stay tight can indicate lost support or movement in the bedding below.
Skip the overhead-only photo. It can hide the actual grade. Lay a straightedge across the patio and shoot it from a low side angle to reveal a true depression or poor pitch.
All four checks come from George Hardscaping's inspection method. Once you've done them, you should be able to state, in one sentence, whether this is one isolated low paver or a broader area with rocking units, a spreading edge, or an identifiable water source feeding it. That sentence decides which path below you take.
Match your diagnosis to the right fix
One low paver, no rocking neighbors, no active water source, and no history of resettling
What it means: Isolated bedding issue
What to do: Reset it yourself (next section)
Widening bowl, recurring puddle, or an area that settled again after a prior fix
What it means: Broader base or soil failure
What to do: Open and rebuild the section; this is professional-level work.
Puddle traces back to a downspout, sump discharge, or slope still directing water in
What it means: Active runoff source
What to do: Redirect the runoff first; otherwise, the reset will fail.
Spreading edge with a loose restraint, visible root intrusion, or proximity to a utility trench, foundation, or wall
What it means: Structural or utility risk
What to do: Get a professional evaluation before digging.
Matching the repair to the actual cause keeps you from under-fixing a puddle that returns, or paying for a full rebuild when a single reset would have done the job.
How to fix standing water on a paver patio when one paver has settled
This section applies only if your diagnosis landed in row one of the table above. If it didn't, skip ahead to the next section instead of forcing a bedding fix on a problem that isn't a bedding issue.
Skill level: Beginner DIY.
Time: A couple of hours for one paver or a small cluster. Add more if the bedding sand needs to dry first; CMHA's guidance is explicit that wet or frozen sand should not go back into the ground.
Weather: Pick a dry day. Installing over wet or frozen soil, or with wet or frozen sand, is against CMHA's own construction standard.
Tools and materials: replacement bedding sand, jointing or polymeric sand, a flathead screwdriver or paver puller, a rubber mallet, a stiff push broom, work gloves, knee protection, and a wheelbarrow or bucket for spoil.
Do not proceed if: the exposed soil is soft or wet, you find roots or debris under the paver, water is actively flowing into the area from a downspout or slope, or the nearby edge restraint feels loose. Any of those means you're in the next section, not this one.
Remove the joint sand and lift the affected paver. Set it aside on a clean surface.
Inspect the exposed bedding and subgrade. Check for soft or wet soil, standing moisture, roots, or debris. Finding any of these means stopping here and moving to the escalation list below instead of continuing the reset.
Remove the compromised bedding sand. Don't reuse sand that's wet or has been frozen. CMHA advises spreading wet sand on a clean, hard surface to dry before it goes back down.
Spread fresh bedding sand and screed it to an uncompacted nominal 1-inch thickness, checking it against the surrounding, unaffected pavers with your straightedge so the new level actually matches.
Reset the paver, tap it level with the rubber mallet, then sweep jointing sand into the joints. Work the sand in with the broom, then tamp it down by hand or with a scrap board and the mallet until the joints are fully packed and the paver won't shift.
Mistake to avoid: Don't wedge extra sand under the low corner just to force a level look. That leaves the paver without real support underneath, and it comes loose again.
Success check: The paver sits flush with its neighbors, doesn't rock when you step on it, and the joints are packed solid. If it still rocks after reseating, the bedding underneath needs a second pass. Don't try to force it level with joint sand alone.
When it's bigger than one paver: stop and call a pro for paver patio drainage problems
If your diagnosis landed in rows two through four of the table, this moves past ordinary-reader DIY territory, and the guidance that exists is construction-level, not a homeowner spec.
When poor pitch is the underlying issue, George Hardscaping's guide points to a This Old House repair where crews pulled the affected pavers, rebuilt the base grade, and reinstalled the units — the same order of operations any proper paver patio slope and drainage repair follows. A contractor sets the target slope and excavation depth for your specific patio; that layout math isn't something to eyeball from a blog post.
For soil that stays wet or drains slowly, CMHA's construction guidance recommends removing standing water first, then stabilizing saturated areas with crushed stone or cement, and using a perimeter stone-and-geotextile assembly to pull excess water out of the subgrade and base. CMHA ties its drain-pipe recommendation specifically to clay or slow-draining soils under vehicular traffic, so treat it as evidence that managing saturated subgrade matters, not as a ready-made drainage plan for a residential patio.
Excavated soil should also get checked for organic material, roots, debris, or large rocks. CMHA's guidance treats leftover debris as a common cause of repeat settling, so anything found should come out and get replaced with clean, compacted aggregate.
Call a professional if you see any of the following:
An outside edge that's spreading with a still-loose restraint
An area that's settled again after a previous repair
Roots visibly lifting the surface
Any repair that would touch a utility trench, foundation, or wall whose movement hasn't been assessed
A low spot creating a trip hazard at a step, door, or main walking route
None of these mean the whole patio needs replacing. They mean the assembly needs a real diagnosis before anyone decides how much to open up. Ask any contractor to quote surface work separately from base, drainage, edge-restraint, and disposal work, so a section repair doesn't get priced like a full rebuild.
For chronic pooling rather than a one-time low spot, it's worth asking a contractor about permeable interlocking pavers. CMHA's permeable pavement guidance describes the system as eliminating surface puddles and cutting ice and deicing costs by letting water infiltrate at the joints instead of sheeting across the top. That spec covers new-construction pedestrian and vehicular installations, not retrofitting an existing residential patio, so it's a redesign conversation to have with a contractor, not a substitute for fixing grading or subsoil drainage.
After the repair: what to check and when to reset again
Right after resetting a paver, confirm it sits flush, doesn't rock underfoot, and that the joints are packed with sand all the way through. Then watch that same spot through the next rain for two things: water should move away from the patio instead of collecting in the same place, and the reset paver should stay flush without new rocking.
If that spot settles again, treat the repeat settling itself as the signal, regardless of how quickly it happened. That's confirmation the base or drainage, not the surface, is the actual problem. Stop resetting it yourself at that point and get the soil, grade, and subsurface water flow evaluated before anyone opens the area again.


















Comments
Be the first, drop a comment!