



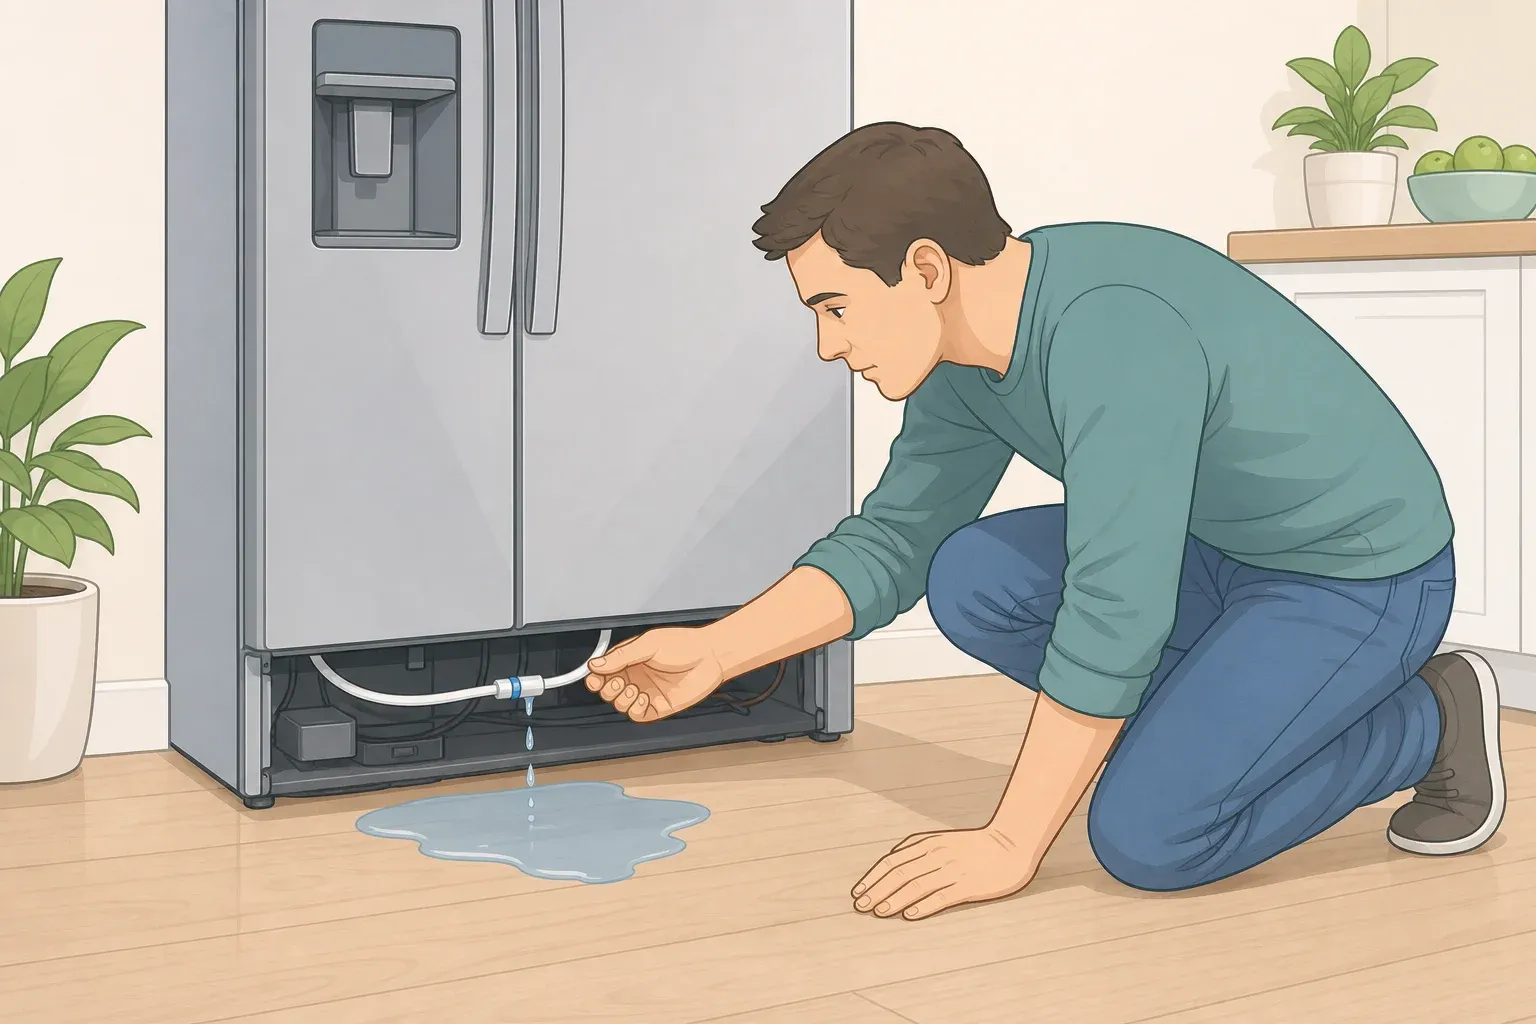
A cracked ice-maker line doesn't make noise. It sits behind the refrigerator, dripping onto the subfloor for weeks, sometimes months, until someone notices a stain or a soft spot underfoot. By then, a slow leak like this can have already caused $15,000 or more in subfloor and wall damage over roughly three months.
Appliance maintenance to prevent costly home repairs runs on that same math. Water damage and freezing made up 27.6% of homeowners insurance claims in 2022, second only to wind and hail, with claims averaging $13,954 across 2018 to 2022, according to Insurance Information Institute data.
None of that requires servicing every internal part of a fridge or washer. It comes down to checking the specific hoses, lines, and seals that fail most often, on a schedule that catches wear before it turns into a leak. This guide walks through what to inspect on the refrigerator, washing machine, and dishwasher, how to tell when a part needs replacing versus when it needs a professional, and what to do if you find water where it shouldn't be.
Why small appliance leaks turn into big repair bills
A burst pipe floods a room in minutes, which is exactly why someone notices right away. An appliance leak behaves differently: a pinhole in a supply line, a slow hose connection failure, or a deteriorating dishwasher seal can drip for weeks before it's visible, and by the time water shows up on the floor, it may already have spread inside a wall cavity or under the subfloor.
About one in 60 insured homes files a water damage or freezing claim in a given year, and water claims led every other loss category at 31.1% of claim volume in the first quarter of 2026, according to RapidEye's research. The 2026 LexisNexis U.S. Home Trends Report found that severity for non-weather water claims specifically rose 63.16% from 2019 through 2025, a trend it ties to rising remediation and material costs.
Hardware backs this up. LexisNexis Risk Solutions studied 2,306 homes in 2020, comparing homes with an in-line Flo by Moen automatic shutoff against a control group without one, and found a 96% lower rate of claim events in the shutoff group, with severity down 72% on the claims that still occurred. The control group's claim events rose 10% over the same window, according to LexisNexis Risk Solutions data. It's a correlation, not a causal guarantee, but it's a strong one, and it lines up with what the checklist below is built to prevent.
Appliance maintenance checklist to prevent costly home repairs
This work is beginner-friendly. You'll want an adjustable wrench, a flashlight, and a screwdriver, plus a replacement braided stainless-steel supply line if the refrigerator's current line turns out to be old rubber or plastic. Check your appliance's manual before starting anything. Shutoff locations, connection sizes, and disconnection steps vary by model.
Shut off the water valve feeding an appliance before disconnecting anything on it. If a valve is corroded, won't turn, or leaks when touched, stop and call a plumber rather than forcing it. If you spot a frayed cord, a damaged outlet, or standing water near a plugged-in appliance, don't touch anything electrical. Shut off power to the area if you can do so safely without entering the water, or call an electrician.
Check the refrigerator's ice-maker line
Pull the fridge out, with help if it's heavy, and look at the quarter-inch line running from the wall valve to the appliance. These lines sit hidden behind the fridge and rarely get a second look, and the compressor's steady vibration, plus the occasional jostle during cleaning, gradually weakens plastic or copper tubing over time.
If the line is old rubber or plastic, or shows cracking or discoloration, replace it with a braided stainless-steel line, sold at most hardware stores for under $20, proactively every five years rather than waiting for it to fail. Shut off the wall valve, check the manual for the disconnect steps specific to your model, and hand-tighten the new fitting without forcing it. Turn the water back on slowly and watch the connection for a few minutes before pushing the fridge back into place. If it drips at all, shut the valve back off and call a plumber or appliance technician rather than continuing to tighten it.
Inspect washing machine hoses once a year
Unlike most home plumbing, these rubber supply hoses stay pressurized around the clock, and that constant stress means they typically last five to eight years before failure risk climbs sharply. Shut off both hot and cold supply valves before touching anything, then check the hoses for stiffness, cracking, or bulging near the fittings.
If you're replacing them, buy braided stainless-steel hoses rated for high pressure, confirm the thread size matches what's installed, and hand-tighten each fitting without overtightening. Turn the valves back on and watch the connections for a few minutes before walking away; if a fitting weeps, snug it slightly more or call a plumber. A failed rubber hose doesn't just drip; it releases the full pressure of the household water supply into the room until someone shuts it off, and in a second-floor laundry room that can mean damage to every level below it.
Check dishwasher seals and under-cabinet connections annually
Run a finger along the door gasket; it should be supple, with no cracks or gaps. If it's failing, check the dishwasher's manual for the correct replacement part; procedures vary enough by manufacturer that it's worth confirming before ordering anything, or have an appliance technician handle it if the panel removal isn't something you're comfortable with. Then look underneath the unit, behind the kick plate, where supply and drain connections hide and can leak unnoticed until the cabinet floor is saturated. This under-cabinet check is visual only. If a connection looks wet or corroded, that's a stop point, not something to work on yourself.
Know where every appliance shutoff valve is, and close the washing machine's water supply before extended travel. If a hose fails while nobody's home, this habit limits how much water gets out before anyone catches it.
Material fatigue, heat, and vibration wear on hoses, seals, and lines regardless of how new the appliance is. Don't skip these checks on a machine just because it was installed recently.
What you find determines what happens next
Dry, intact hose or line: record the inspection date and move on.
Cracked, bulging, stiff, or corroded part: replace it, but only if the manual supports doing that replacement yourself.
Active leak or a valve that won't close: shut off the water and call a plumber.
Water near an outlet, cord, or plugged-in appliance: don't enter or touch the area; call an electrician.
Wet flooring, drywall, or a concealed space that feels damp: arrange a professional assessment before deciding it's fine.
A simple schedule to keep this on track
What matters is repeating these checks often enough to catch wear before it fails. A workable routine looks like this:
Every month: Look and smell for dampness, stains, odors, or pooling near the fridge, washer, and dishwasher.
Annually: Inspect the washing machine hoses, the refrigerator's ice-maker line, the dishwasher gasket, and any accessible connections.
Before extended travel: Close the washing machine's water valves and test any leak sensors you've installed.
When you replace a part: Write the installation date on the hose or line, or log it somewhere you'll remember, so you know when it's due for another look.
Heat speeds up this wear. Sustained temperatures above 100°F, and even higher readings in attics and crawl spaces, degrade rubber gaskets, hoses, and seals faster than cooler climates do, and a hose that might last eight years in a mild region can fail in five in a hot laundry room that regularly hits 90°F. If that describes a laundry room or utility closet in your home, shorten the interval between hose checks rather than waiting for the annual pass.
Leak sensors and shutoff systems worth adding
Checking hoses and seals by hand catches wear between inspections, but it won't catch a leak that starts the week after you checked, or one that happens while the house is empty. That's where detection comes in. Only 5% of U.S. single-family homeowners report owning a smart water leak detector, even though 26% of U.S. internet households say they've experienced water leak damage, according to RapidEye's research.
A basic point sensor sounds a local alarm the moment it detects moisture, a low-cost add-on to the checklist above. Place it close to the appliance's connections, where a leak is likely to start, rather than tucked against a wall it won't reach. Whole-home systems like Flo by Moen or Phyn go further: they monitor water flow throughout the house for patterns consistent with a slow leak and can shut off the main supply automatically before damage escalates.
Ask your insurer what they offer before buying anything. Some carriers pair a discount with free or subsidized hardware. Nationwide's program, for instance, offers a policy discount alongside a free LeakBot device in certain states, though the discount is discontinued if the device isn't ordered and activated within 55 days of enrollment. Terms like that vary by insurer, state, and enrollment window, so confirm with your own provider rather than assuming any of it applies automatically.
Warning signs of an appliance leak and what to do next
Between formal checks, watch for a musty smell near an appliance, warped flooring, a swollen cabinet base, a water stain that wasn't there before, or a dishwasher pooling water at its base during or after a cycle, which can indicate a door-seal problem.
If you find one, work through this in order:
Shut off the water supply valve to that specific appliance, or the home's main shutoff if you can't locate the appliance valve.
Photograph the damage before moving anything, for both repair planning and any insurance claim.
Call a water damage restoration company rather than waiting to see if the area dries on its own. Moisture that's worked into flooring or a wall cavity needs professional extraction equipment to remove completely.
If water is near an outlet, cord, or plugged-in appliance, don't step in it and don't touch anything electrical. Shut off power to the area if you can do so safely, or call an electrician.
Waiting even 48 hours to address standing water significantly raises mold risk and can turn a manageable drying job into a full remediation project. This isn't a place to save money by delaying.
Don't skip the HVAC filter while you're at it
This belongs on the same calendar, even though it's a different kind of maintenance and won't prevent the water damage described above. A dirty, overloaded filter simply stops working well. The EPA says to follow the manufacturer's schedule, and many manufacturers recommend changing filters every 60 to 90 days, according to EPA guidance.
Filtration reduces indoor pollutants, but it doesn't remove all of them, and it's not a substitute for ventilation or for fixing mold at its source. Treat this as routine household upkeep alongside the appliance checks above, not as protection against the kind of water damage this article covers.
Finishing the checklist
A completed inspection should leave you with a few concrete things: shutoff valves labeled and easy to find, a replacement date written on any hose or line you swapped out, and any leak sensors tested and confirmed working, not just installed and forgotten.
Treat a hose or line that's already failed once as reason to replace it, not monitor it. That's a conservative call rather than a documented failure rate, but a part that's already given out under pressure has told you what it's likely to do again.
Call a plumber if a valve won't close, a fitting keeps weeping after reasonable hand-tightening, or a connection looks corroded. Call an electrician if standing water is anywhere near a cord, outlet, or plugged-in appliance. Call a restoration company if flooring has warped, drywall feels wet, or moisture has reached a wall cavity or subfloor. Outside of those triggers, this doesn't need to become a bigger project than it is: two hoses, one line, one seal, and a flashlight cover most of the risk.

















Comments
Be the first, drop a comment!